

All Channels Overview
The Channels page shows all available channels for your agent. Each channel can be enabled, configured, and managed independently. Available channels include:- Chat bubble — A floating chat bubble embedded on your website
- Help page — A standalone help page hosted by Chatbase
- Center Stage — A full-focus chat experience that opens centered over your website
- Email — Let your agent respond to emails
- Phone — Let your agent handle inbound phone calls, via Twilio or your own SIP trunk
- Slack — Use your agent inside Slack
- Zapier — Connect your agent to thousands of apps
- WordPress — Official WordPress plugin
- WhatsApp — Respond to WhatsApp messages
- Messenger — Connect your agent to Facebook Messenger
- Instagram — Let your agent respond to Instagram messages
- Zendesk — Respond to Zendesk support tickets
- Salesforce — Connect your agent to Salesforce to assist with CRM workflows
- Shopify — Connect your agent to your Shopify store
Chat Bubble
The Chat bubble allows you to embed a floating chat window on your website so visitors can interact with your agent directly.Enable the Chat Bubble
- Go to Channels and click Manage on the Chat bubble card.
- Click Deploy and choose Website widget.
- Click Enable chat bubble.
Chat bubble settings
The chat bubble settings are split into four tabs:- Overview: The model, data sources, actions, instructions, and visibility for this channel.
- Display: What users see when the chat starts, including content, capabilities, colors, typography, floating bubble, and localization.
- Voice: Voice calling for this channel.
- Actions: The actions your agent can perform in this channel.
Overview
The Overview tab shows your agent’s Model and Data sources, which apply to the whole agent, alongside the Actions, Instructions, and Visibility for this channel.Model
The AI model your agent uses globally across all channels.Data sources
A read-only summary of what the agent is trained on: its training status, total size, and counts of Links, Texts, and Q&A’s.Actions
View the actions enabled for this channel.Instructions
Customize the instructions used by this channel.Sync with global instructions
By default, your agent uses global instructions, which define its core behavior across all channels. When Sync with global instructions is enabled, the chat bubble uses the same global instructions as the rest of your agent. When this setting is disabled, you can define channel-specific instructions that apply only to the chat bubble and override the global instructions for this channel.Visibility
Control whether this channel is active. When disabled, the channel is hidden and messages from this channel won’t be routed to your agent.Chat bubble display
Under the Display tab, you can control what users see when the chat starts.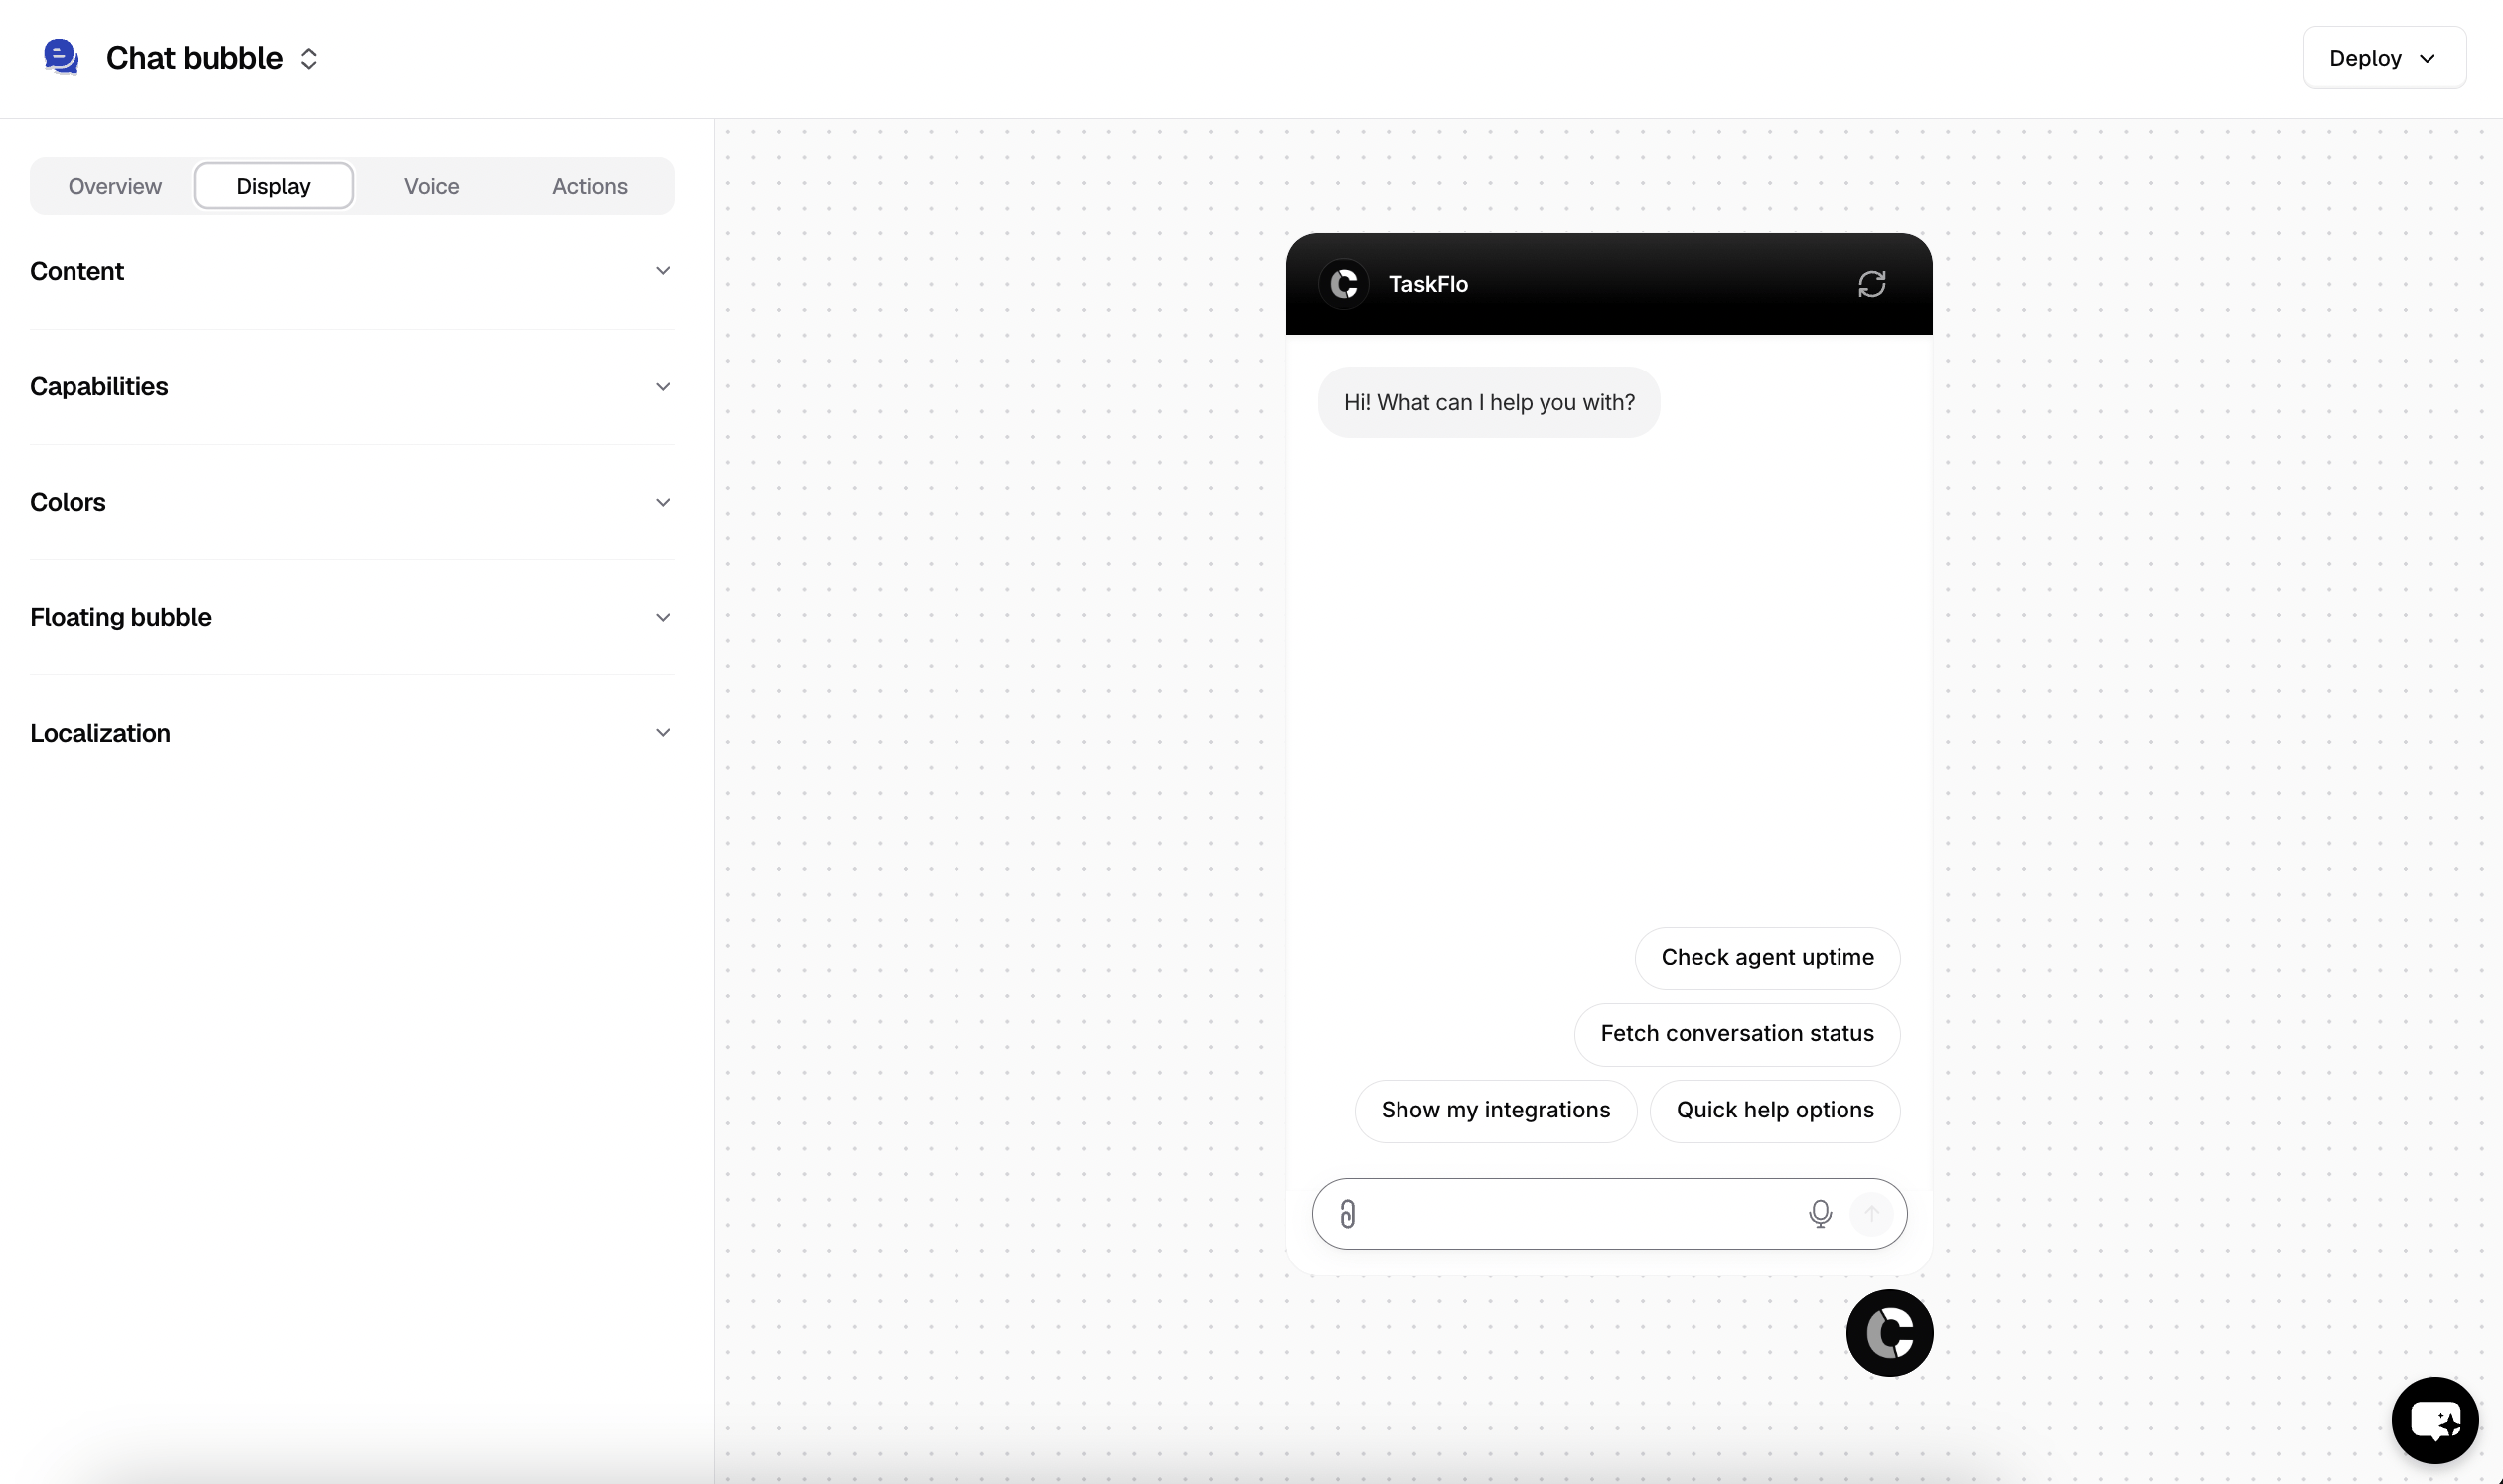
Content
- Agent picture: Picture of the AI agent when providing answers.
- Display name: The name shown at the top of the chat bubble.
- Initial message: The message shown before the user opens the chat bubble, designed to grab attention and encourage interaction, also shown once the user opens the bubble. Enter each message on a new line to send several. You can customize the initial message per user by following this guide.
- Use different message for mobile: Toggle this on if you want to show a different initial message when users open your website on a mobile device (usually a shorter message).
- Auto show initial messages pop-ups after set duration: Set a timer to control when the initial messages pop up.
- Show auto pop-up on mobile: Toggle this off if you want to disable the pop up when users open your website on a mobile device.
- Use different duration for mobile: Toggle this on if you want to set a different timer for the pop-up when users open your website on a mobile device.
- Message placeholder: The text shown in the field where the users write their questions.
- Dismissable notice: A message shown above the text input area that disappears after the user sends a message. Supports rich text, up to 200 characters.
- Footer: A message shown below the text input area, for a disclaimer or a link to your privacy policy. Supports rich text, up to 200 characters.
- Suggested messages: Predefined prompts shown when users open the chat to help them start the conversation quickly. These should reflect your most common questions or actions. Click + Add message to add one, and use the type dropdown beside it (default Basic) to group related prompts under a main message, so users pick a category first and then a more specific follow-up. Enable Keep showing suggested messages to keep them visible after the first reply. These are fixed wordings. To have the agent adapt its suggestions as the conversation develops, use the Suggested Messages action instead.
If you include links in the footer or a dismissible notice, they must be full URLs starting with
(e.g.,
http:// or https:// (e.g.,
https://www.example.com), not just www.example.com or example.comCapabilities
- Enable attachments: Enable or disable sending attachments, allowing your agent to process attachments and respond based on their content.
- Enable voice to text: When enabled, a dictation button (microphone) appears in the text input area. Users can speak their message, which is converted to text for them to review and edit before sending.
- Copy messages: When enabled, a copy button on agent messages is displayed to allow users to copy the response.
- Collect user feedback: When enabled, it allows the user to provide a feedback by displaying a thumbs up or down button on AI agent messages.
- Delete conversations: Allow users to delete their own conversations from the recent chats screen.
Colors
- Theme: Choose between Light or Dark mode.
-
Tinted grayscale: Add a subtle hue to neutral elements such as the chat background, borders, and agent message bubbles. Leave this disabled to use the default grayscale colors.
- Hue: Set the base hue of the tint from
0to360on the color wheel. For example,0is red,120is green, and220is blue. - Tint: Control the intensity of the tint from
0to9. Higher values make the selected hue more noticeable. - Shade: Adjust the lightness or darkness of tinted surfaces from
-4to4. Negative values make them lighter, positive values make them darker, and0keeps the default shade.
- Hue: Set the base hue of the tint from
-
Accent color: Apply a custom color to highlighted elements, such as user message bubbles. When disabled, the default accent color is used.
- Color: Enter the hex value of your accent color, or use the reset button to restore the default.
- Use accent color for header: Apply the accent color to the chat header.
- Use accent color for send icon: Apply the accent color to the send button in the text input area.
- Chat bubble button color: Set the color of the floating chat button displayed on your website.
Typography
- Font family: Choose the font used throughout the chat bubble.
- Font size: Set the base font size for text displayed in the bubble.
Floating bubble
- Position: Align the bubble to the Left or Right.
- Chat bubble icon style: You can select from the built-in icon styles or upload your own custom icon to better match your brand.
- Show text in the chat bubble: Display a short label next to the chat bubble icon to make the chat bubble more noticeable and encourage visitors to start a conversation.
Localization
The Chat bubble supports localization, allowing you to translate action buttons and interface text into multiple languages. Language source Choose how the chat bubble detects which language to display:- Visitor’s browser: Uses the language configured in the visitor’s browser. This is the default option.
- Website language: Uses the language specified in the page’s html lang attribute. This is recommended for multilingual websites with their own language switcher, as it allows the chat bubble’s language to match the language of the page the visitor is viewing.
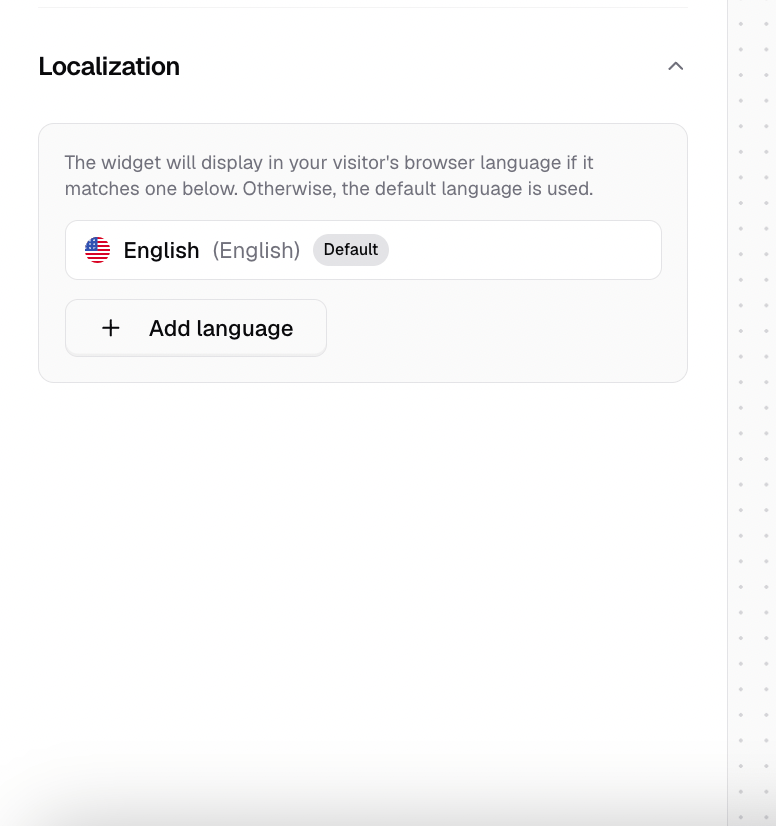
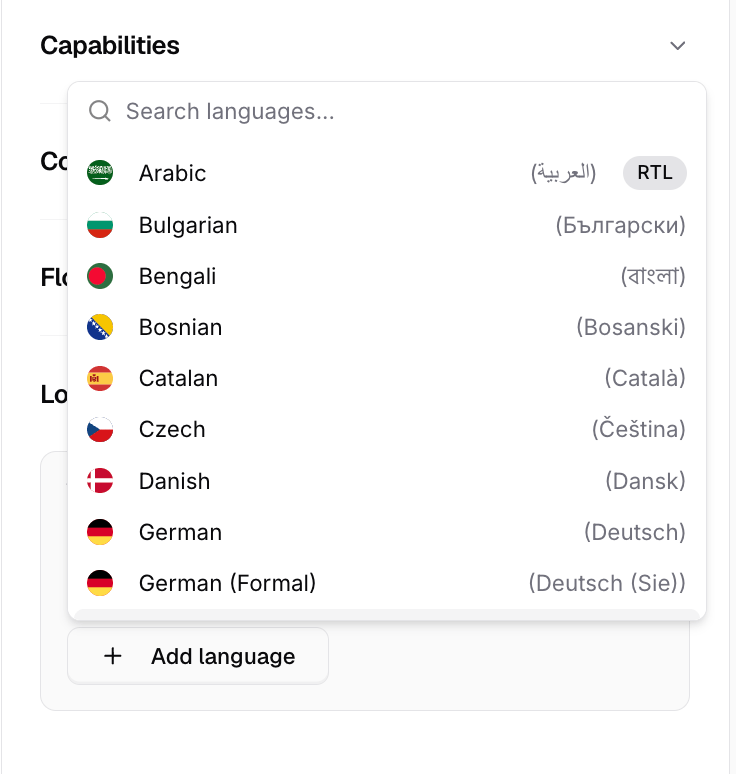
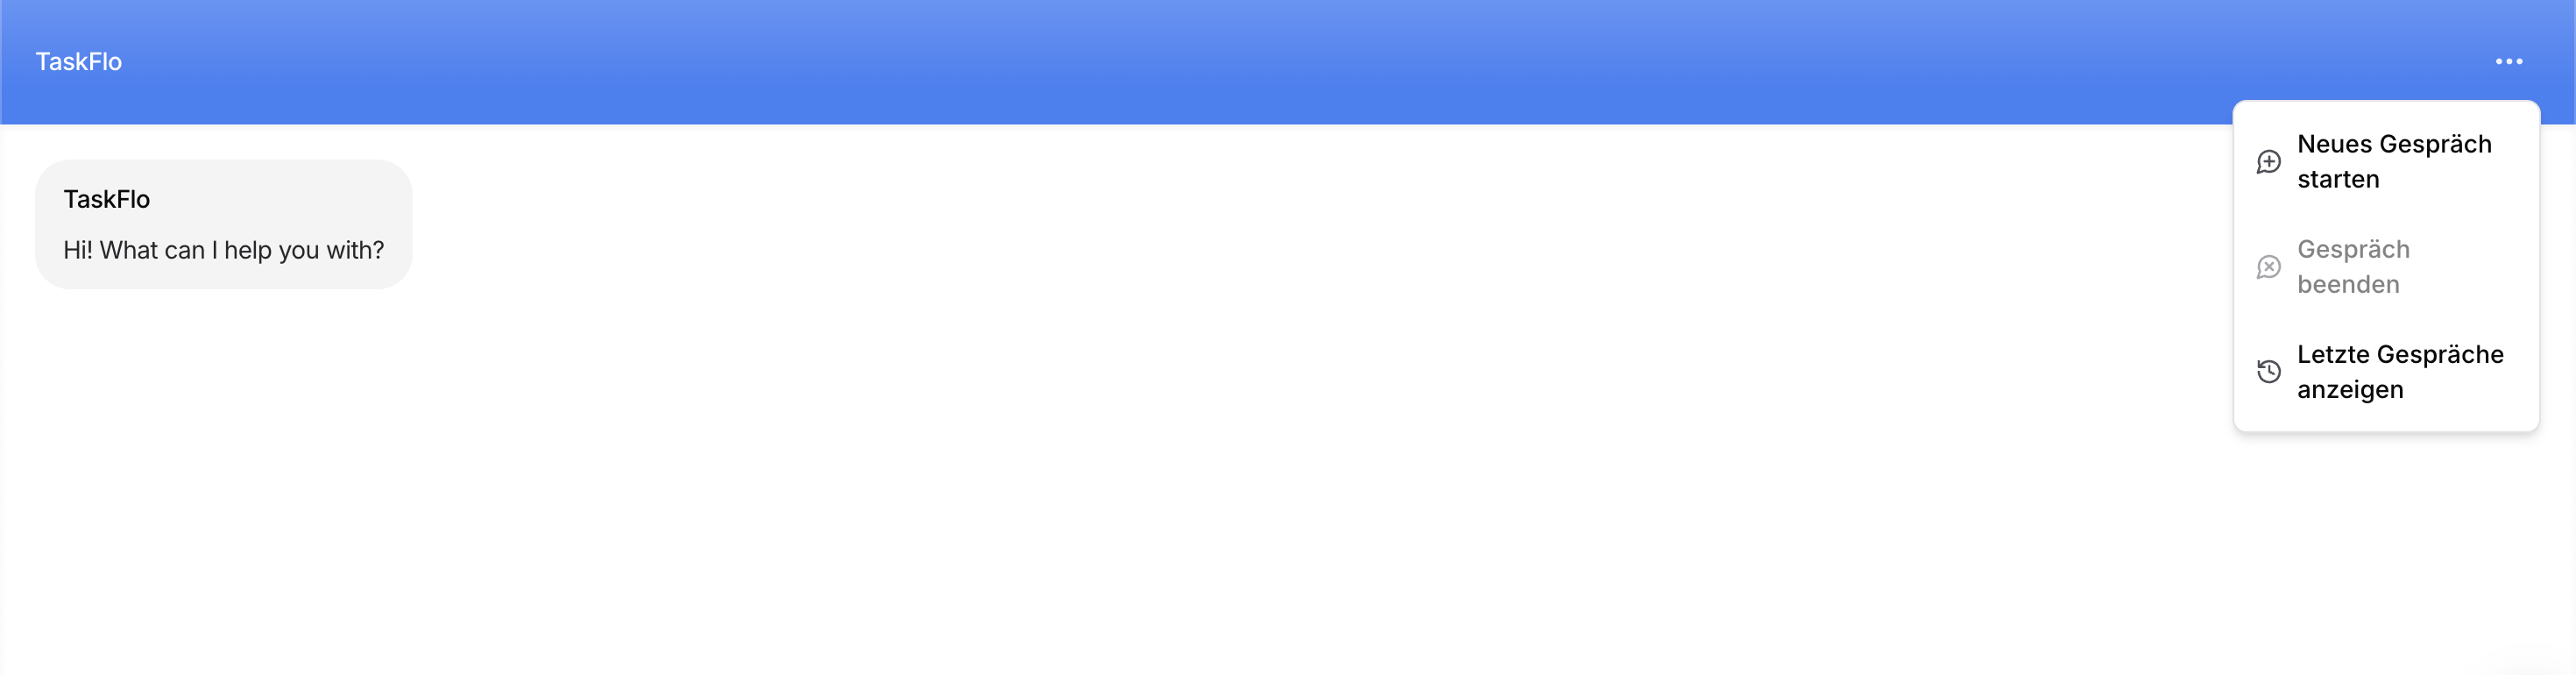
The chat bubble only displays languages you’ve added under Localization. If the detected language hasn’t been added, the chat bubble falls back to your default language.
Attachments
Chatbase allows your end-users to upload attachments during conversations. The AI agent can analyze supported files and generate responses based on their content. Supported Attachment Formats- Images: .png, .jpg, .jpeg
- Documents: .pdf
Some platforms (such as Instagram, Messenger, and WhatsApp) may allow users to upload additional file types (e.g., GIF). These formats are not supported. Any unsupported file types will be automatically discarded and not processed.
- Maximum attachments per message: 5 files
- Maximum file size: 5 MB per file
- Maximum PDF length: 5 pages per file
- Maximum characters per PDF page: 2,000 token (~8,000 characters)
- Text requests
- Image analysis
- PDF file analysis (per page)
- Credits are consumed for the text response
- Additional credits are consumed for each attachment
- Images: charged per image
- PDFs: charged per page
Actions + Attachments
If the message triggers an action (for example booking a meeting), the attachments are processed more than once.
They are charged once when the action is executed, and again when the agent generates a response.
Example (Model cost = 1 credit)
In this case, the image is billed twice: once when processing the action, and again when generating the agent’s response.
Other Supported Channels
- Help Page
- Center stage
- Messenger
Voice
Configure channel-specific voice settings that override your agent’s default voice configuration. Learn more about voice settings in the Voice settings documentation.Deploy button
The Deploy button provides the code needed to add the chat bubble to your website. It opens a dropdown with Website widget, Website iframe, Shopify, and WordPress.Allowed Domains
You can restrict where your agent is allowed to load by specifying approved domains. When enabled, the agent will only work on the domains listed here.Website widget (Recommended)
Embed a floating chat bubble on your website.- Supports all advanced features of the agent
- Fully customizable from the Display and Overview tabs
- Best option for most use cases
Website iframe
Embed the chat interface directly using an iframe.- Simple to integrate
- Advanced features are not supported
- Recommended only if iframe embedding is required by your setup
<body> tag.
Help Page
The Help page is a standalone page hosted by Chatbase.It’s ideal for help centers, documentation portals, or internal tools.
Enable the Help Page
- Go to Channels → Help page
- Click Deploy, then Enable help page
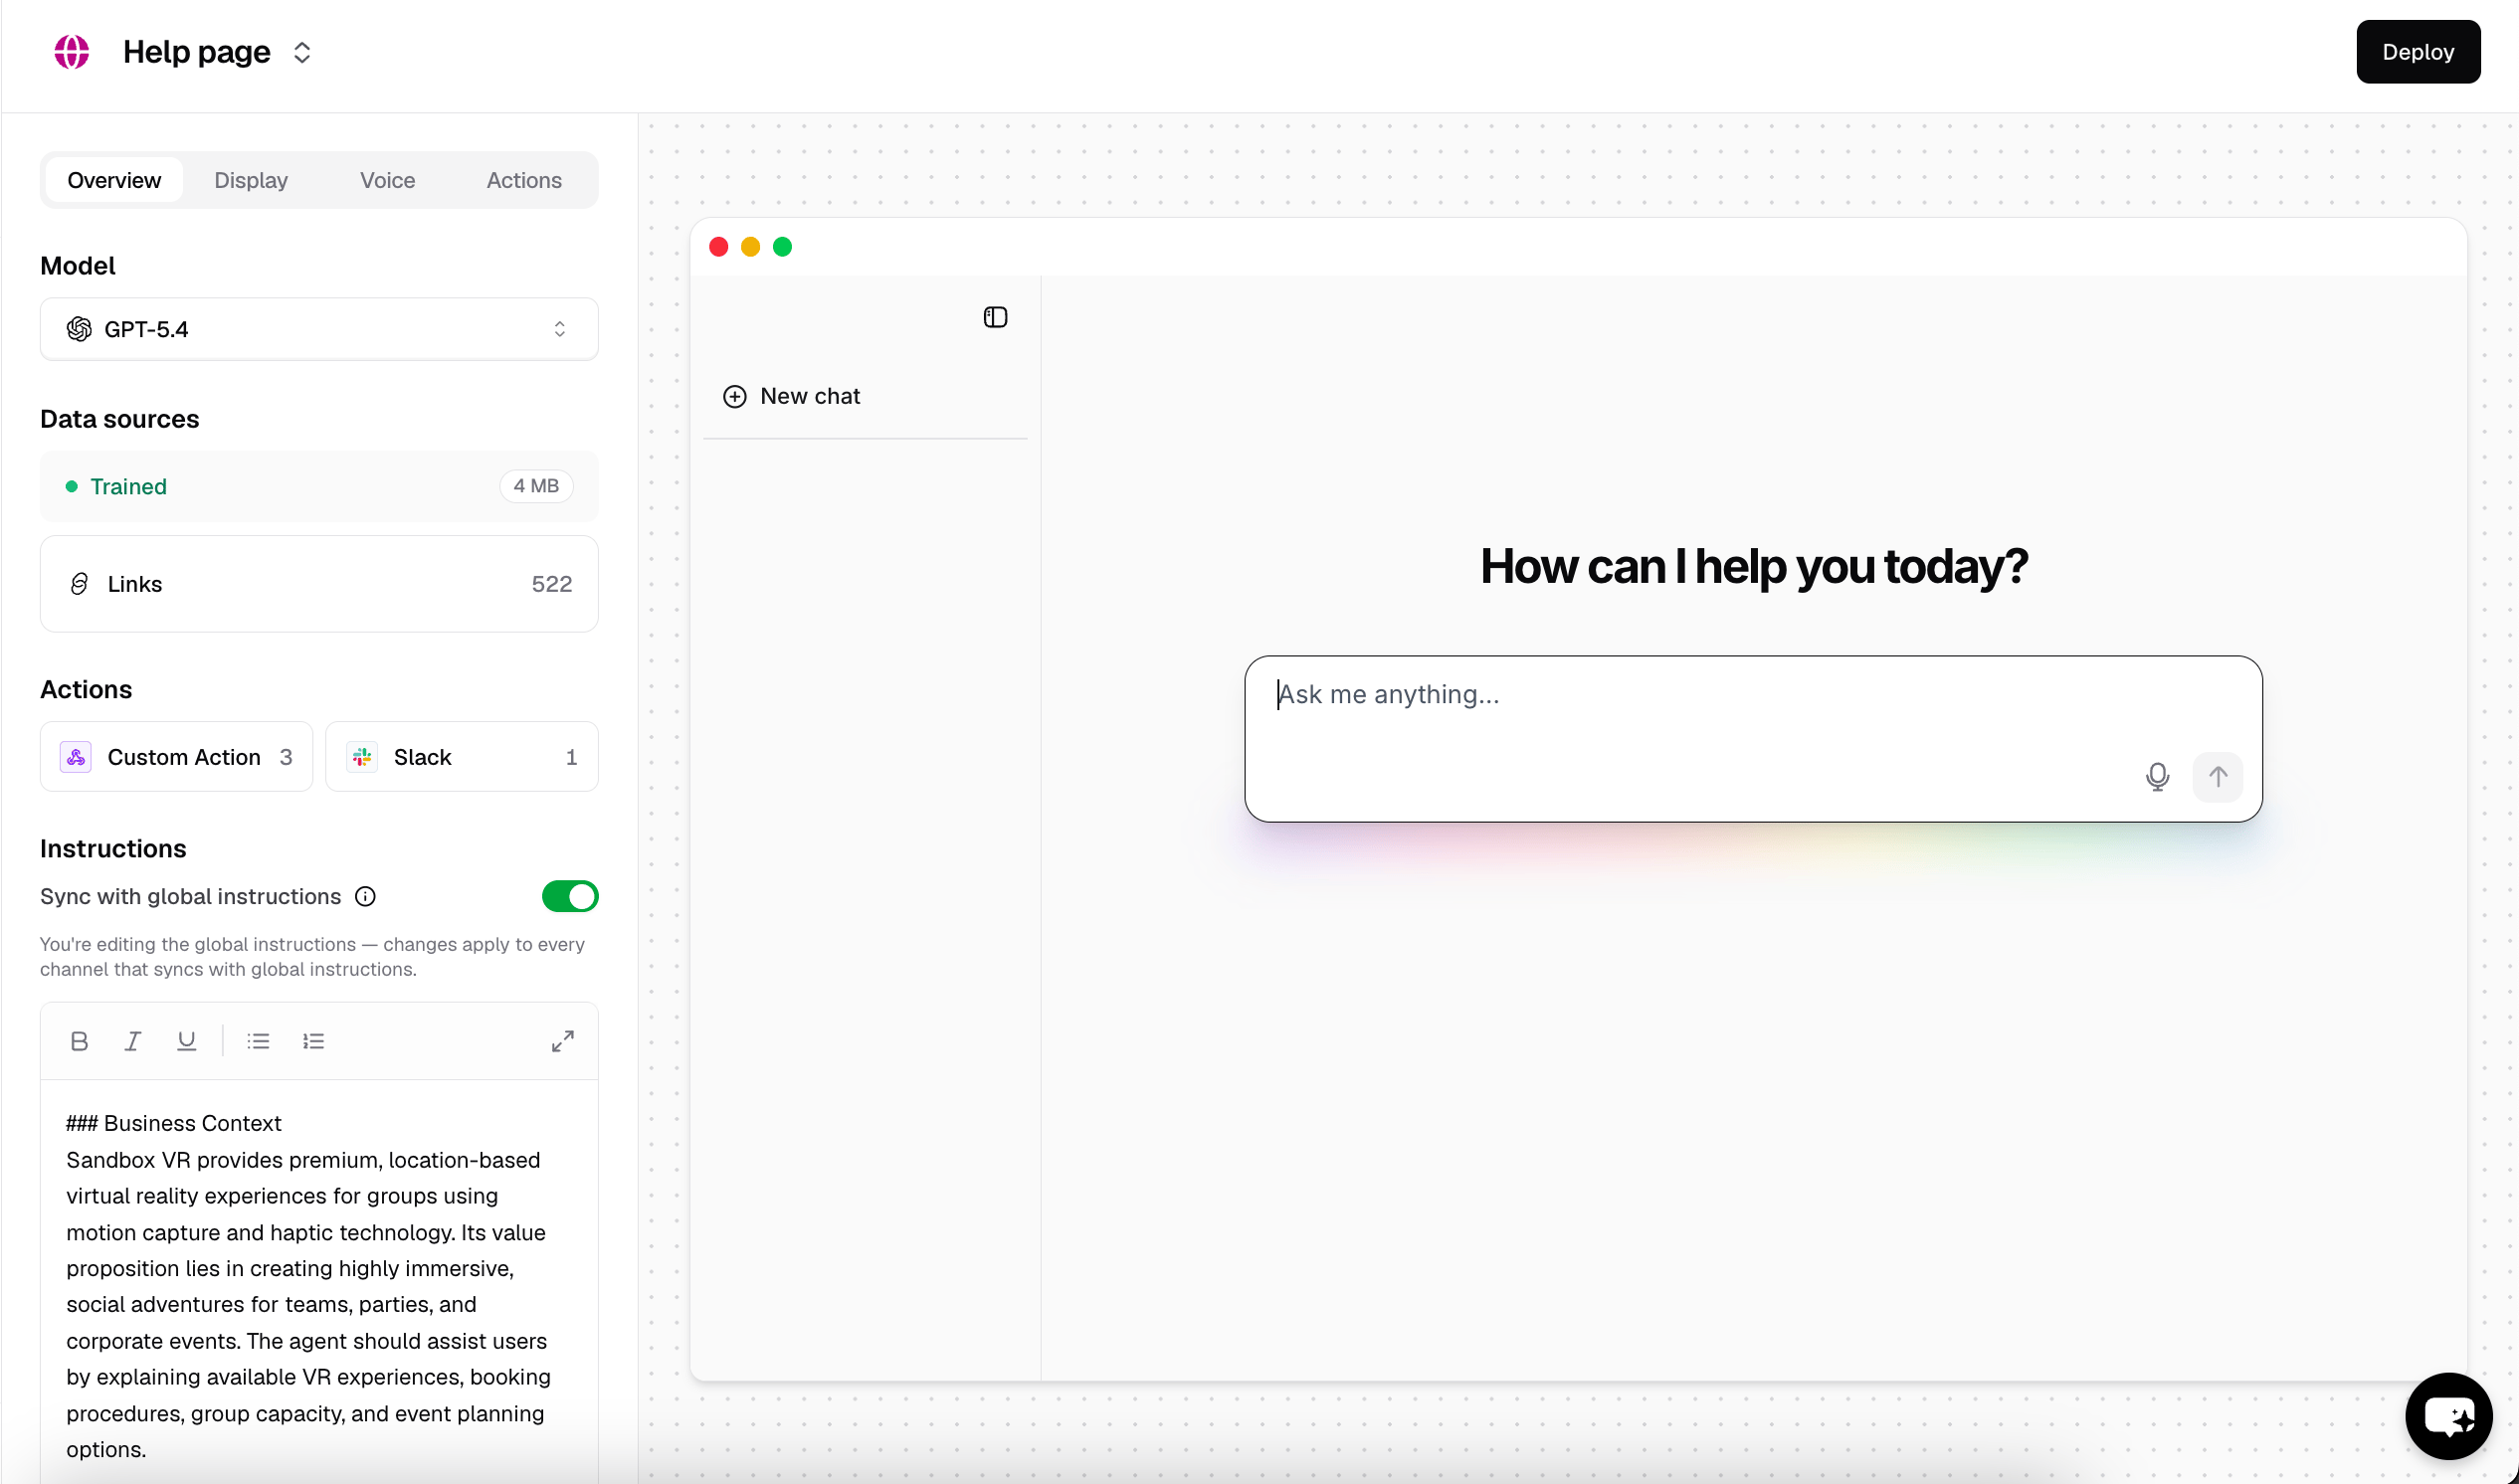
Help page display
General
- Page title: The title shown in the browser tab.
- Favicon: Upload a custom favicon for the help page. Supports JPG, PNG, and SVG files up to 1MB.
Content
- Welcome message: The text shown at the center of the Help page, greeting your users.
- Message placeholder: The text shown in the field where the users write their questions.
- Suggested Messages
Assets
- Scheme: Upload differents assets for dark and light modes.
- Logos: Upload a logo for light mode.
- Heros: Upload a hero for light mode.
Capabilites
- Enable voice to text: When enabled, a microphone button is shown in the text input area that converts speech into text for users to review before sending.
- Enable attachments: Enable or disable sending attachments, allowing your agent to process attachments and respond based on their content.
Colors
- Theme settings: Enable or disable theme switching. Set a default theme for all users. Customize light and dark primary colors.
Buttons
- Add Primary and Secondary buttons to the left sidebar for if you have links that you’d like to refer your users to.
- Add link buttons at the bottom of the help page
Deploy Button
The Deploy button shows the default URL Chatbase generated for your help page, and lets you host it on your own website. You can:- Use the default Chatbase domain. Your help page is served at
www.chatbase.co/{id}/help, where{id}is a unique identifier generated automatically by Chatbase. - Deploy on your own domain (for example,
yourcompany.com/help). Check out the Help Page Proxy for detailed steps on how to do it.
Center Stage
Center Stage opens your agent in a focused chat interface centered over your website. It’s ideal for giving visitors more space to interact with your agent while keeping them on the page they’re currently viewing.Enable Center Stage
- Go to Channels → Center Stage
- Click Deploy, then Enable center stage
Center Stage offers the same settings and configuration options as the Chat bubble.
Third-Party Channels
Slack
Connect your agent to Slack so it can respond to messages when mentioned or messaged directly. Detailed integration steps can be found on this guide. Ideal for internal knowledge bases and team support.Phone
Let your AI agent handle inbound phone calls. Callers are connected directly to your agent, which responds using its configured voice settings and knowledge base. There are two ways to connect a number:- Twilio: import a number from your connected Twilio account. Detailed steps are in the Twilio guide.
- SIP trunk: bring an existing number from your own PBX, SIP provider, or GSM gateway. Detailed steps are in the SIP trunk guide.
Zapier
Use Zapier to connect your agent with thousands of apps and automate workflows. Detailed integration steps can be found on this guide.WordPress
Use the official Chatbase WordPress plugin to add the chat bubble to your WordPress site without writing code. Detailed integration steps can be found on this guide.Messenger
Connect your agent to a Facebook Page and let it respond to Messenger conversations. Detailed integration steps can be found on this guide.Zendesk
Connect your agent to Zendesk to create and respond to support tickets from your customers. Detailed integration steps can be found on this guide.Salesforce
Connect your agent to Salesforce and use it to assist with CRM workflows, such as answering questions about records, supporting agents, or automating responses inside your Salesforce environment. Detailed integration steps can be found on this guide.Shopify
Use the official Chatbase Shopify app to add the chat bubble to your Shopify store without writing code. Detailed integration steps can be found on this guide.Best Practices
- Start with one channel and expand as needed
- Customize prompts and suggested messages per channel
- Test each deployment before sharing it with users
- Use the Help page for structured support and the chat bubble for quick assistance