

The Data sources page
The buttons across the top add content: Add files, Add website, Add text snippet, Add Q&A’s, Add Notion Pages, and Add Tickets. Everything you add appears in one list below, tagged with its type. Use these controls to work with the list:- Search and the All sources filter narrow the list by name or type.
- Bulk select lets you act on several sources at once.
- Sources per page controls how many rows you see.
- The counter on the right tracks usage against your plan’s total size limit in MB. To raise the limit, buy the Extra storage add-on.
- The header shows when the AI agent was last synced, next to the Auto-resync dropdown.
How training works
Every change takes effect on its own. Add, edit, or delete a source and the AI agent learns it within seconds. Each row shows its own status:- Syncing while the source is being processed.
- Synced once it is live.
- Failed with the reason, so you can fix the source and try again.
Adding sources
Files
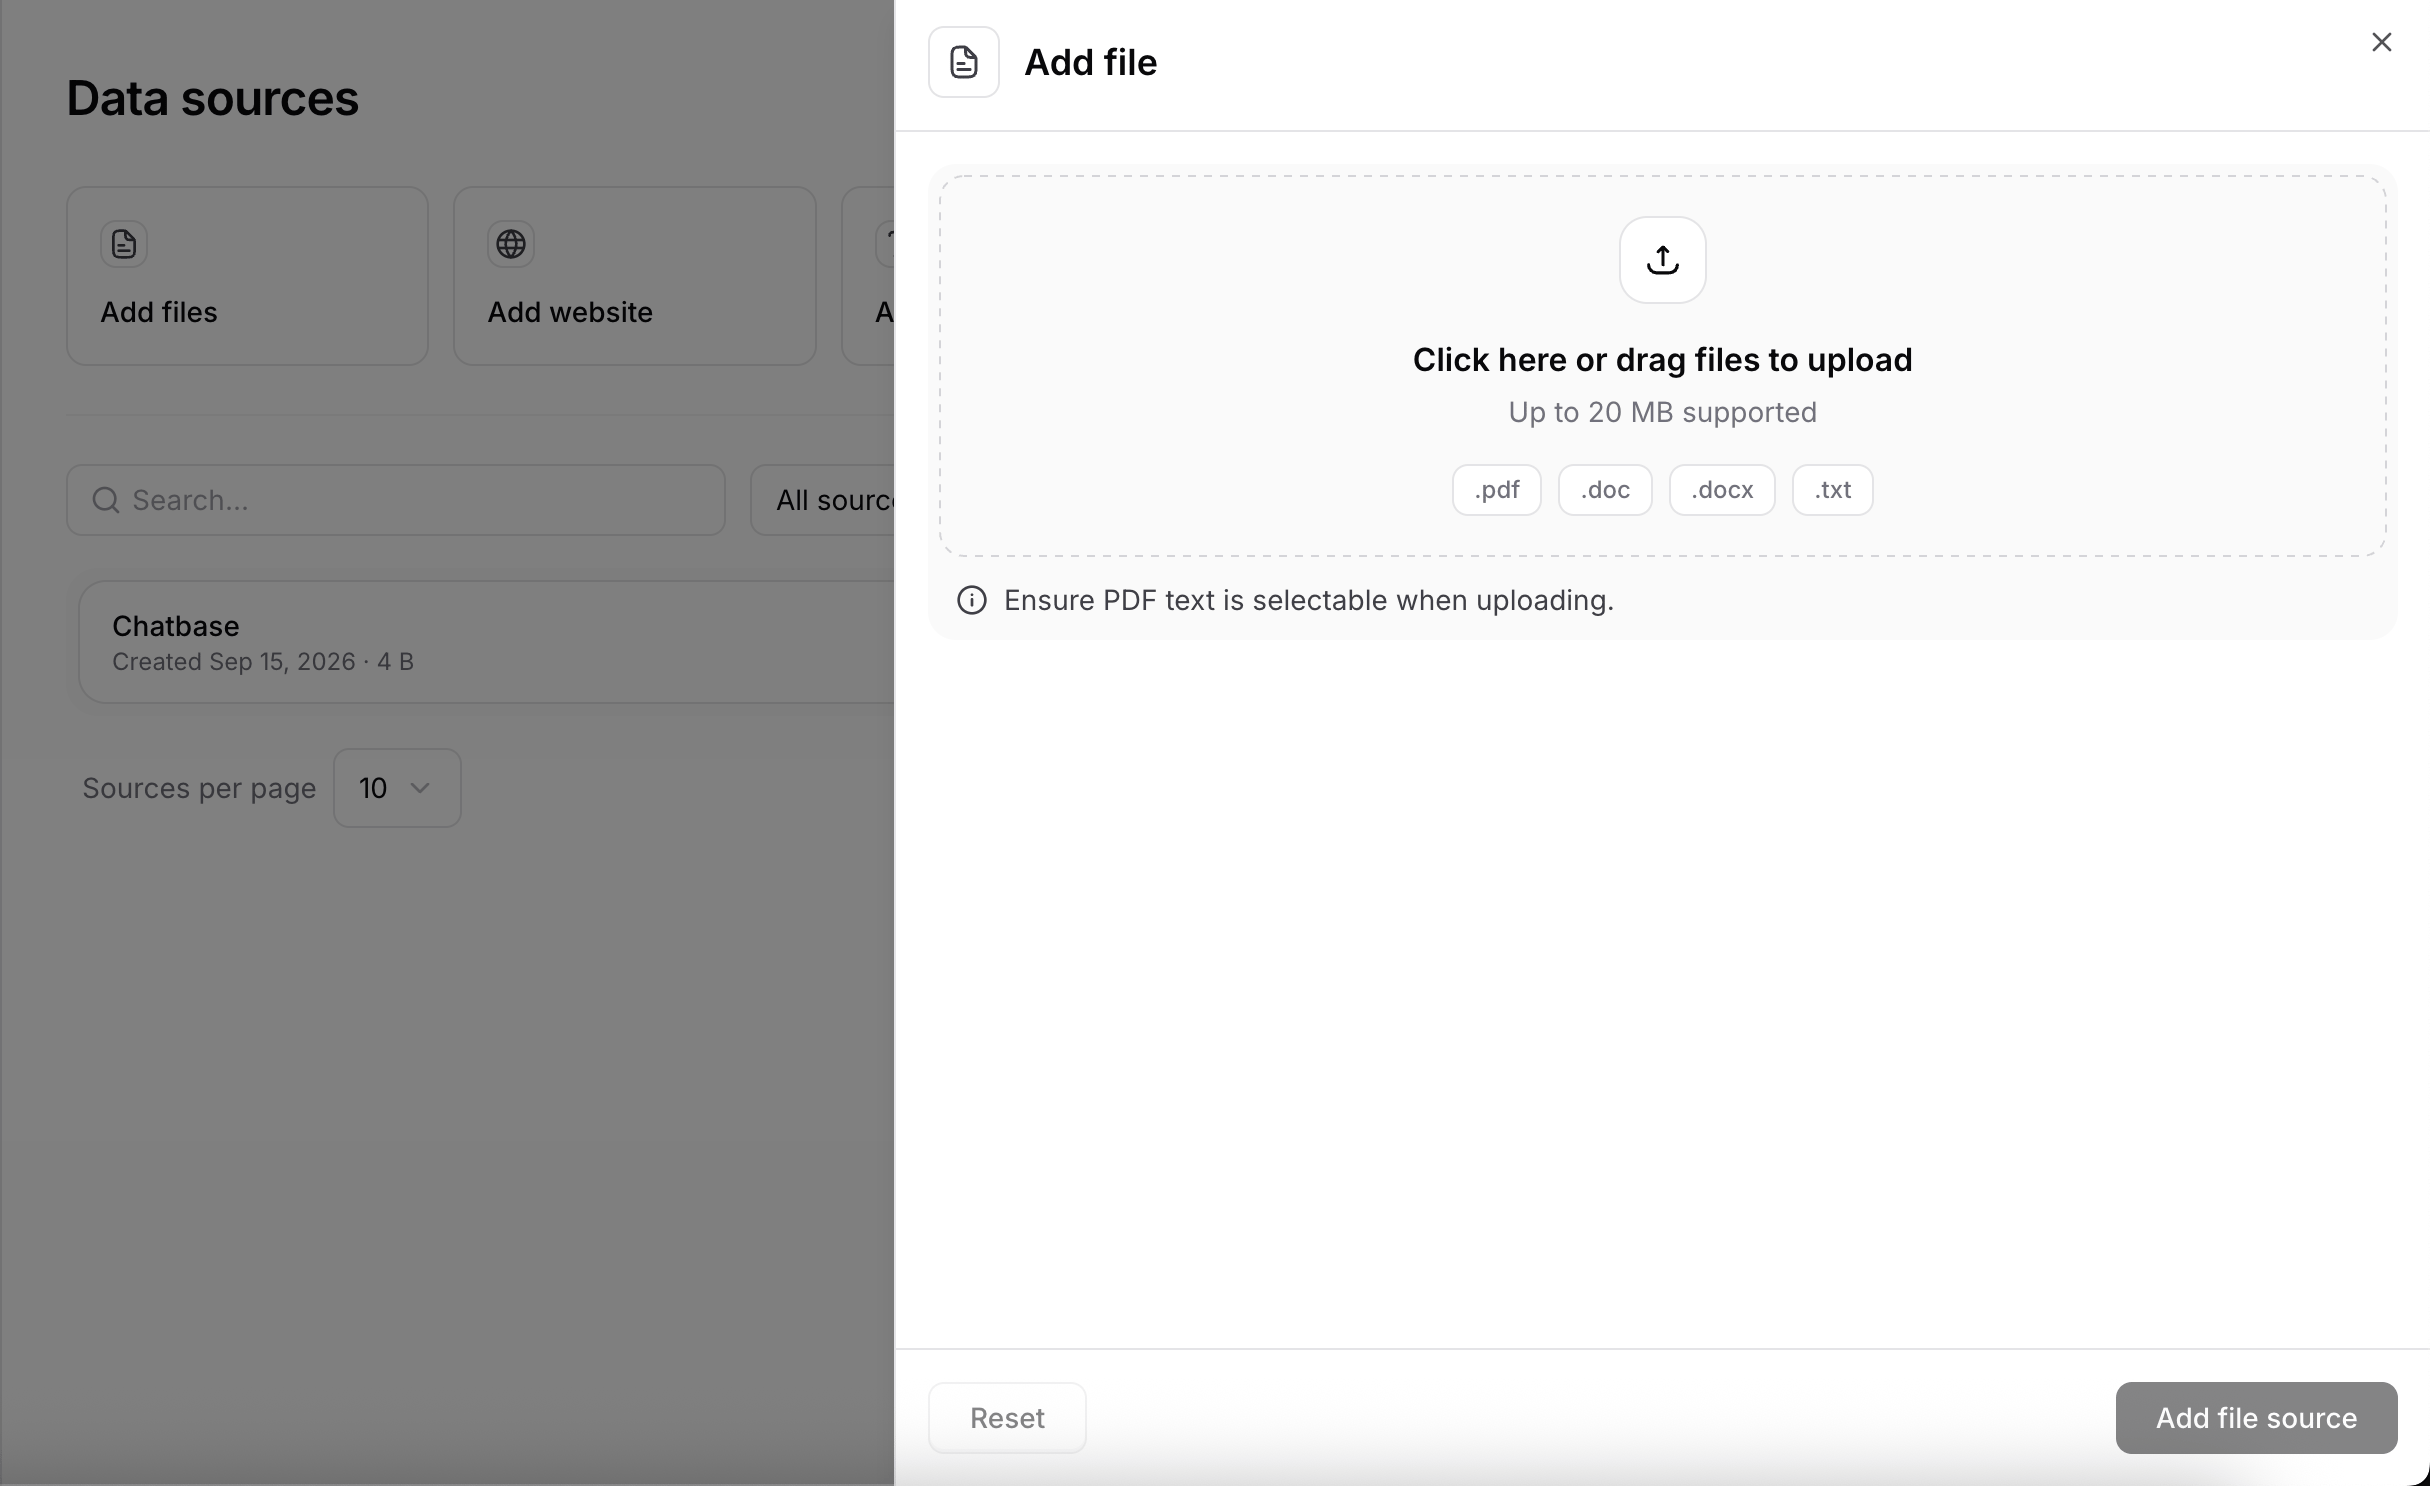
Click Add files to upload documents. Chatbase accepts.pdf, .txt, .doc, and .docx files up to 20 MB each. The text in a file must be selectable. Scanned PDFs with no text layer cannot be trained on.
1
Choose files
Click Add files, then click the upload area or drag documents into it. Click Add file source to start the upload.
2
Wait for the upload
Files enter a queue and upload one by one.
3
Check the status
Each file trains as soon as its upload finishes. Its row shows Syncing, then Synced. If extraction fails, the row shows Failed with the reason. Fix the file and upload it again.
Text
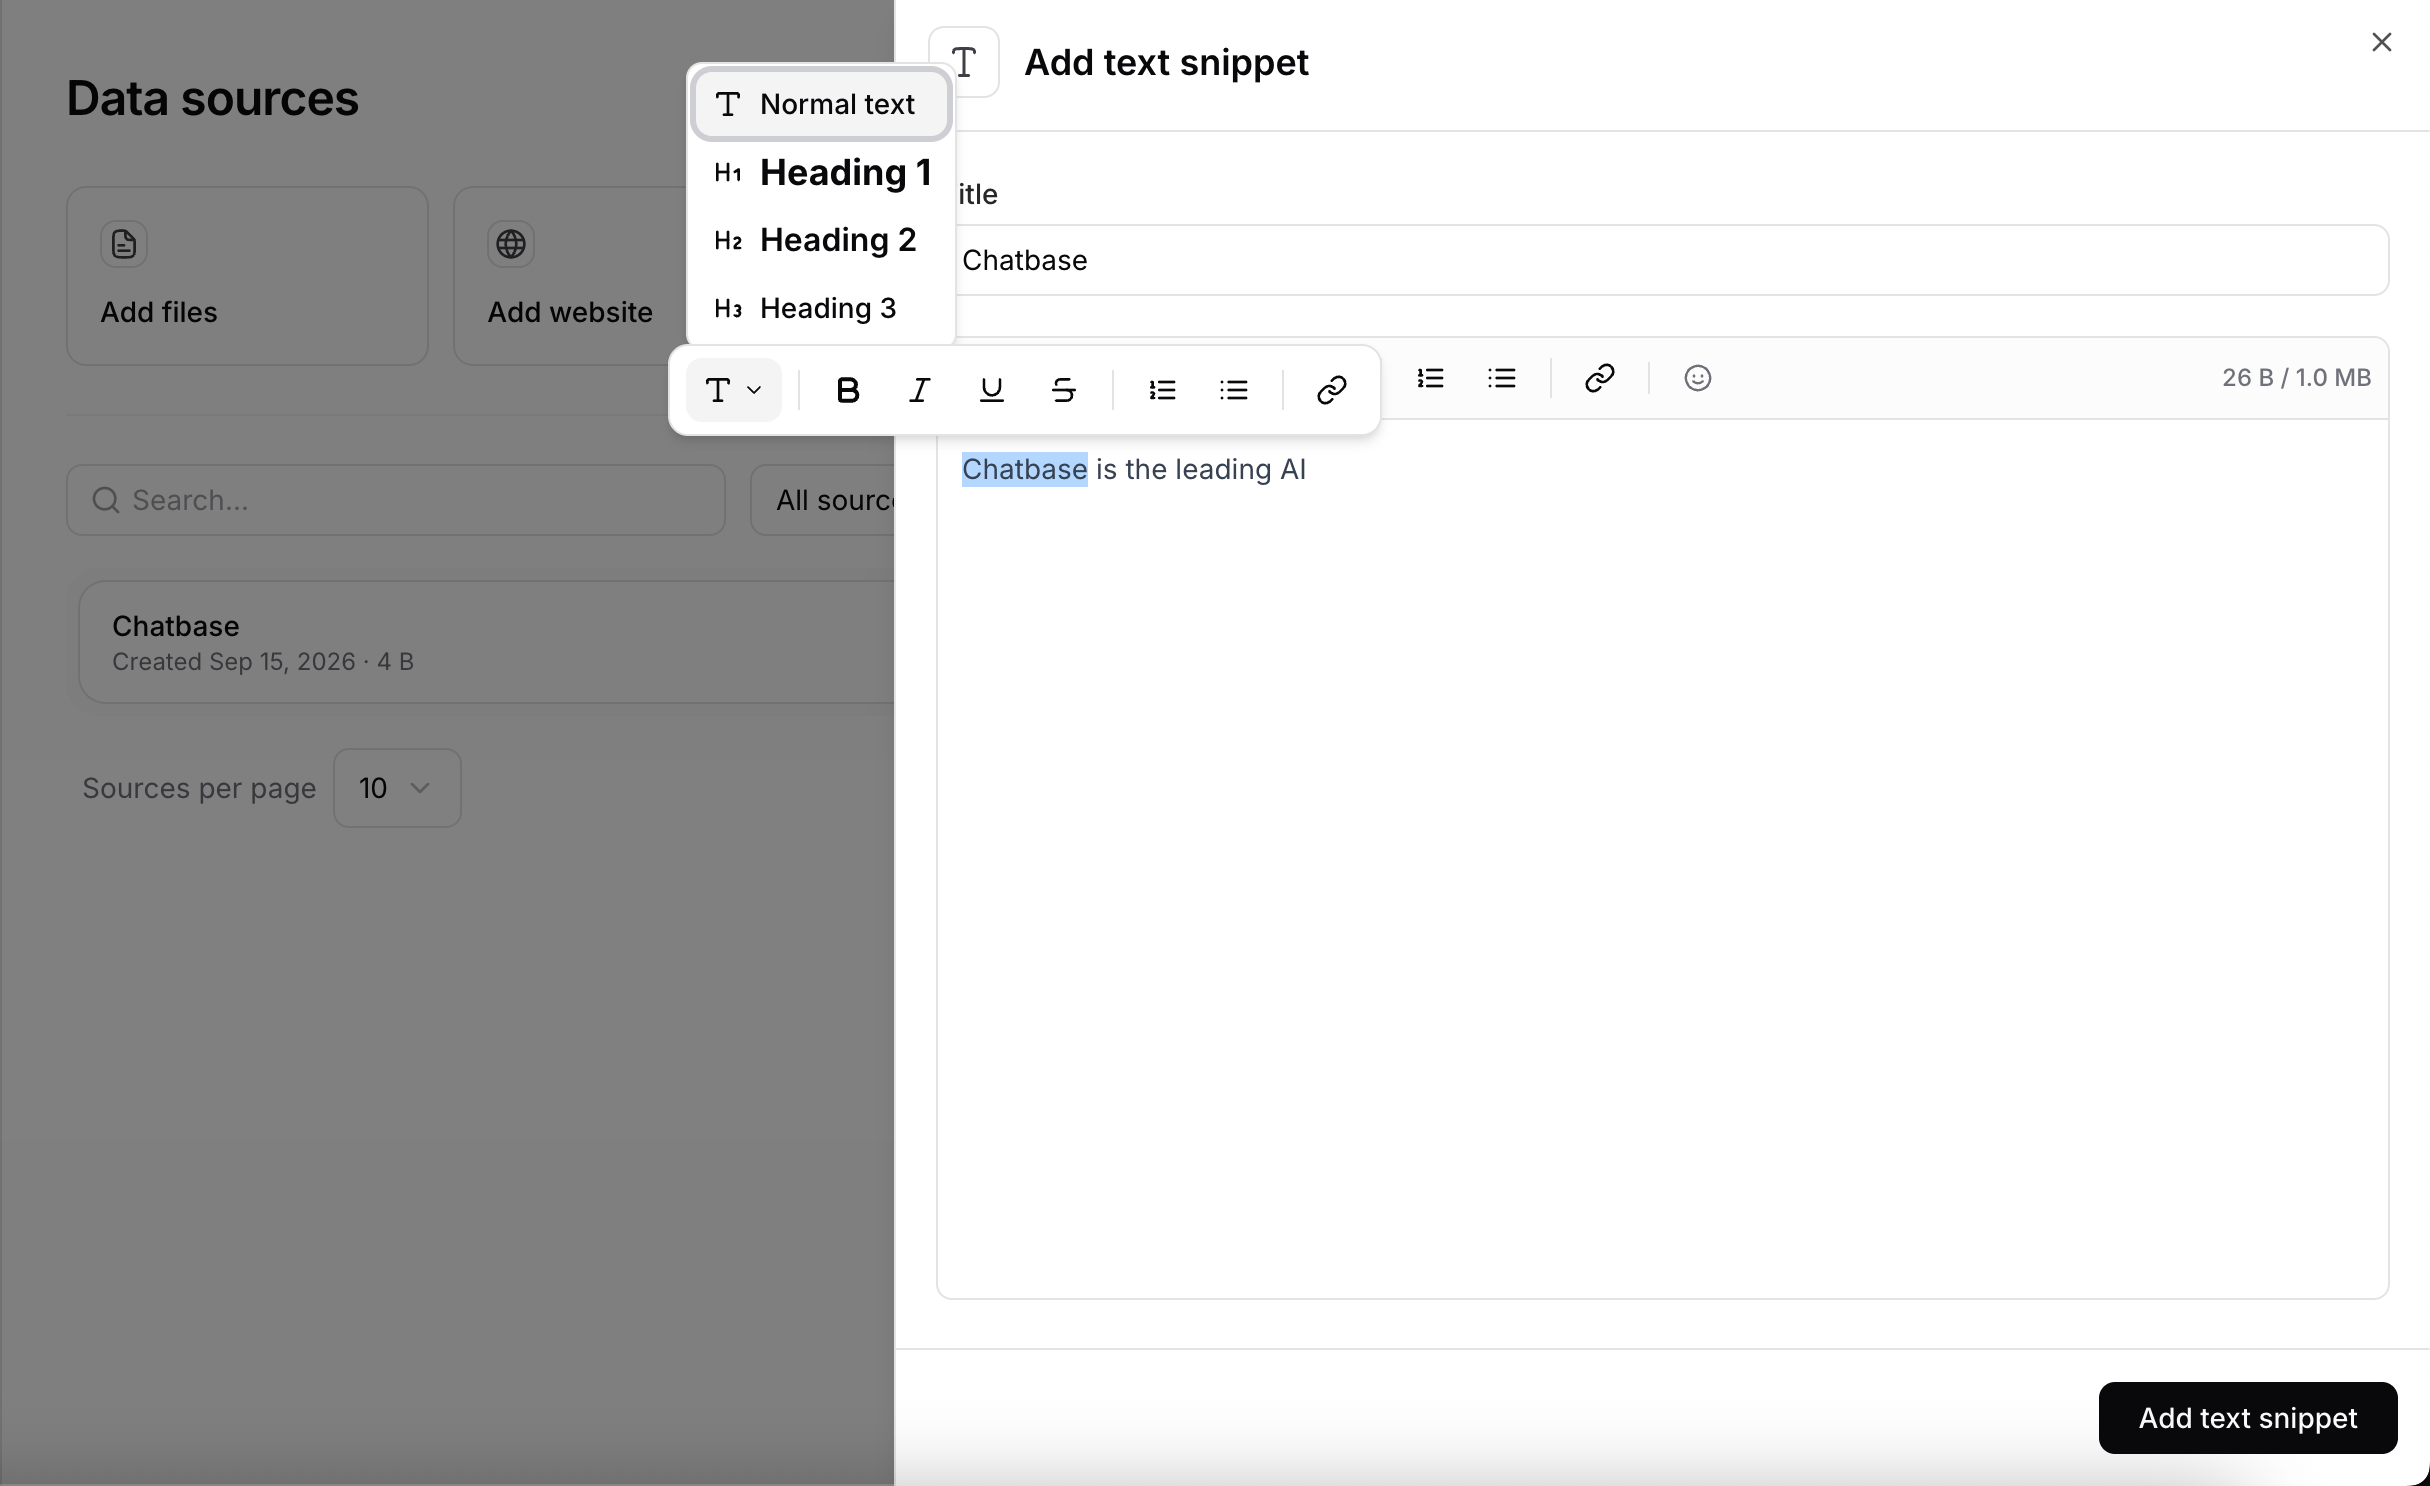
Click Add text snippet to add short pieces of content that don’t belong in a document, such as a policy, a product note, or an internal FAQ. Give each snippet a title so you can find it at a glance. Snippets support rich text formatting:- Headings
- Bold, italic, underline, and strikethrough
- Ordered and bulleted lists
- Hyperlinks
- Emojis
Website
Click Add website to train the AI agent on web content. The panel has three tabs:- Crawl links. Enter the homepage URL and Chatbase discovers every public page.
- Sitemap. Point to an XML sitemap for a structured list of URLs.
- Individual link. Enter the specific URLs you want.
If you use Shopify, add your sitemap at
/sitemap.xml instead of crawling the whole store. This uses less of your size limit and avoids duplicate product and collection pages.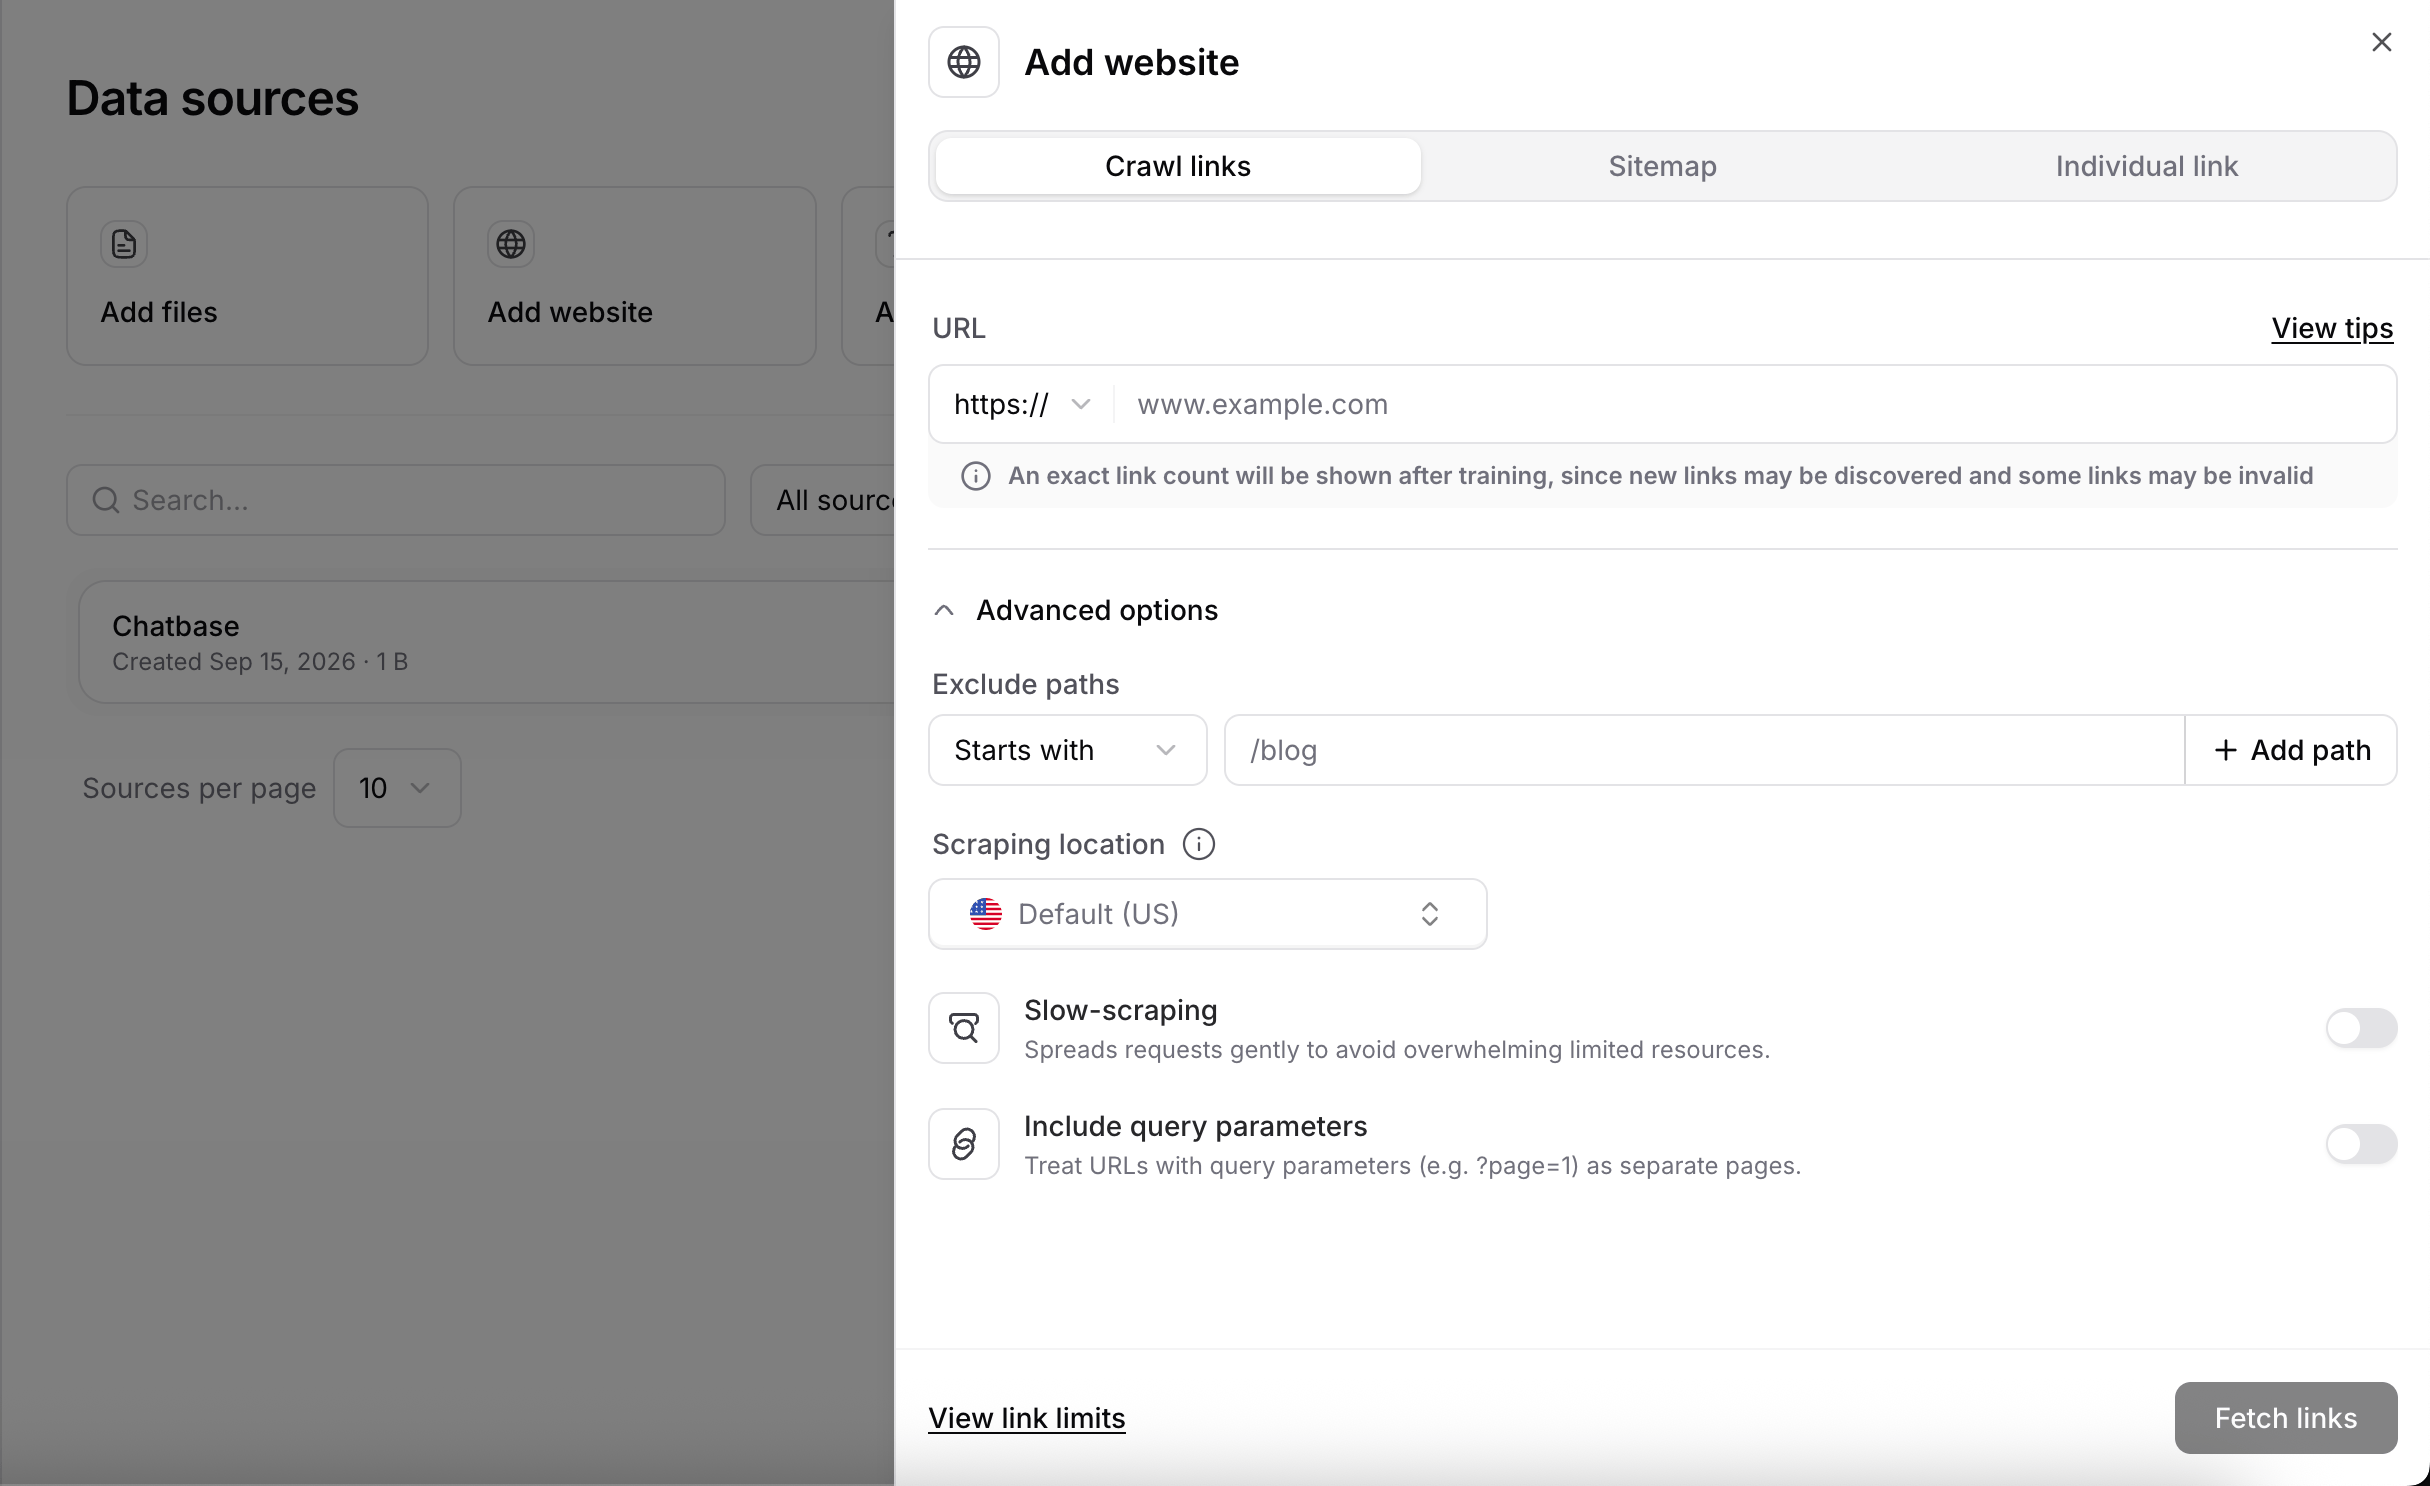
Reviewing fetched links
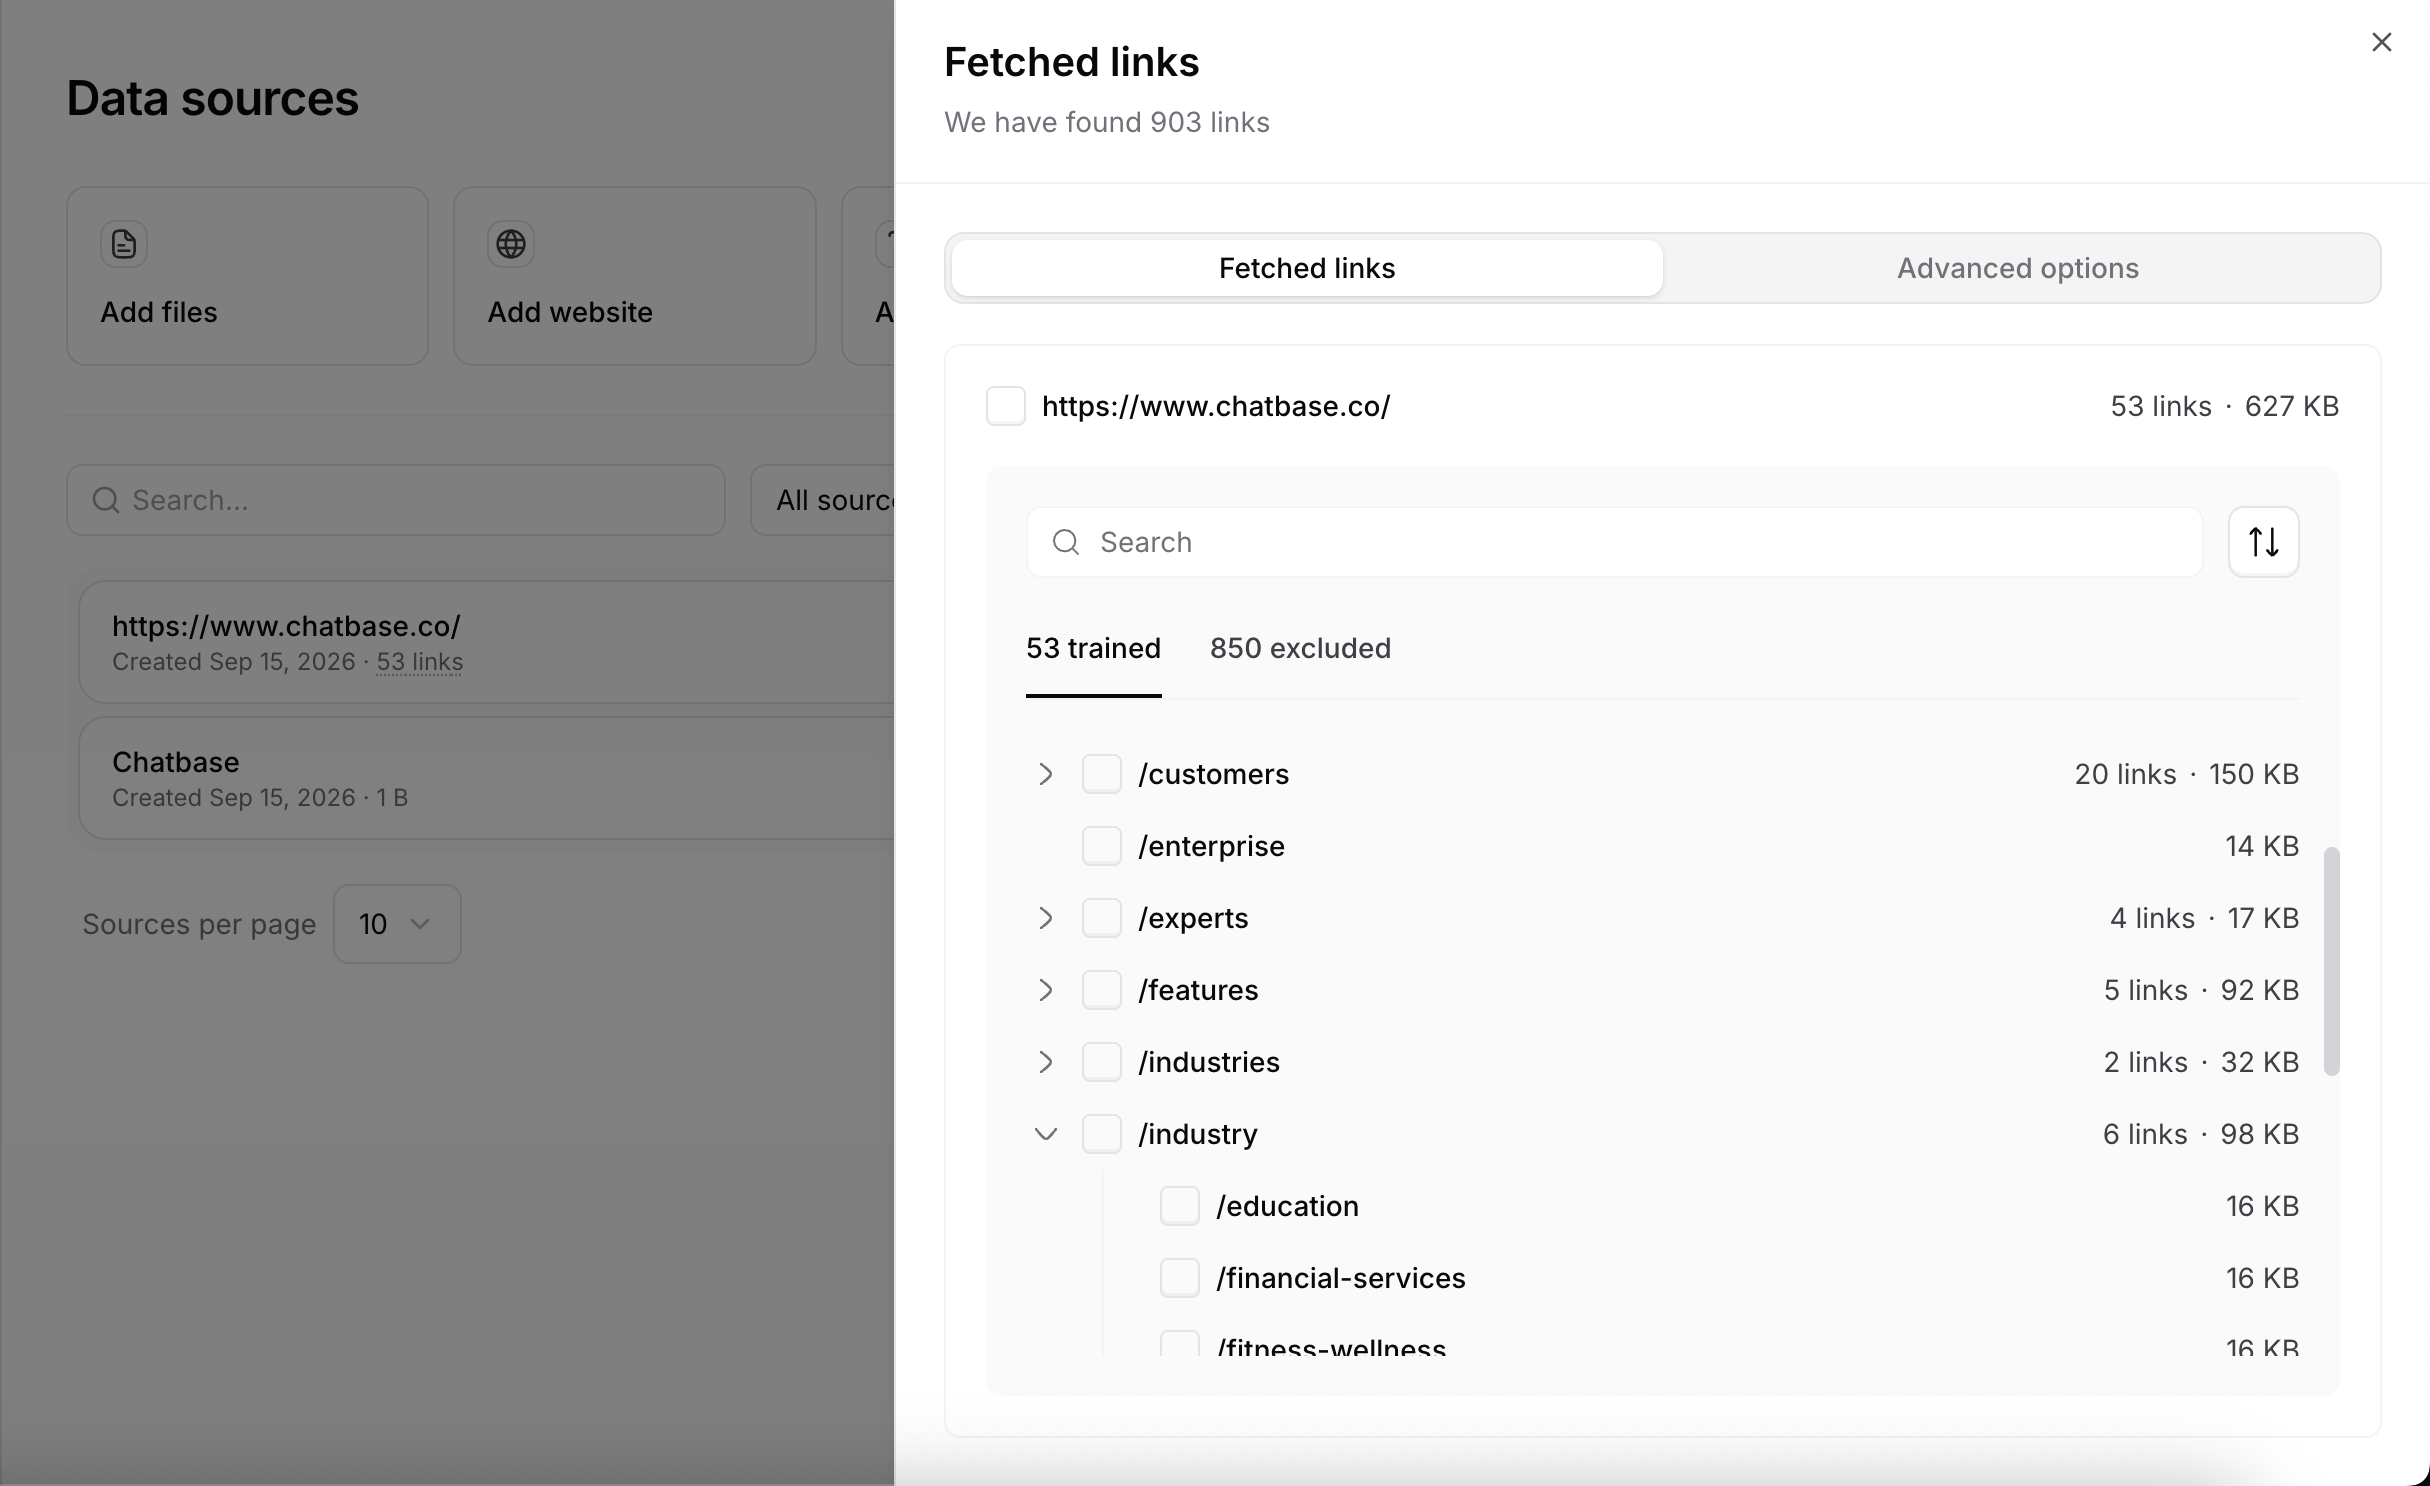
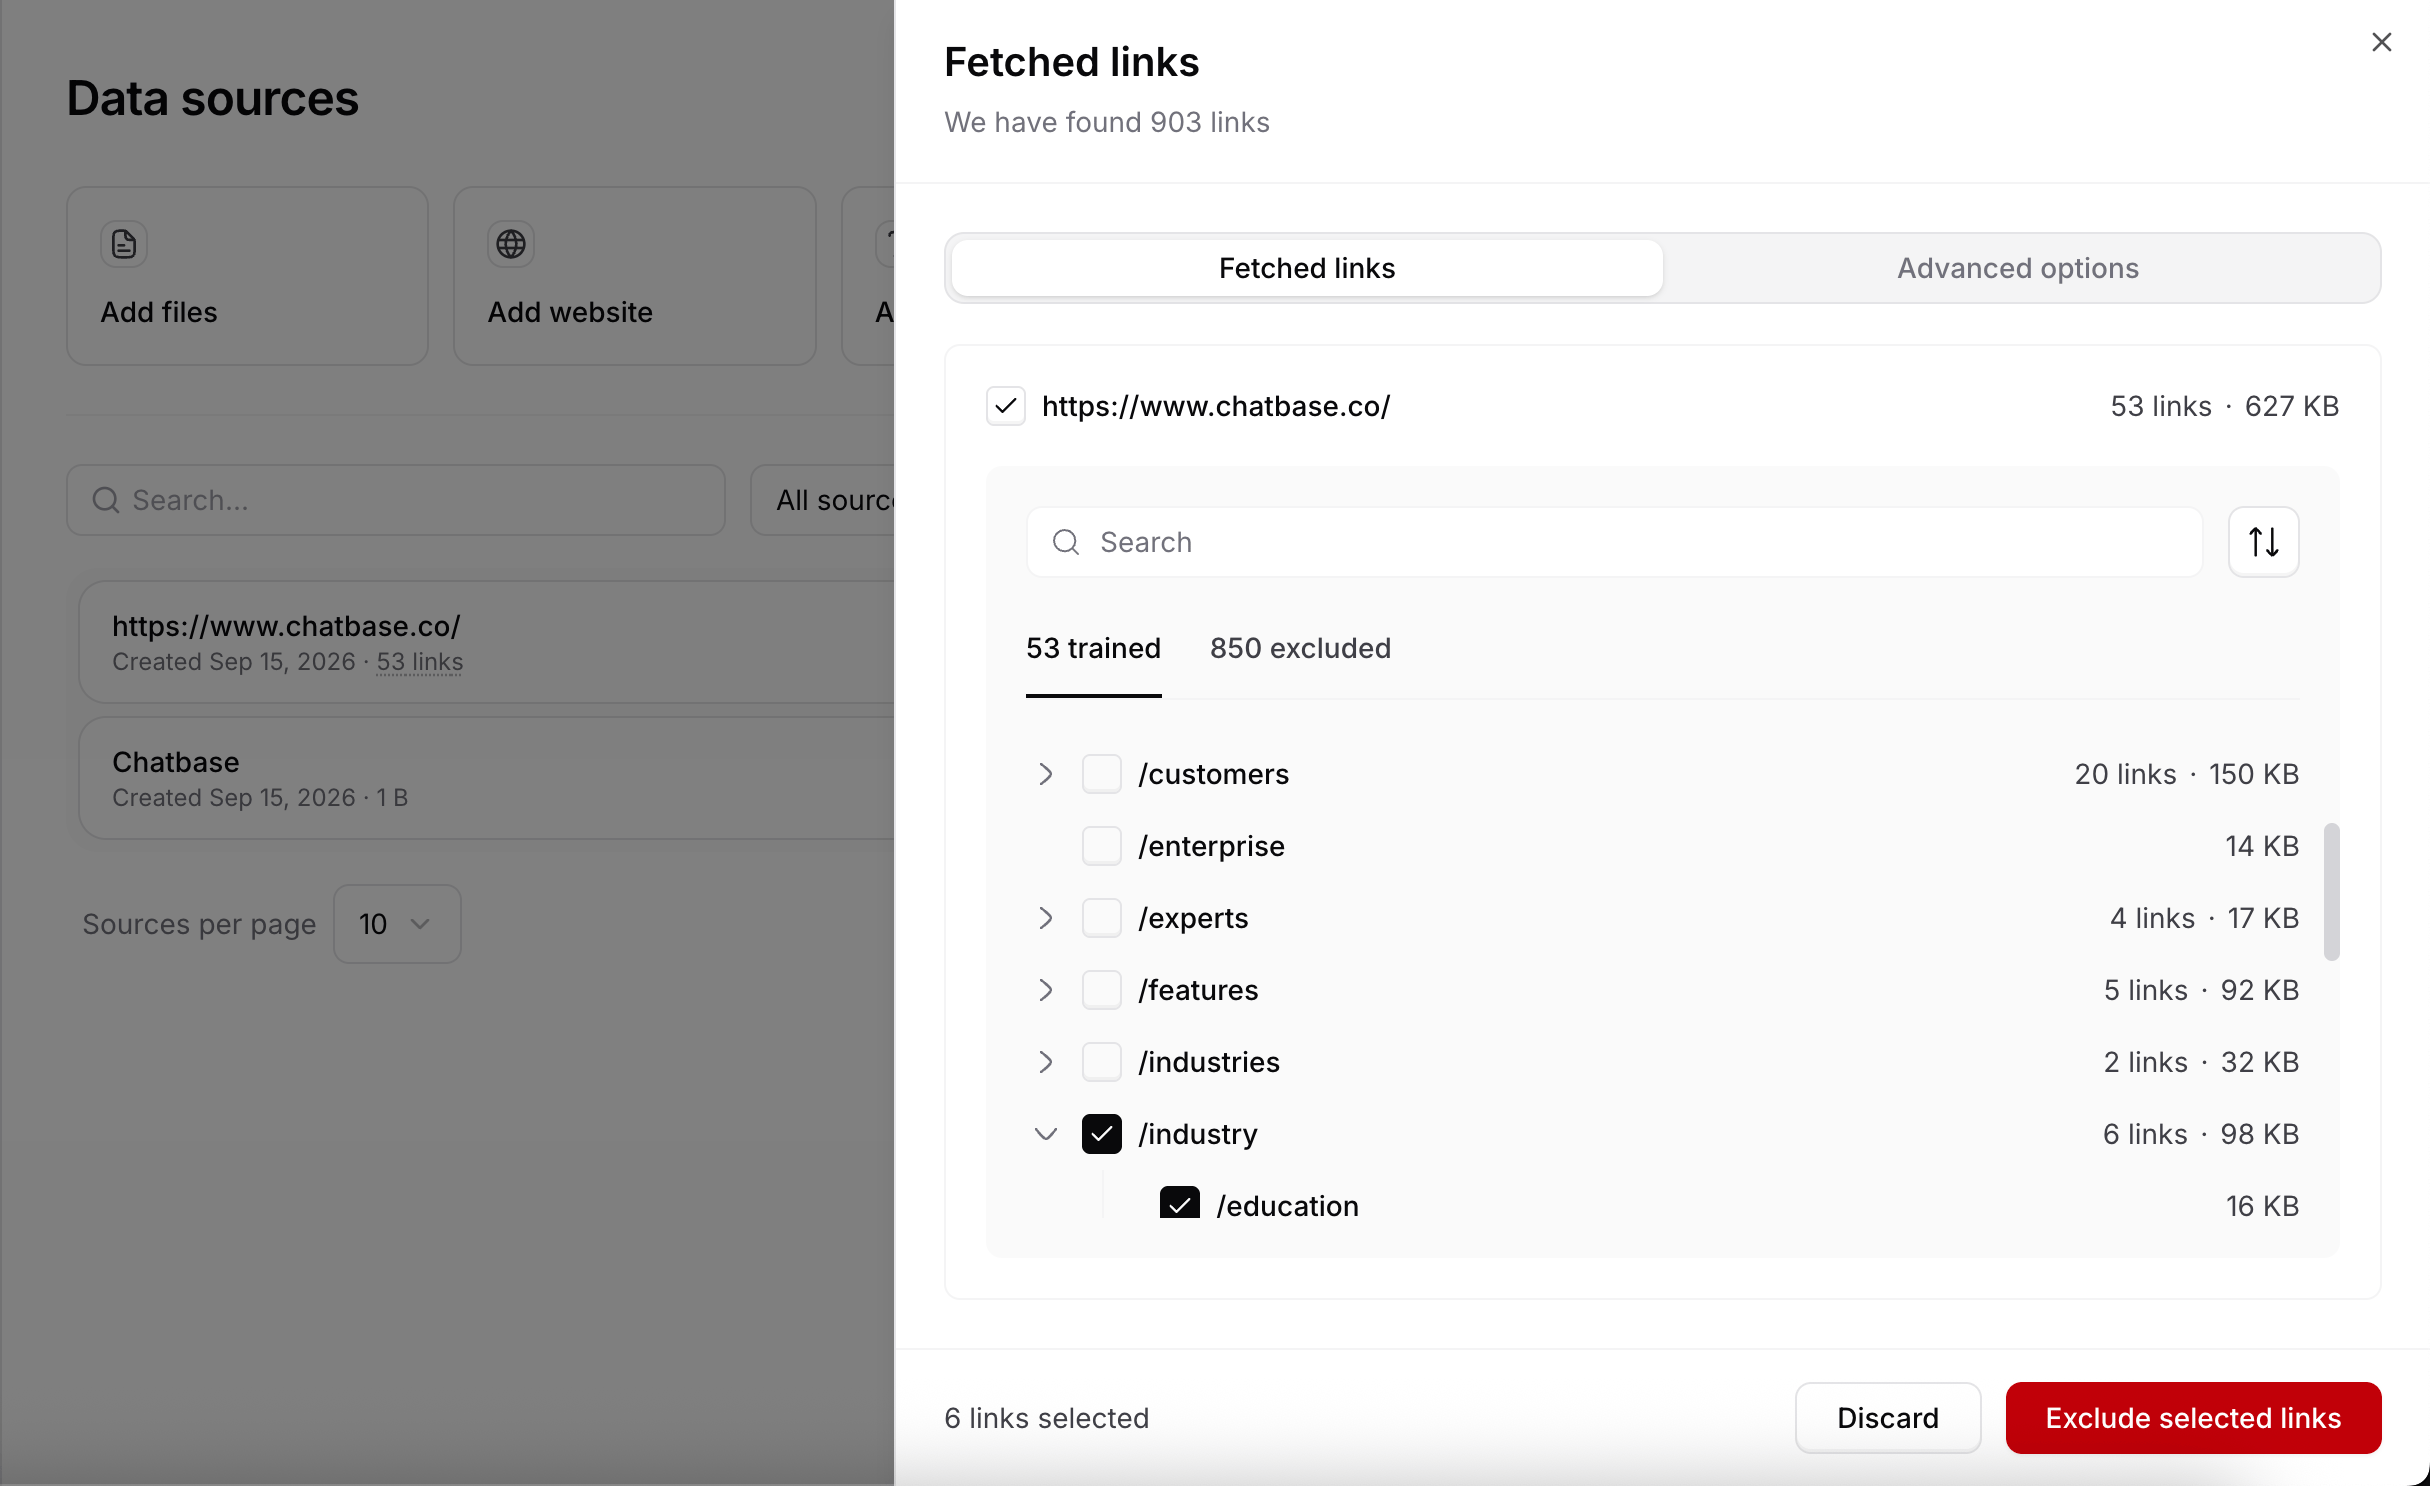
Click a website source to open the Edit link panel. The Fetched links tab lists every link Chatbase found, grouped by path. Expand a folder such as/docs to see the pages inside it. Each row shows how many links it holds and how much of your size limit they use. Use the search box or the sort button to find a page.
Links are split into tabs:
- Trained. Pages that were crawled successfully and the AI agent learns from, such as product pages, blog posts, and documentation.
- Not found. Pages that could not be accessed, usually because they don’t exist or returned an error. This tab only appears when a crawl hit such pages.
- Excluded. Pages the AI agent does not use, either because Chatbase skipped them, such as login, signup, and duplicate pages, or because you excluded them.
Excluding and including links
Tick the checkbox next to a page or a folder to select it. Selecting a folder selects every page inside it, and the footer shows how many links are selected. Then:- In Trained, click Exclude selected links to stop the AI agent from using those pages. They leave the AI agent’s knowledge right away.
- In Excluded, click Include selected links to bring those pages back into training.
/blog, tick its parent folder and exclude it, or add it to Exclude paths on the Advanced options tab so it is skipped on every crawl.
Resyncing a website
To re-read a website when its content has changed, click the three dots on its row, then Resync now. The same menu has Edit, which opens the Edit link panel, and Delete. Sitemaps are also re-read on the Auto-resync schedule.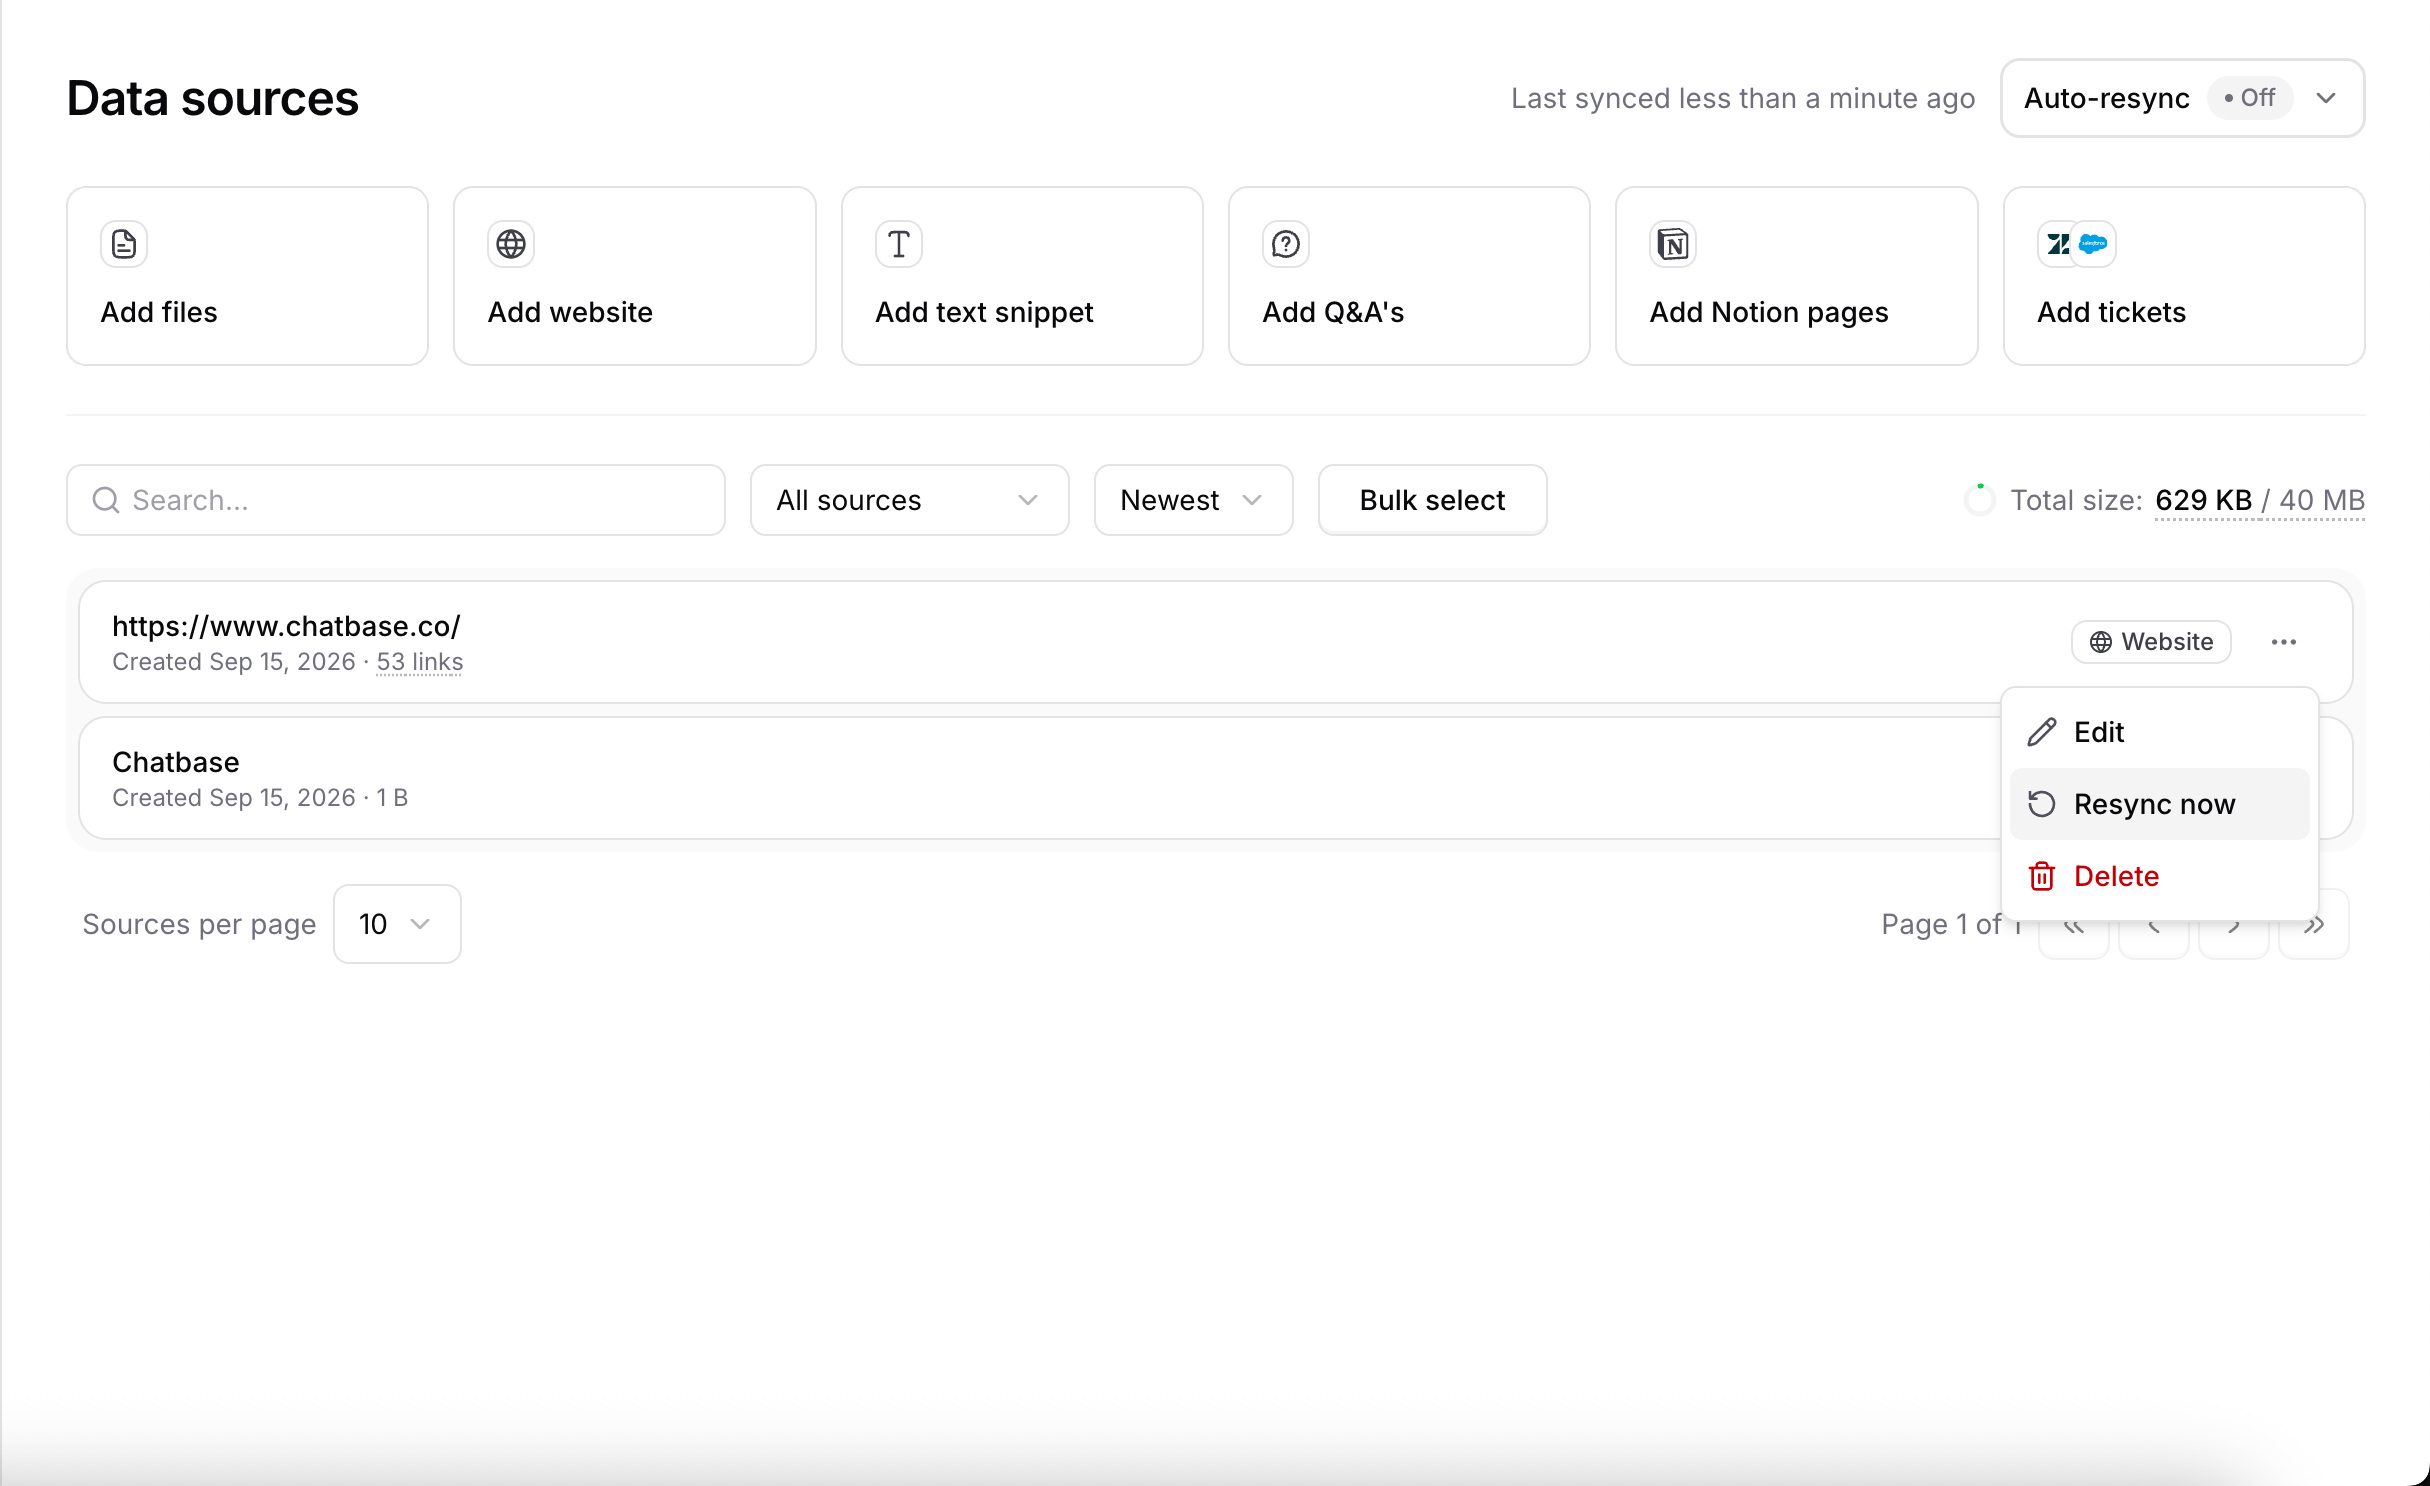
Advanced options
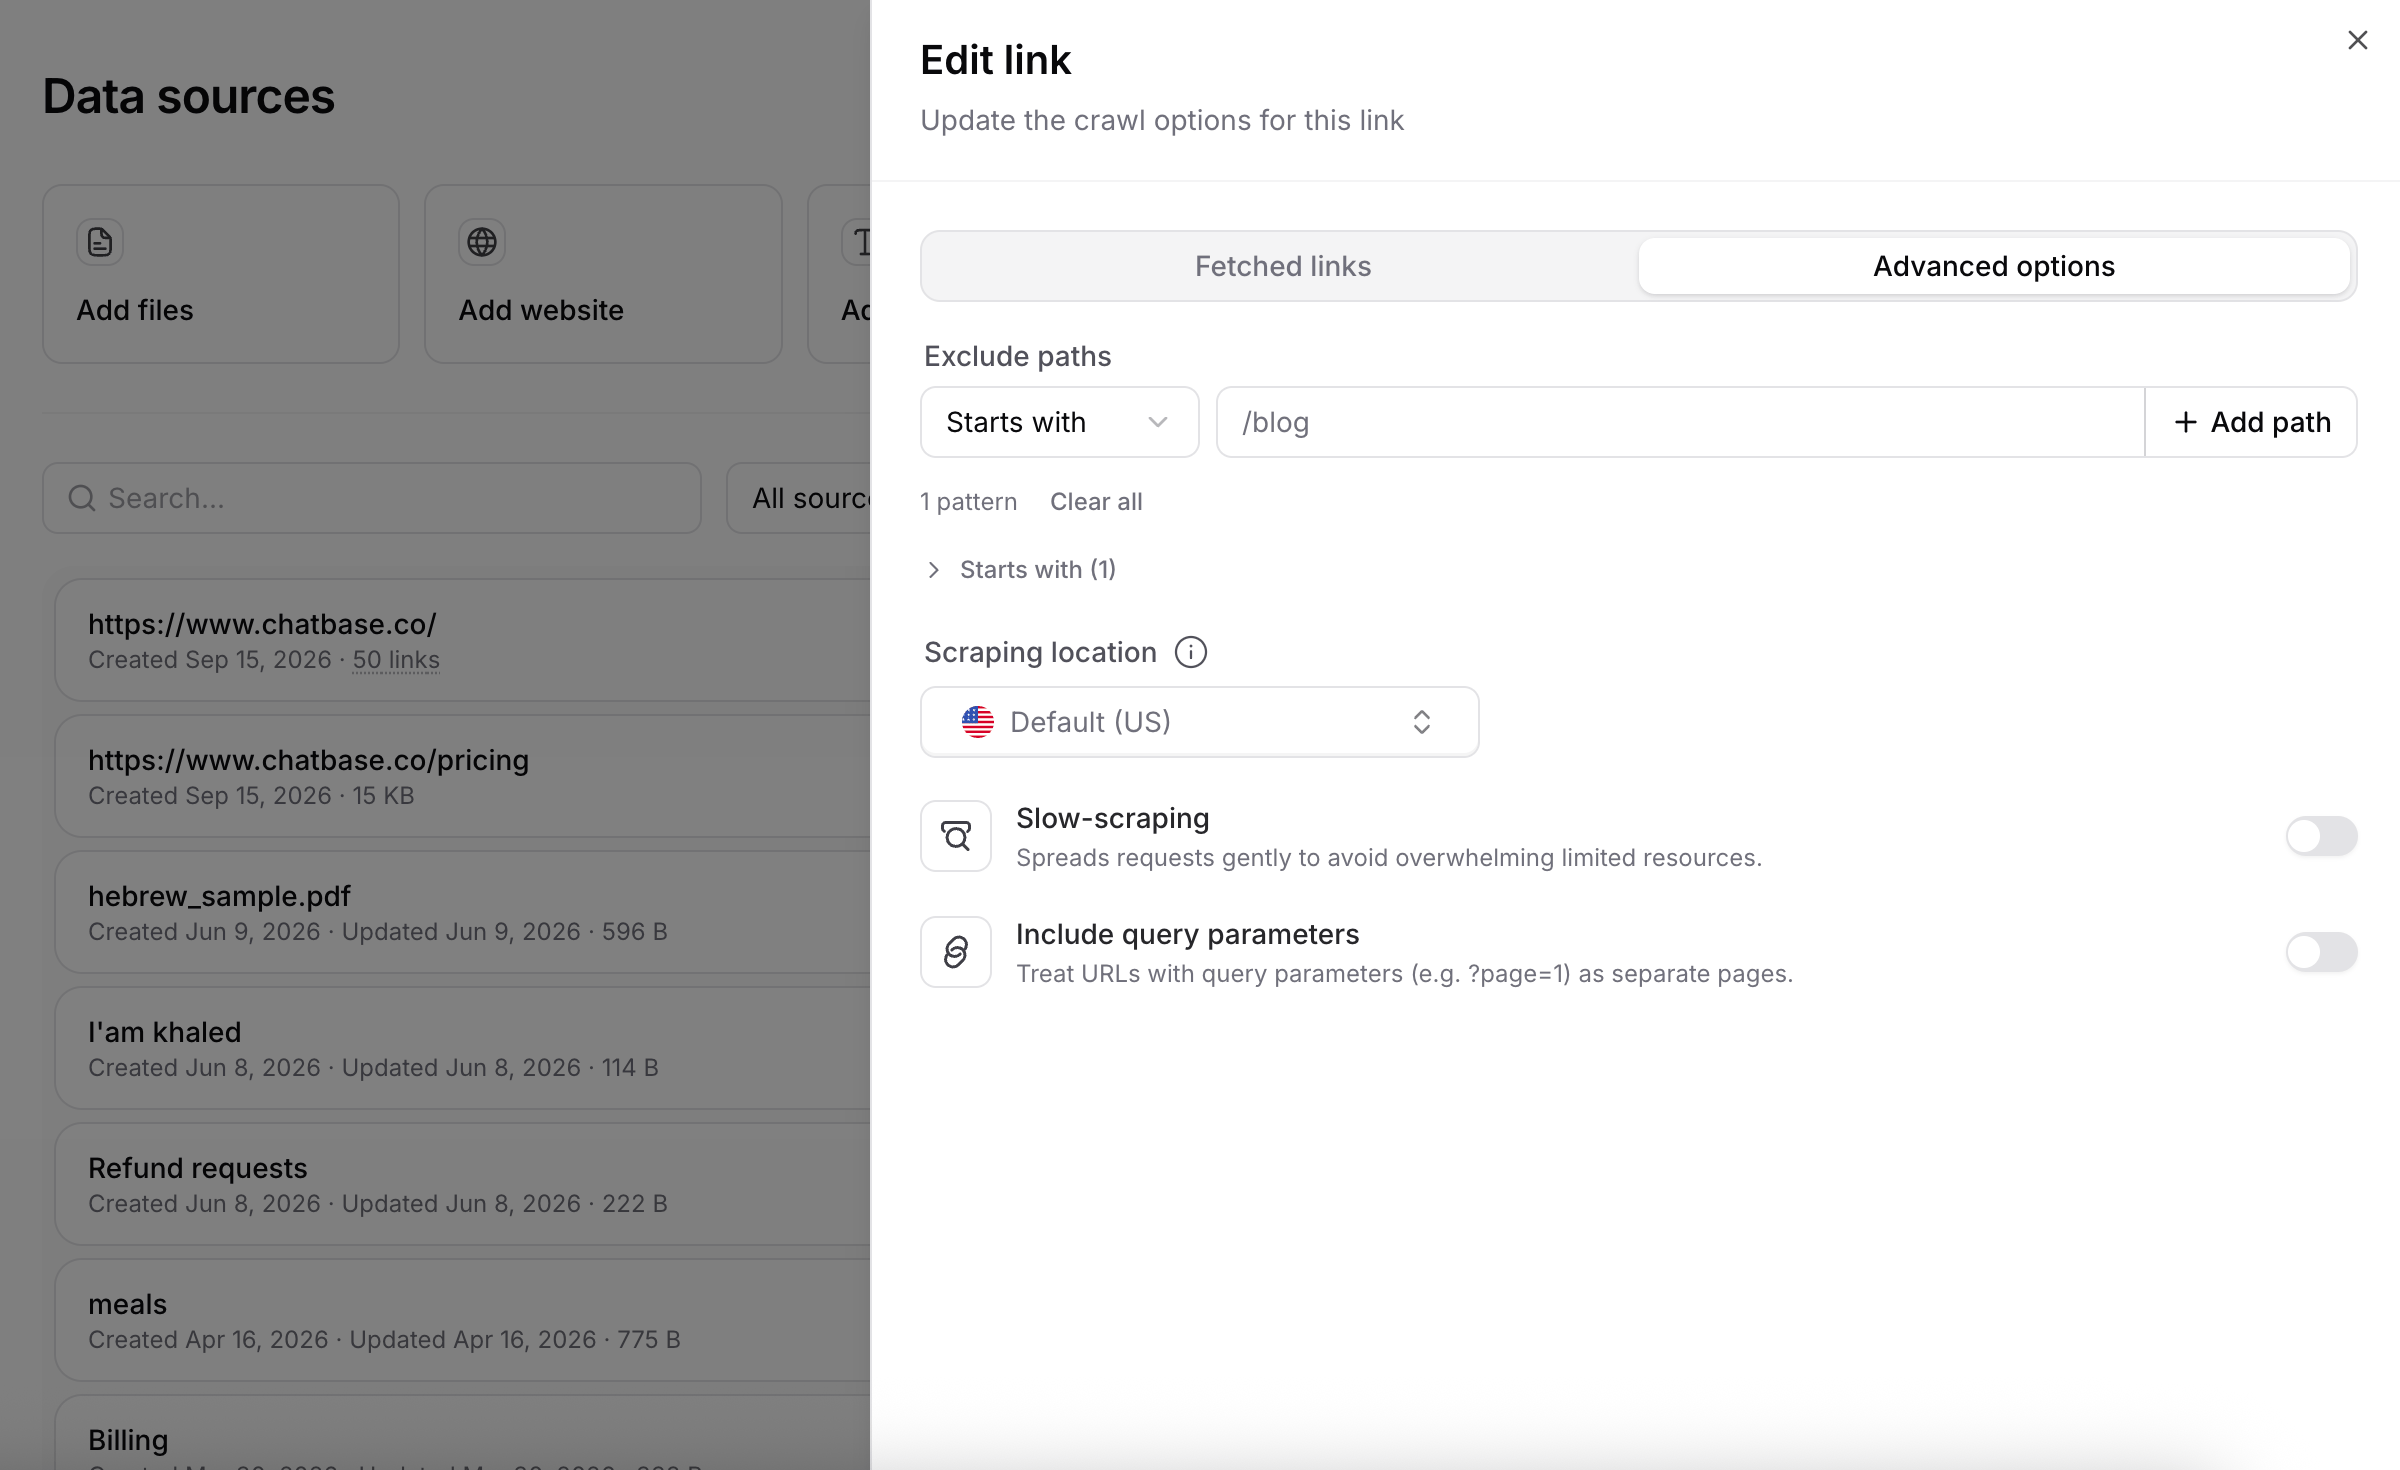
The Advanced options tab of the Edit link panel controls how Chatbase crawls the website. Saving a change starts a resync of that website. Exclude paths. Add patterns for URLs to skip. Pick a match type, enter the path, and click Add path. Patterns are grouped by match type, and Clear all removes them. Match types:
Scraping location. Runs scraping from the selected country. Useful for geo-restricted or localized sites. The default is the US.
Slow-scraping. Spreads requests out to avoid overwhelming a site with limited resources. Turn it on if crawls fail or your server struggles under load.
Include query parameters. Treats URLs that differ only by query parameters, such as
?page=1, as separate pages. Leave it off unless those parameters change the page content.
If Chatbase cannot crawl your website, you may need to allow our crawler in your
robots.txt file. Contact our Support team first so we can whitelist your website on our side, then add this user agent:Q&A
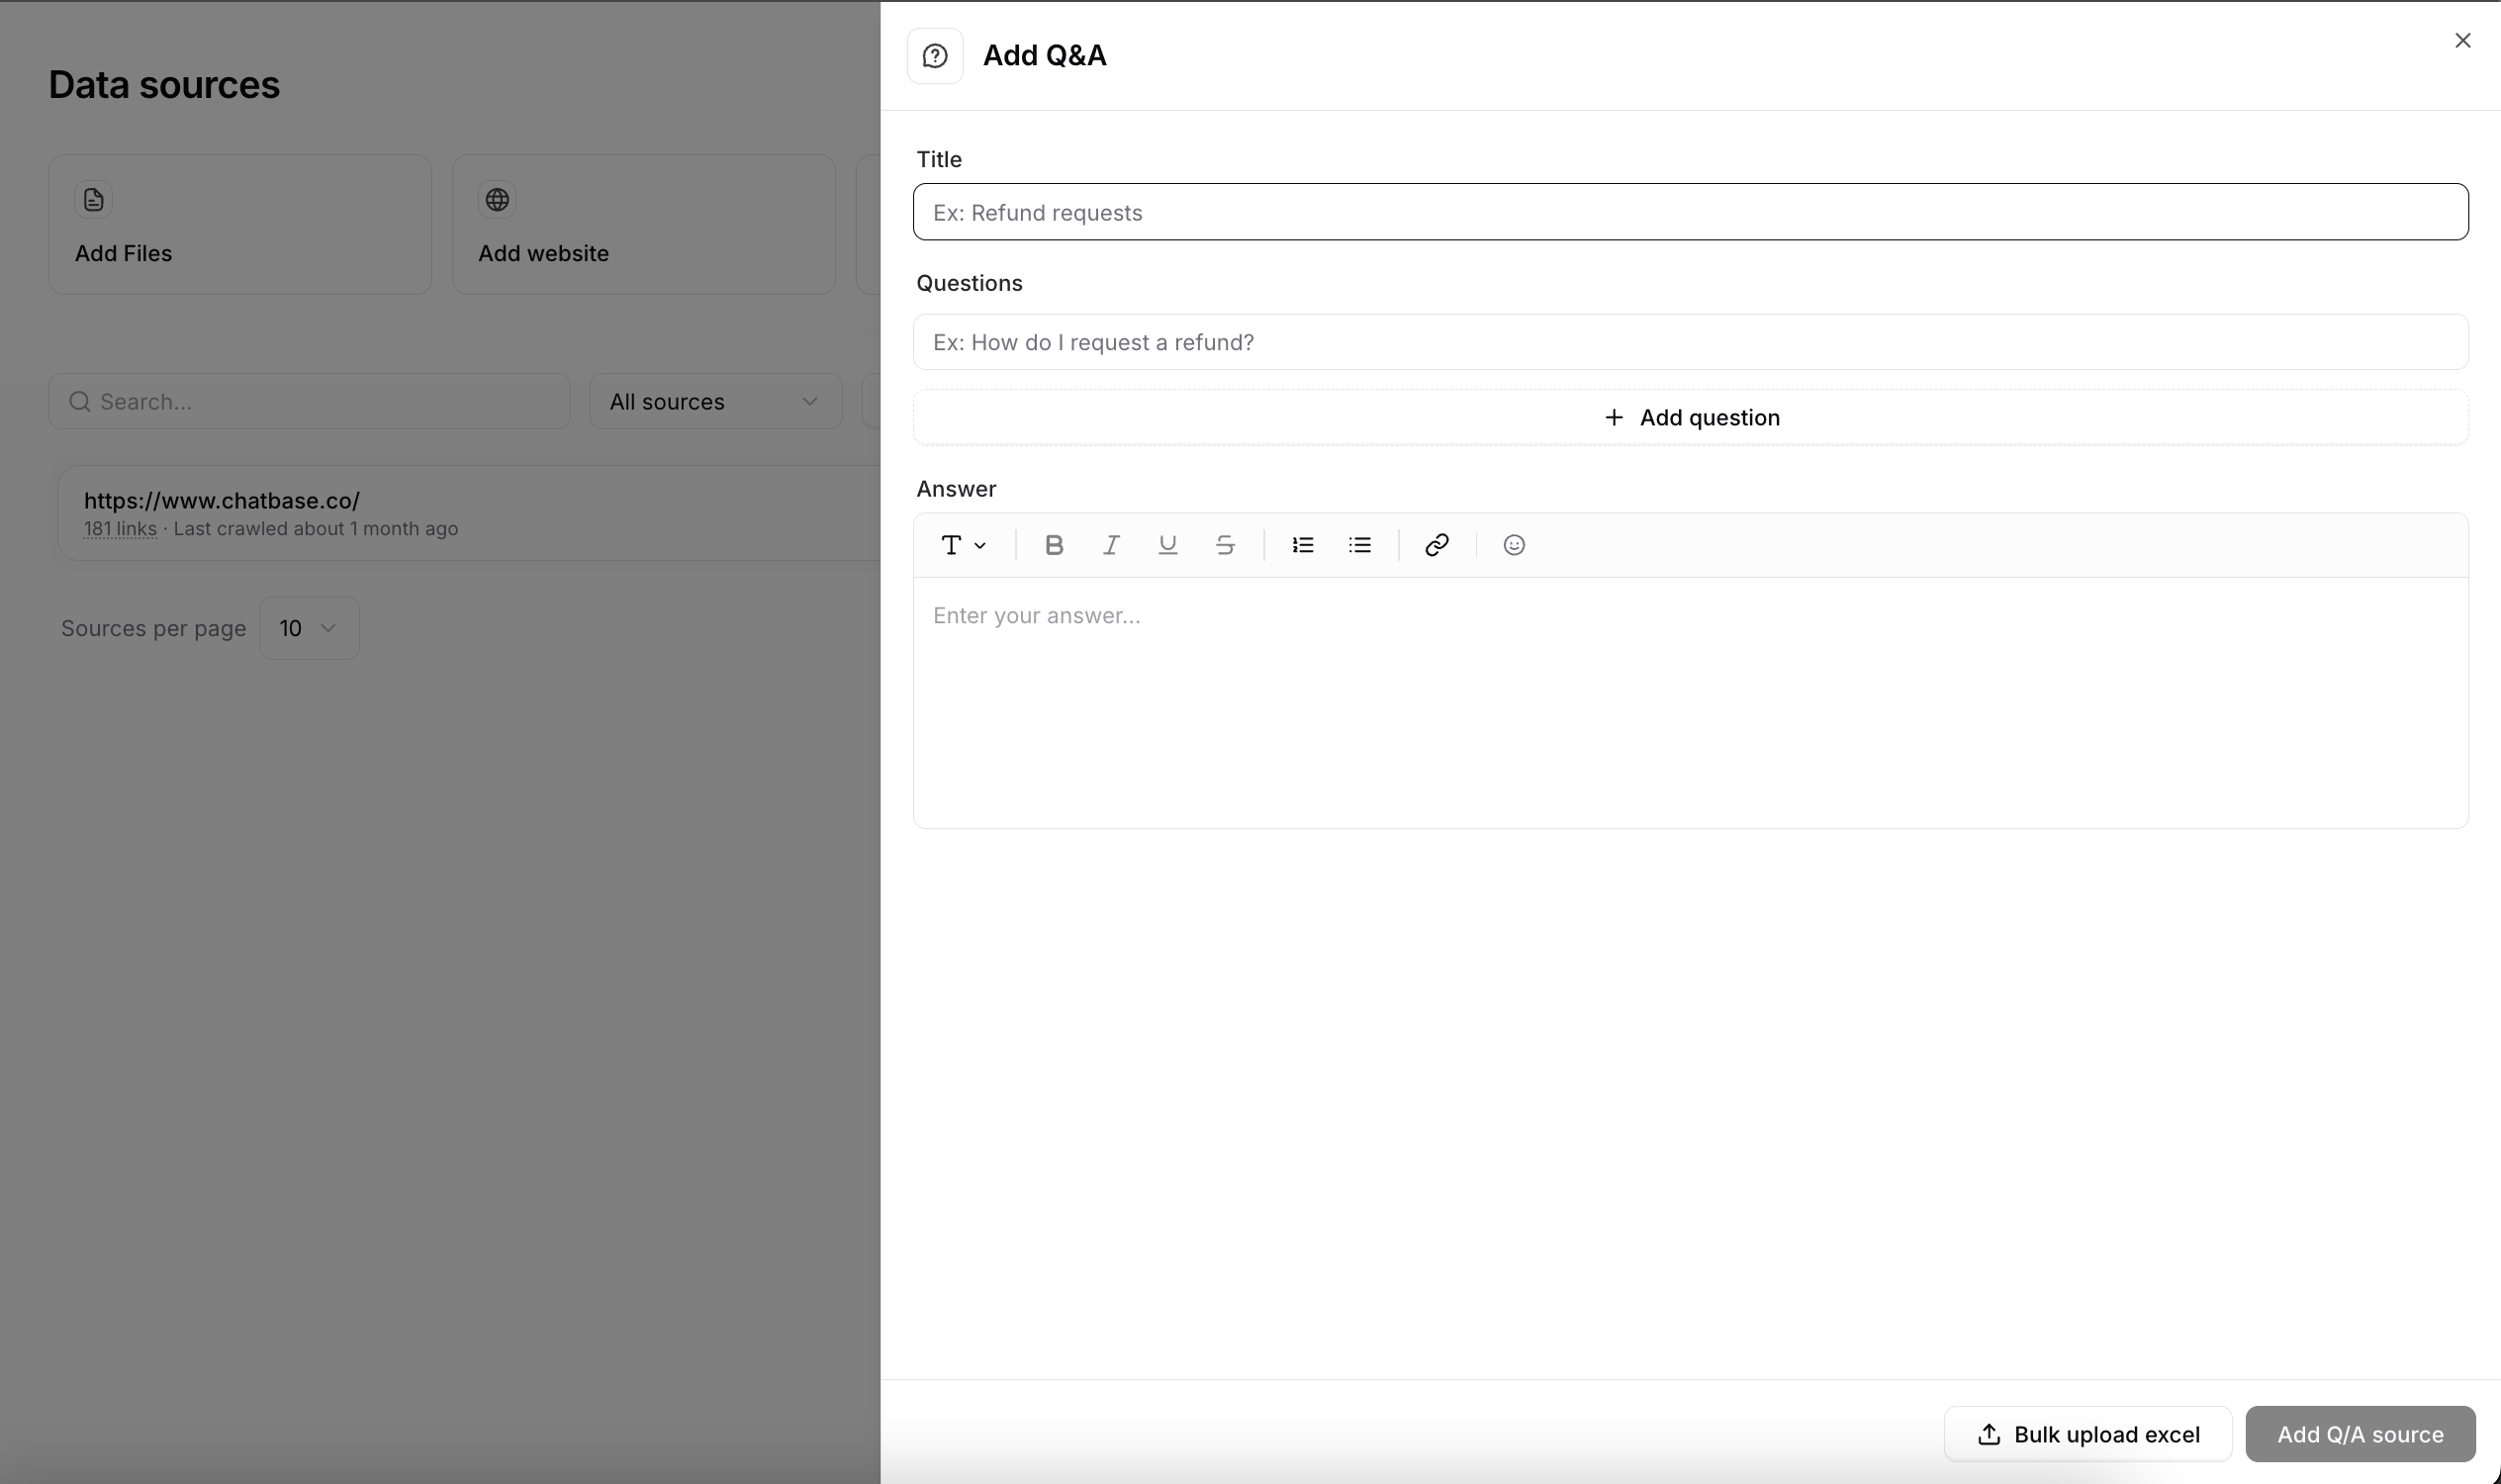
Click Add Q&A’s to train the AI agent with question-and-answer pairs. Use them for questions that need a precise, consistent answer, such as pricing, policies, or business-specific details.- Each entry has a title so you can find it quickly.
- Add several variations of the question to one answer to improve recognition.
- Answers support the same rich text formatting as text snippets.
- Bulk upload accepts an
.xlsxfile with up to 100 rows and a maximum size of 1 MB.
Usage insights
Click any Q&A to open its detail view, which shows how often users ask it:- Number of times the question has been asked, updated instantly.
- When it was last asked.
- When the Q&A was added.
- A chart of how often the question comes up over time.
Notion
Click Add Notion Pages to connect your Notion workspace and choose which pages to import. The AI agent can then answer from the content of those pages.If your Notion workspace is on a paid plan, make sure you have admin access so you can grant all the permissions the integration needs.
Tickets
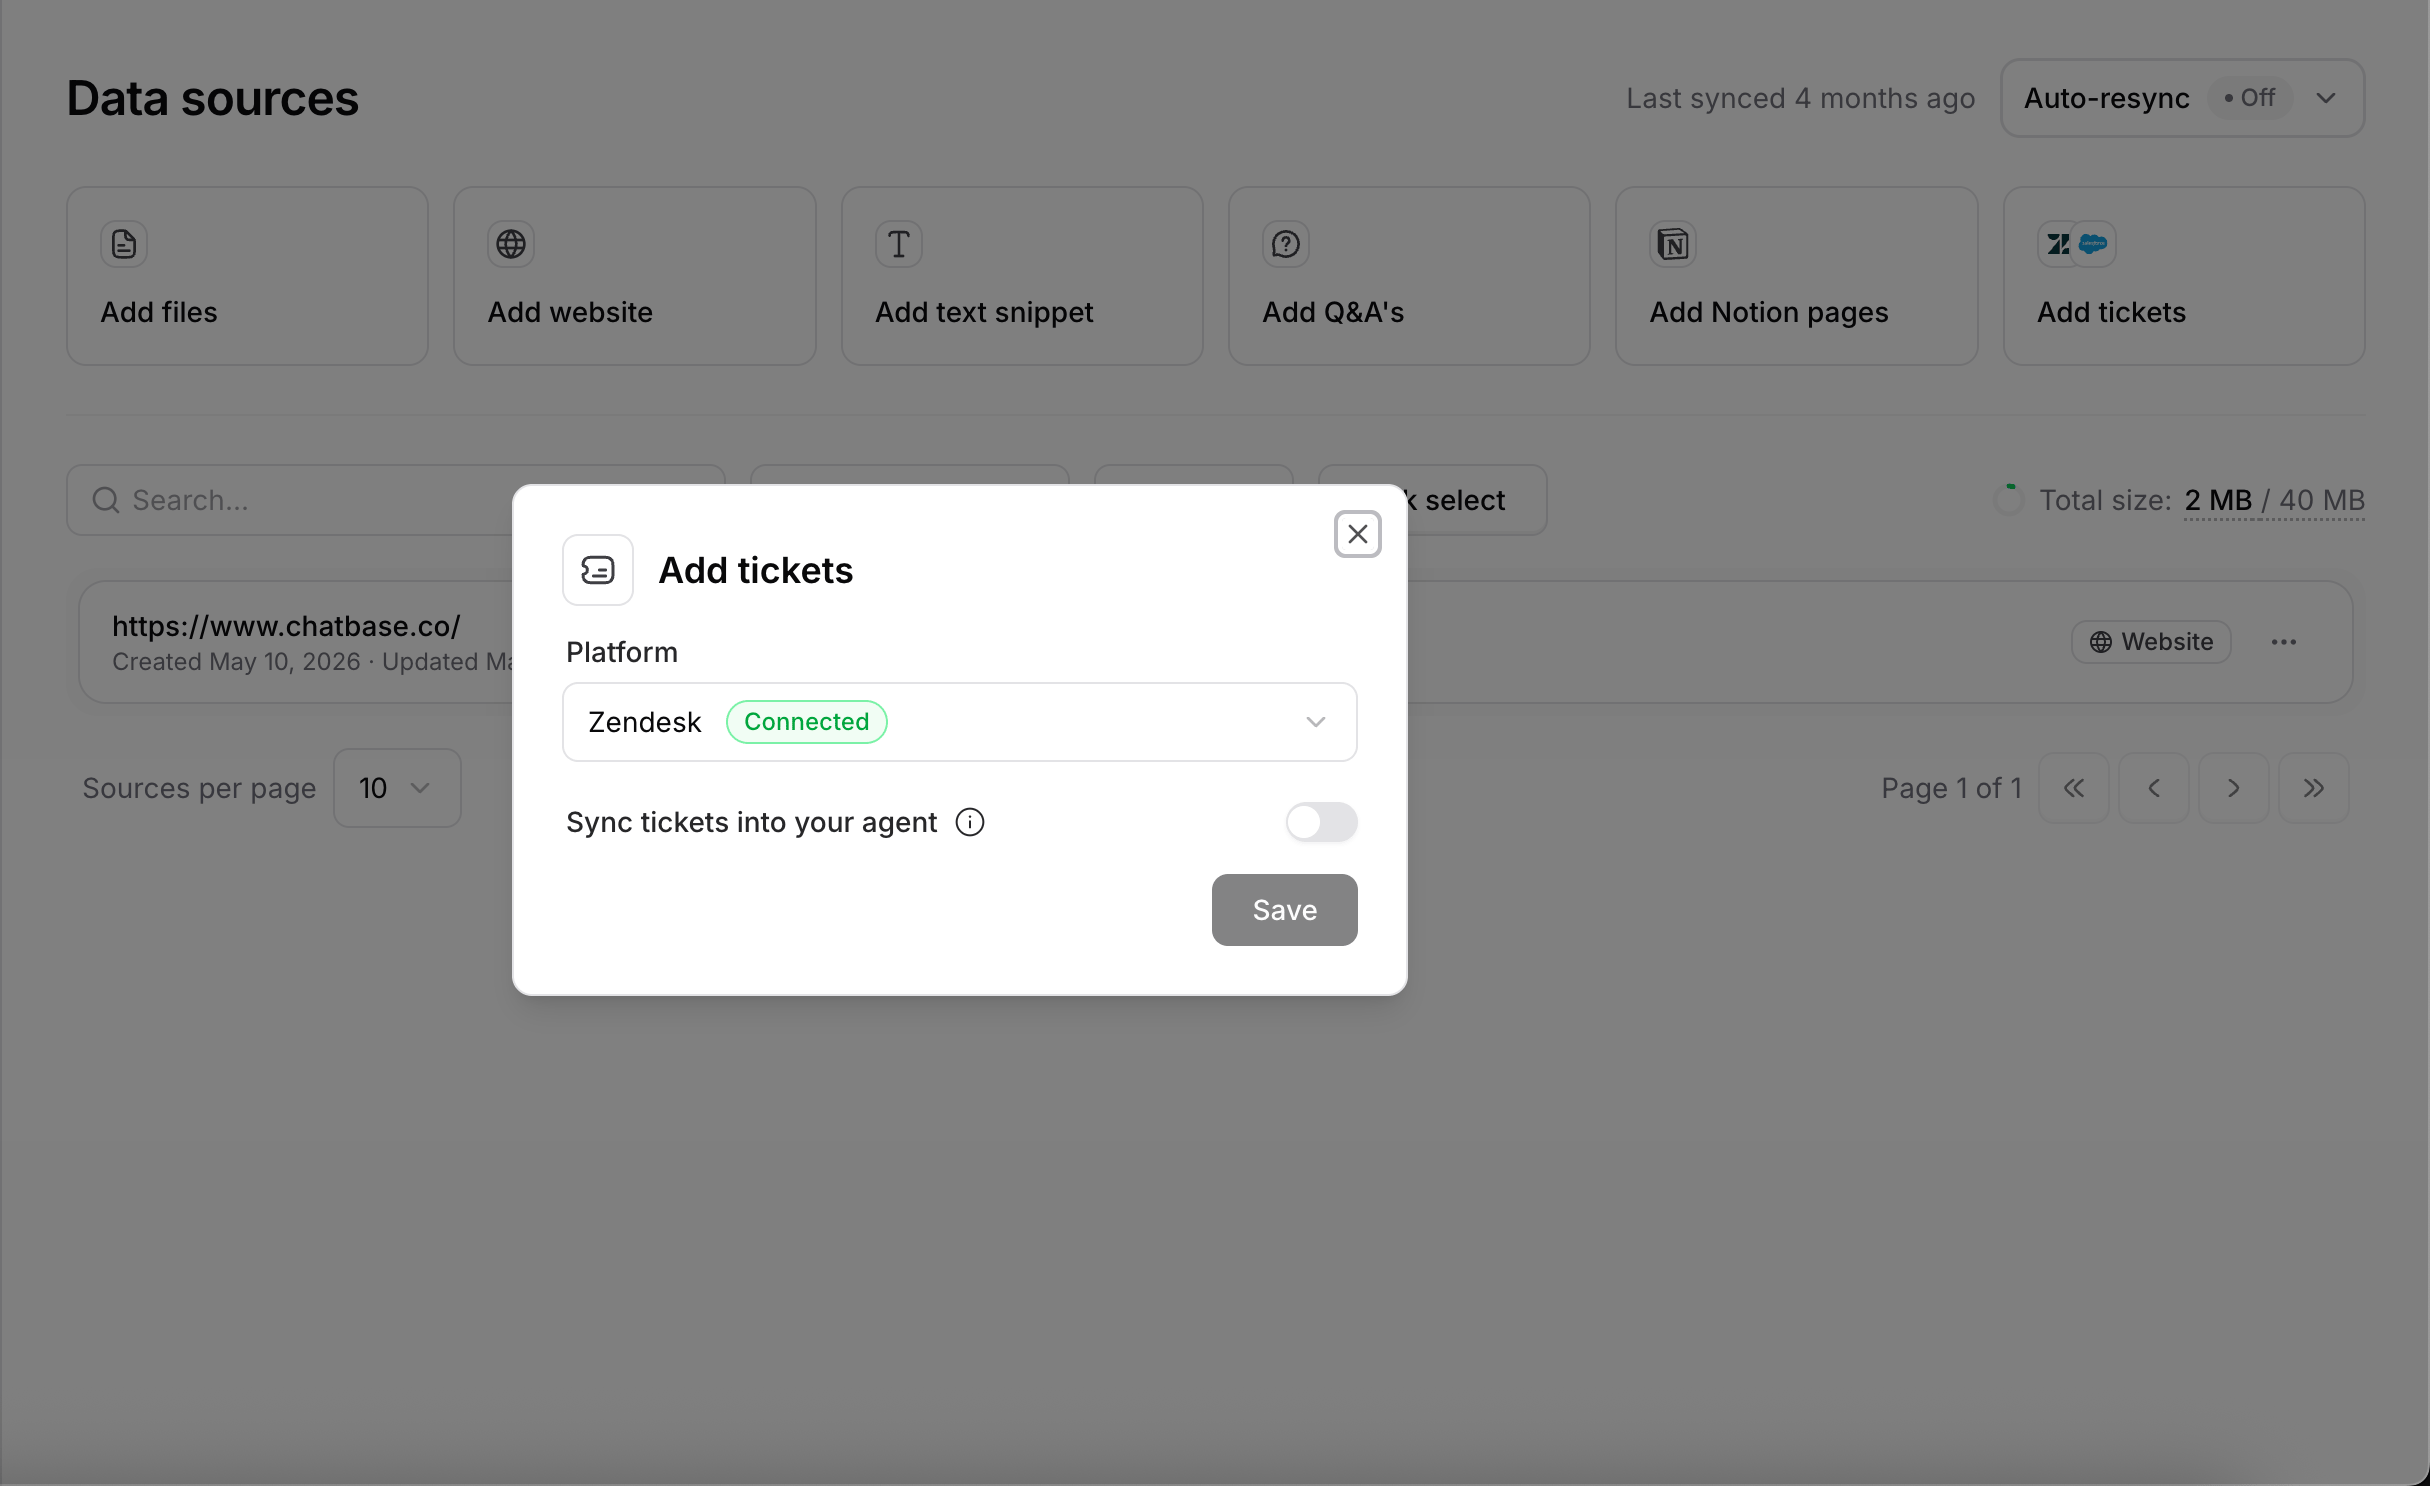
Click Add tickets to train the AI agent on closed support tickets from Salesforce or Zendesk. You need an active integration first. If none is connected, Chatbase prompts you to set one up. You can train on tickets from one platform at a time. To switch, change your selection and import again.1
Pick the platform
Under Platform, choose Salesforce or Zendesk. A Connected badge confirms the integration is active.
2
Turn on syncing
Switch on Sync tickets into your AI agent.
3
Save
Click Save. The sync starts on its own. The Tickets row shows Syncing tickets… while tickets are fetched and summarized, then Synced. New closed tickets are picked up by Auto-resync.
- Tickets cannot be filtered by status or date. All eligible tickets from the selected integration are imported.
- Ticket sources cannot be previewed, edited, or deleted one by one.
- Your integration needs permission to read ticket data.
- Turning off Sync tickets into your AI agent removes the ticket knowledge from the AI agent right away.
Managing sources
Preview and metadata
Click any file, text snippet, or Q&A to preview its content in the dashboard and edit it from the same view. Save your changes and the AI agent learns the updated version. Each source shows when it was added and last updated, so you can track your training data over time.Deleting sources
- One source. Click the three dots on its row, then Delete.
- Several at once. Click Bulk select, tick the sources you want or Select all, then click Delete in the bar at the bottom.
- Websites. Exclude a single link, delete a whole group of pages from one domain, or delete the entire website from its three-dots menu.
Exporting sources
Select the sources you want and click Export. Formats depend on the source type:
Exporting several sources bundles them into a
.zip file. When you export selected sources, you can pick up to 50 at a time, since selection is limited to one page, and the export can be at most 200 MB.
Auto-resync
Files, text, and Q&A only change when you edit them in Chatbase, so they never need a schedule. Websites, Notion pages, and tickets change outside Chatbase. Auto-resync re-reads them every week so the AI agent stays current. To turn it on, click the Auto-resync dropdown in the Data sources header, next to Last synced, and flip the toggle.Auto-resync is available on Standard and Pro plans only. On other plans, use Resync now on a website or Notion source when its content has changed.
- Website. Re-scrapes existing pages and picks up new ones. Sitemap sources drop pages that left the sitemap. Crawled pages that no longer load are marked Failed and kept so you can review them.
- Notion. Syncs changes from your connected workspace.
- Tickets. Imports new closed tickets from Zendesk or Salesforce.
- Once a week in the background.
- Only changed pages are re-embedded. Unchanged pages are skipped.
- Each source shows Syncing while its resync runs and Synced when done.