Create Custom Action
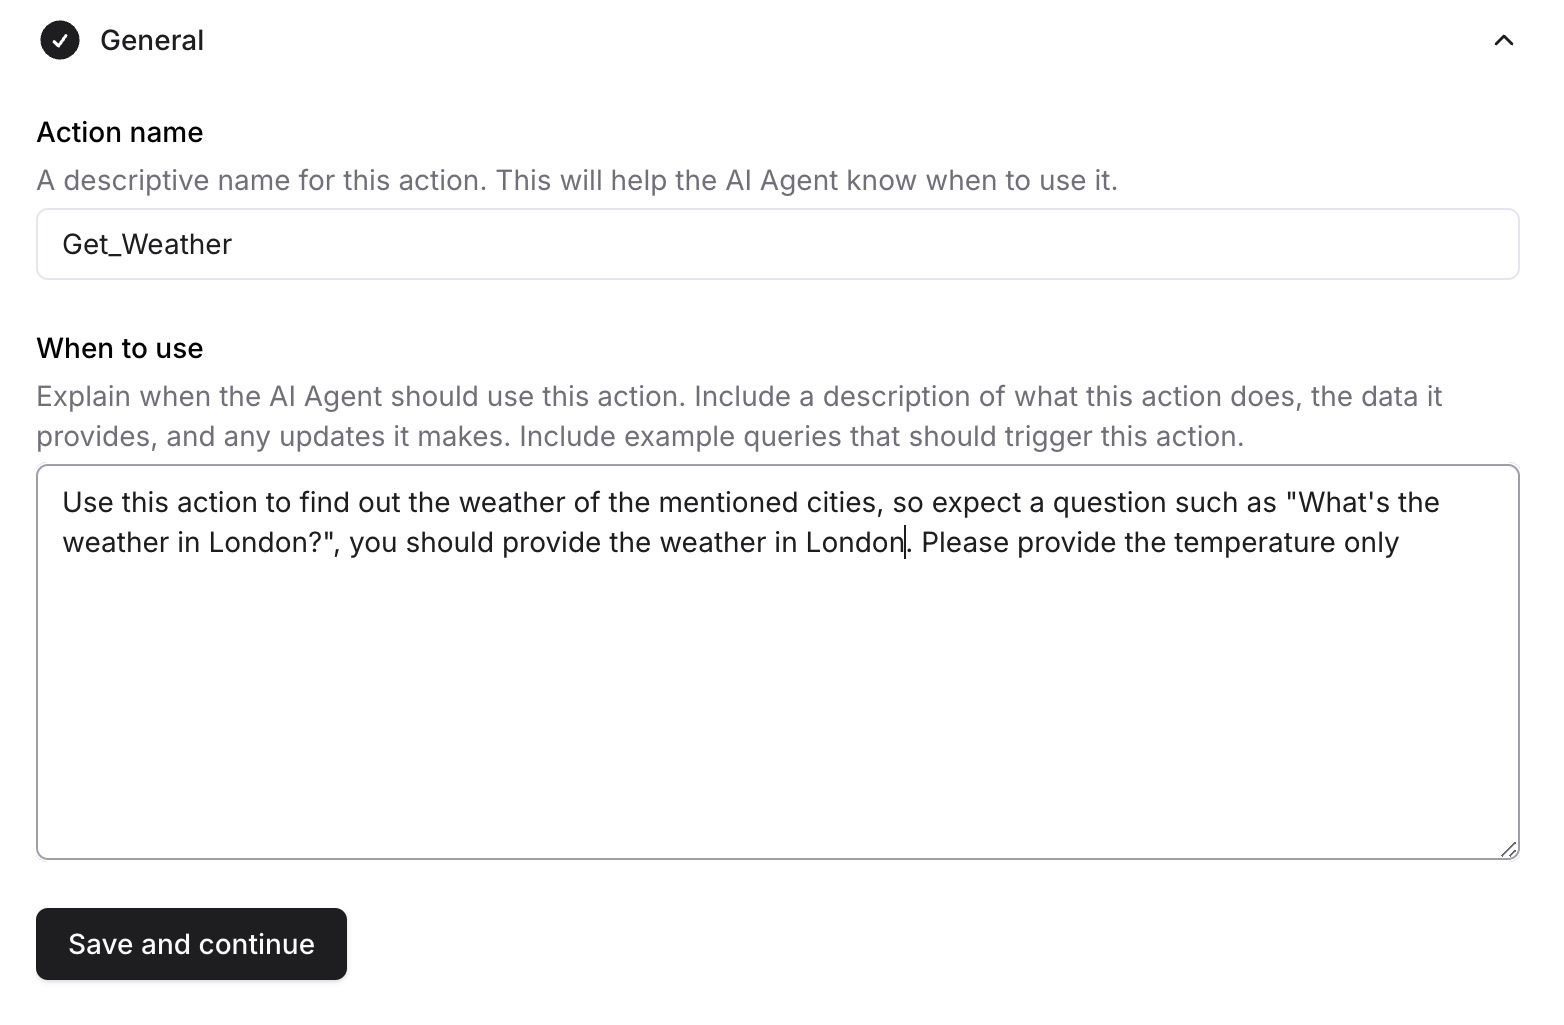
This action allows you to instruct the AI agent to provide any information that’s included in the response of the API you use.General
- Action Name: This is a descriptive name for this action. This will help the AI agent know when to use it.
- When to use: This is the area of instructions that should be provided as a detailed description explaining when the AI agent should use this action and API. It’s recommended to include examples of the data this action provides and customer queries it helps answer.
- You should click on the Save and Continue button after completing the above configuration.
API
-
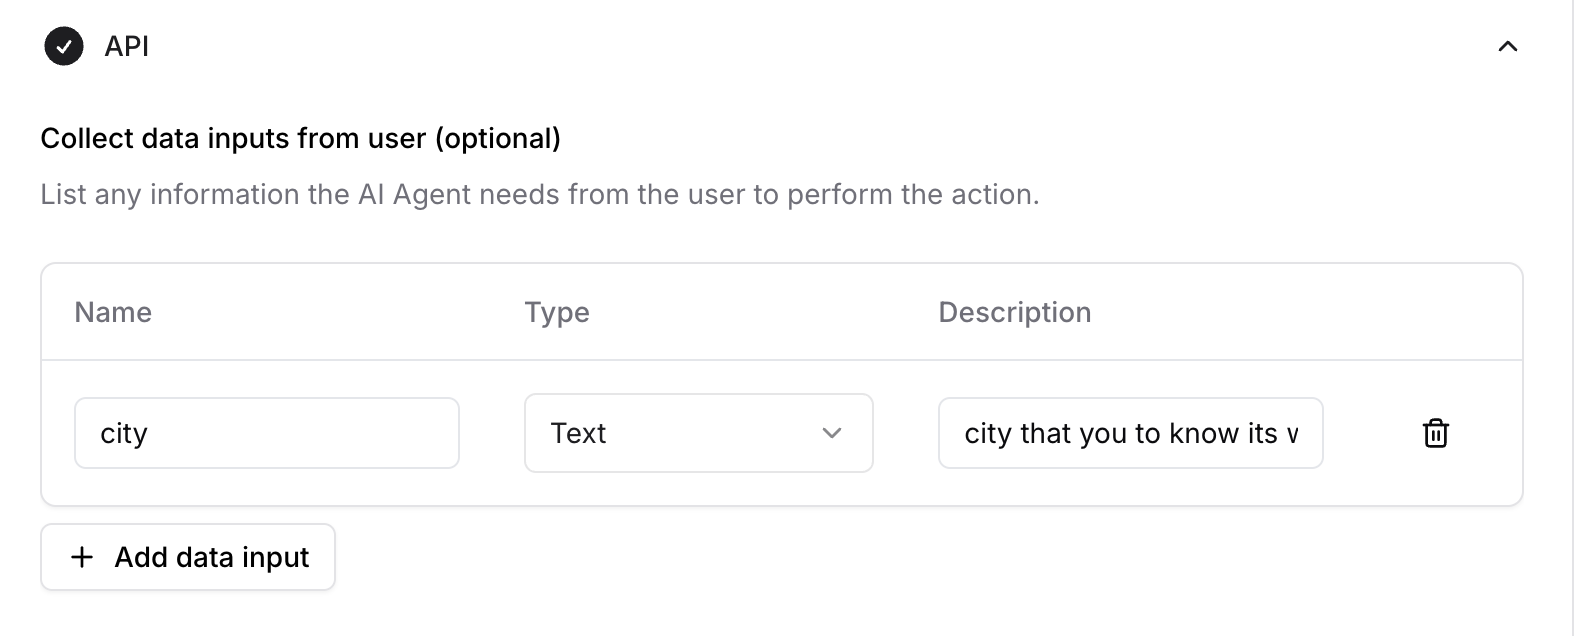
Collect data inputs from user:
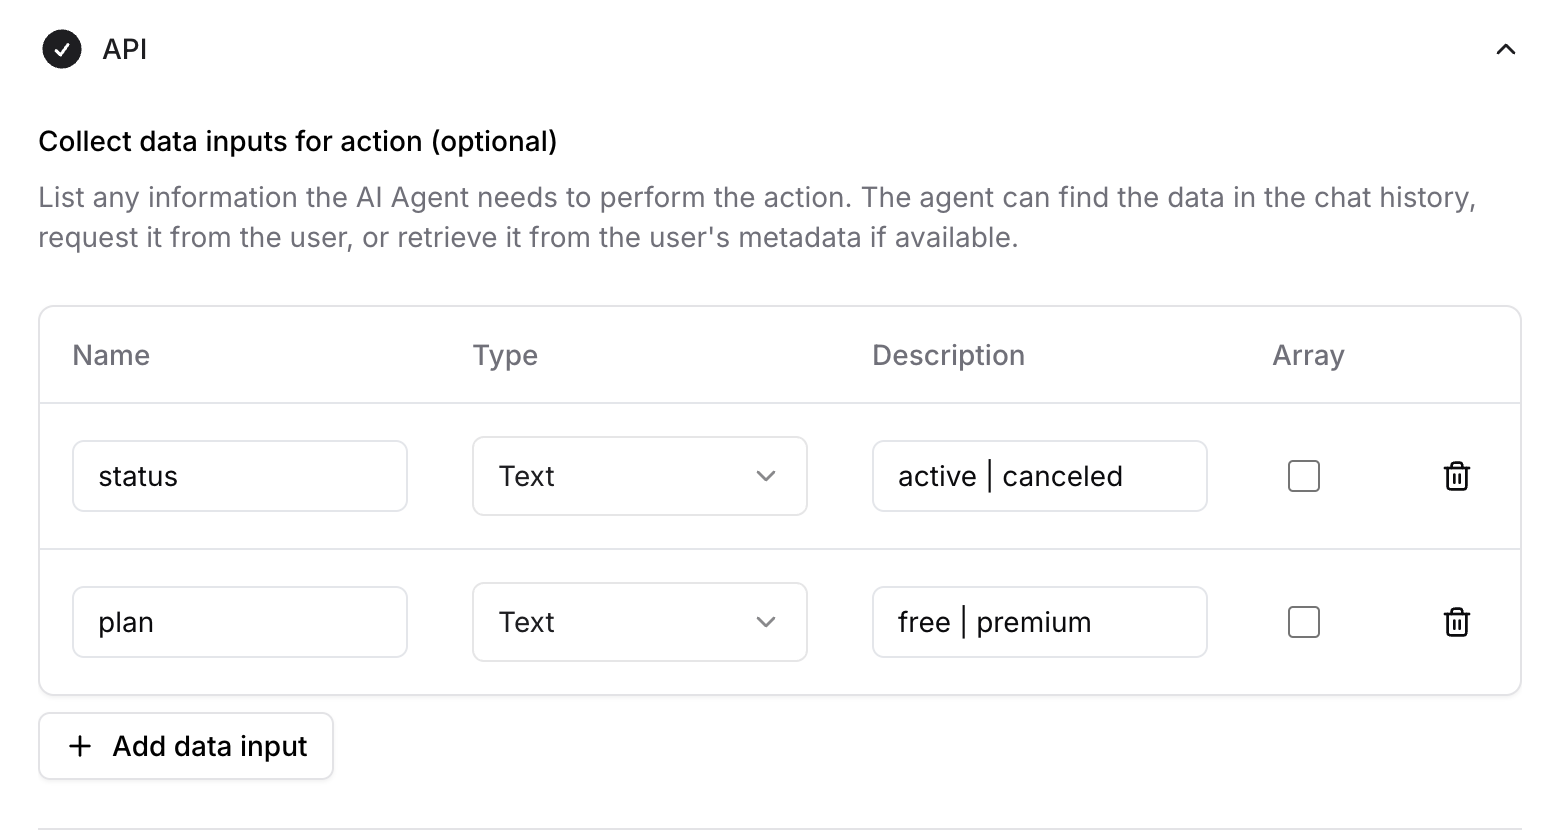
Here you should add the list of information the AI agent needs from the user to perform the action.
- Name: Name of the data input.
- Type: Type of the data input.
- Description: A small sentence that describes to the AI agent the data input that it’s expecting to use in the API.

-
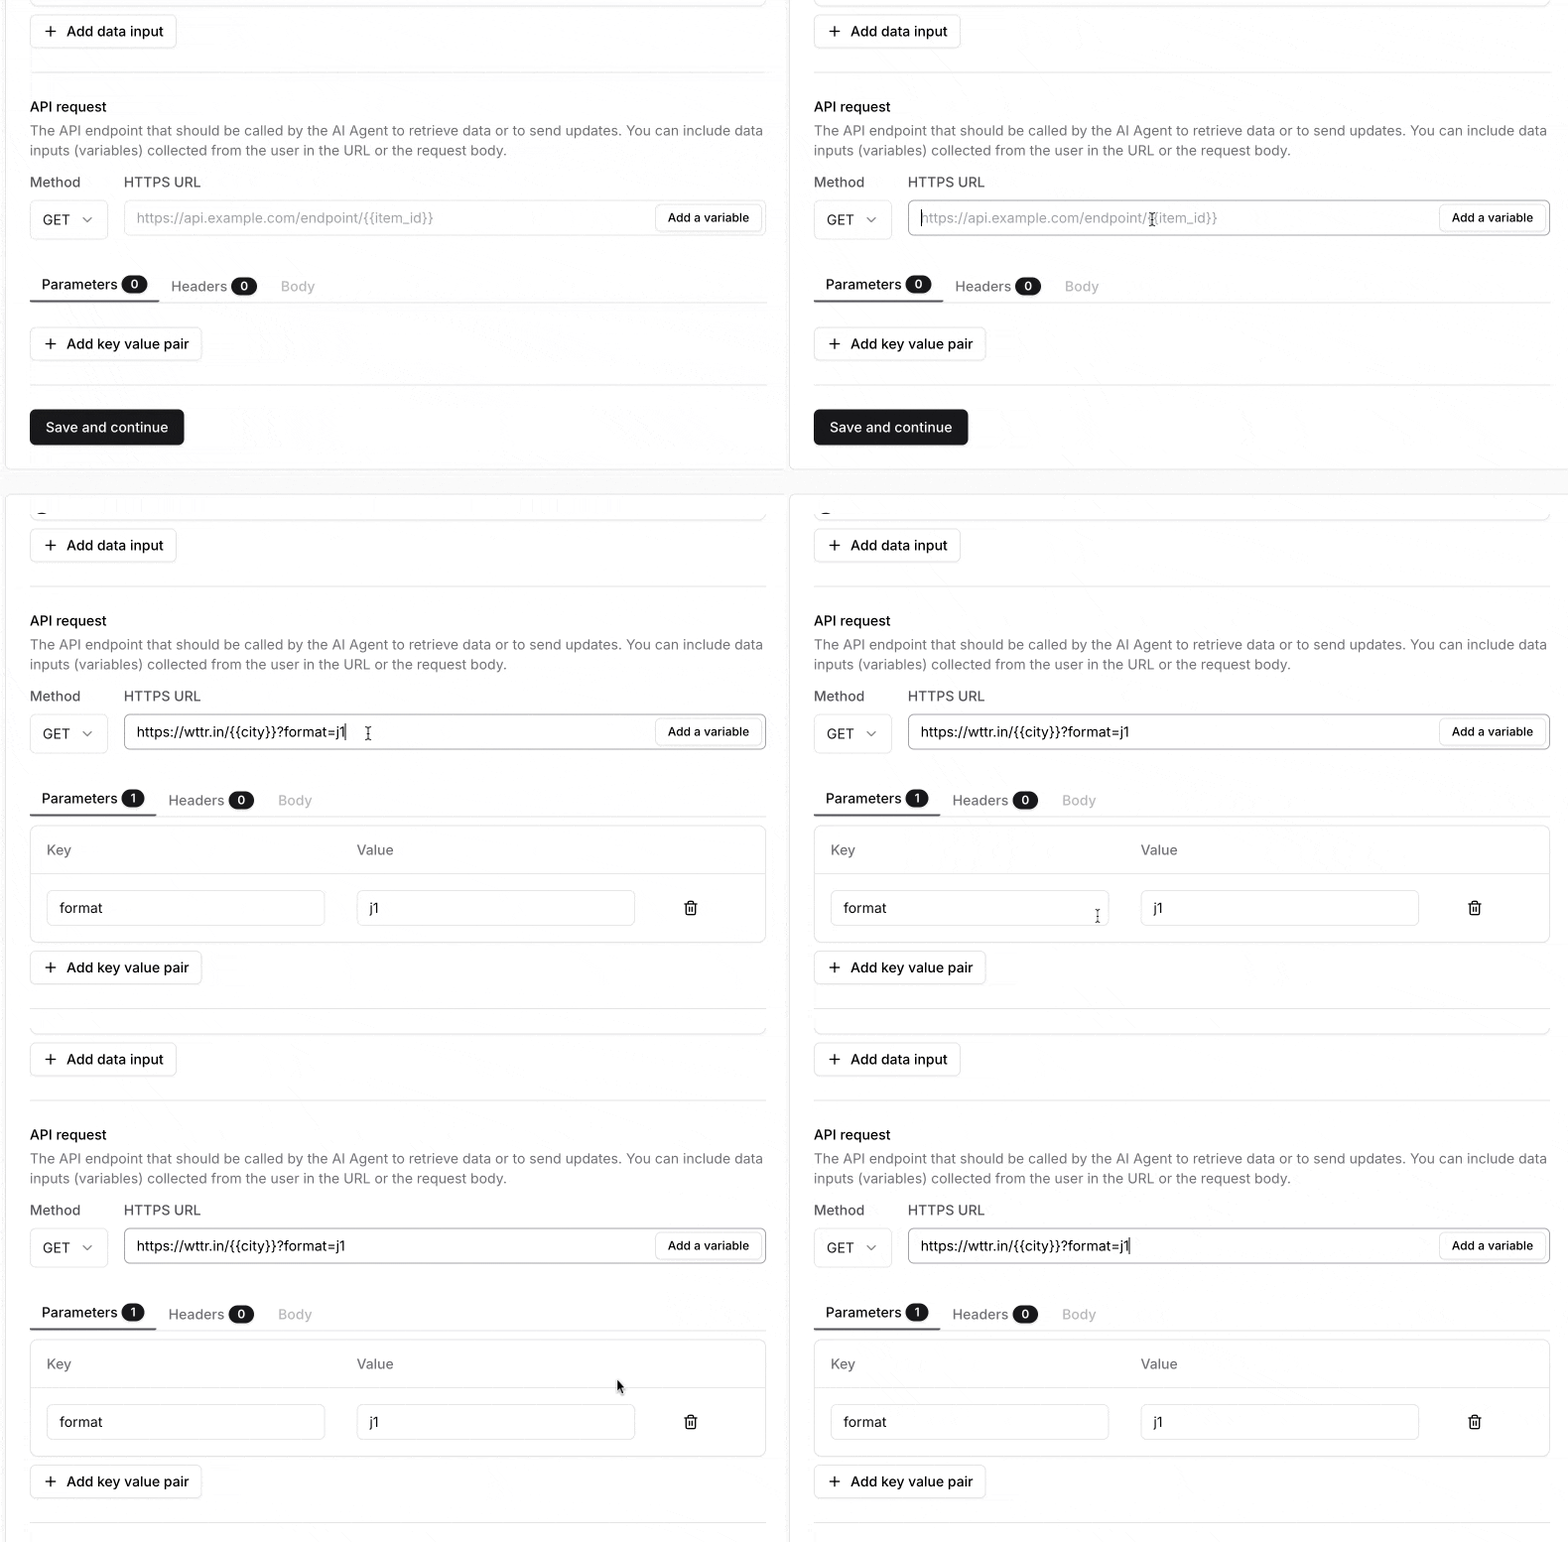
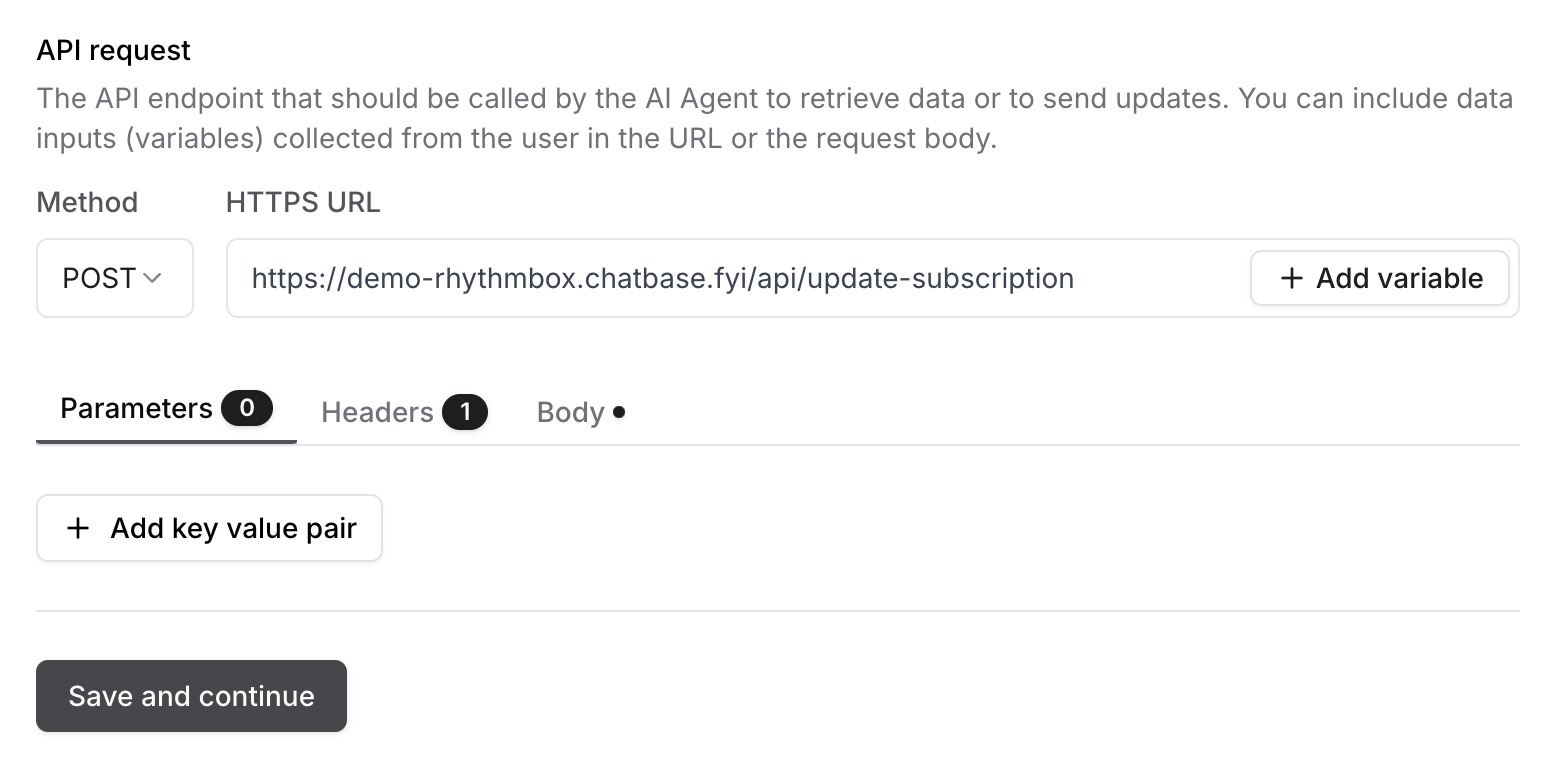
API request:
The API endpoint that should be called by the AI Agent to retrieve data or to send updates. You can include data inputs (variables) collected from the user in the URL or the request body.
- Method: Choose the method that the API should use.
- HTTPS URL: The URL of the API that the AI agent should use to retrieve the needed information.
- Add variable: This button should be used when you want to add a variable that depends on the user’s input.

- Parameters: These are key-value pairs sent as part of the API request URL to provide input data or filter the response.
- Headers: Metadata sent along with the API request to provide information about the request or client.
- Body: The data sent as part of the request, typically for GET, POST, PUT, DELETE methods. The common formats should include JSON.
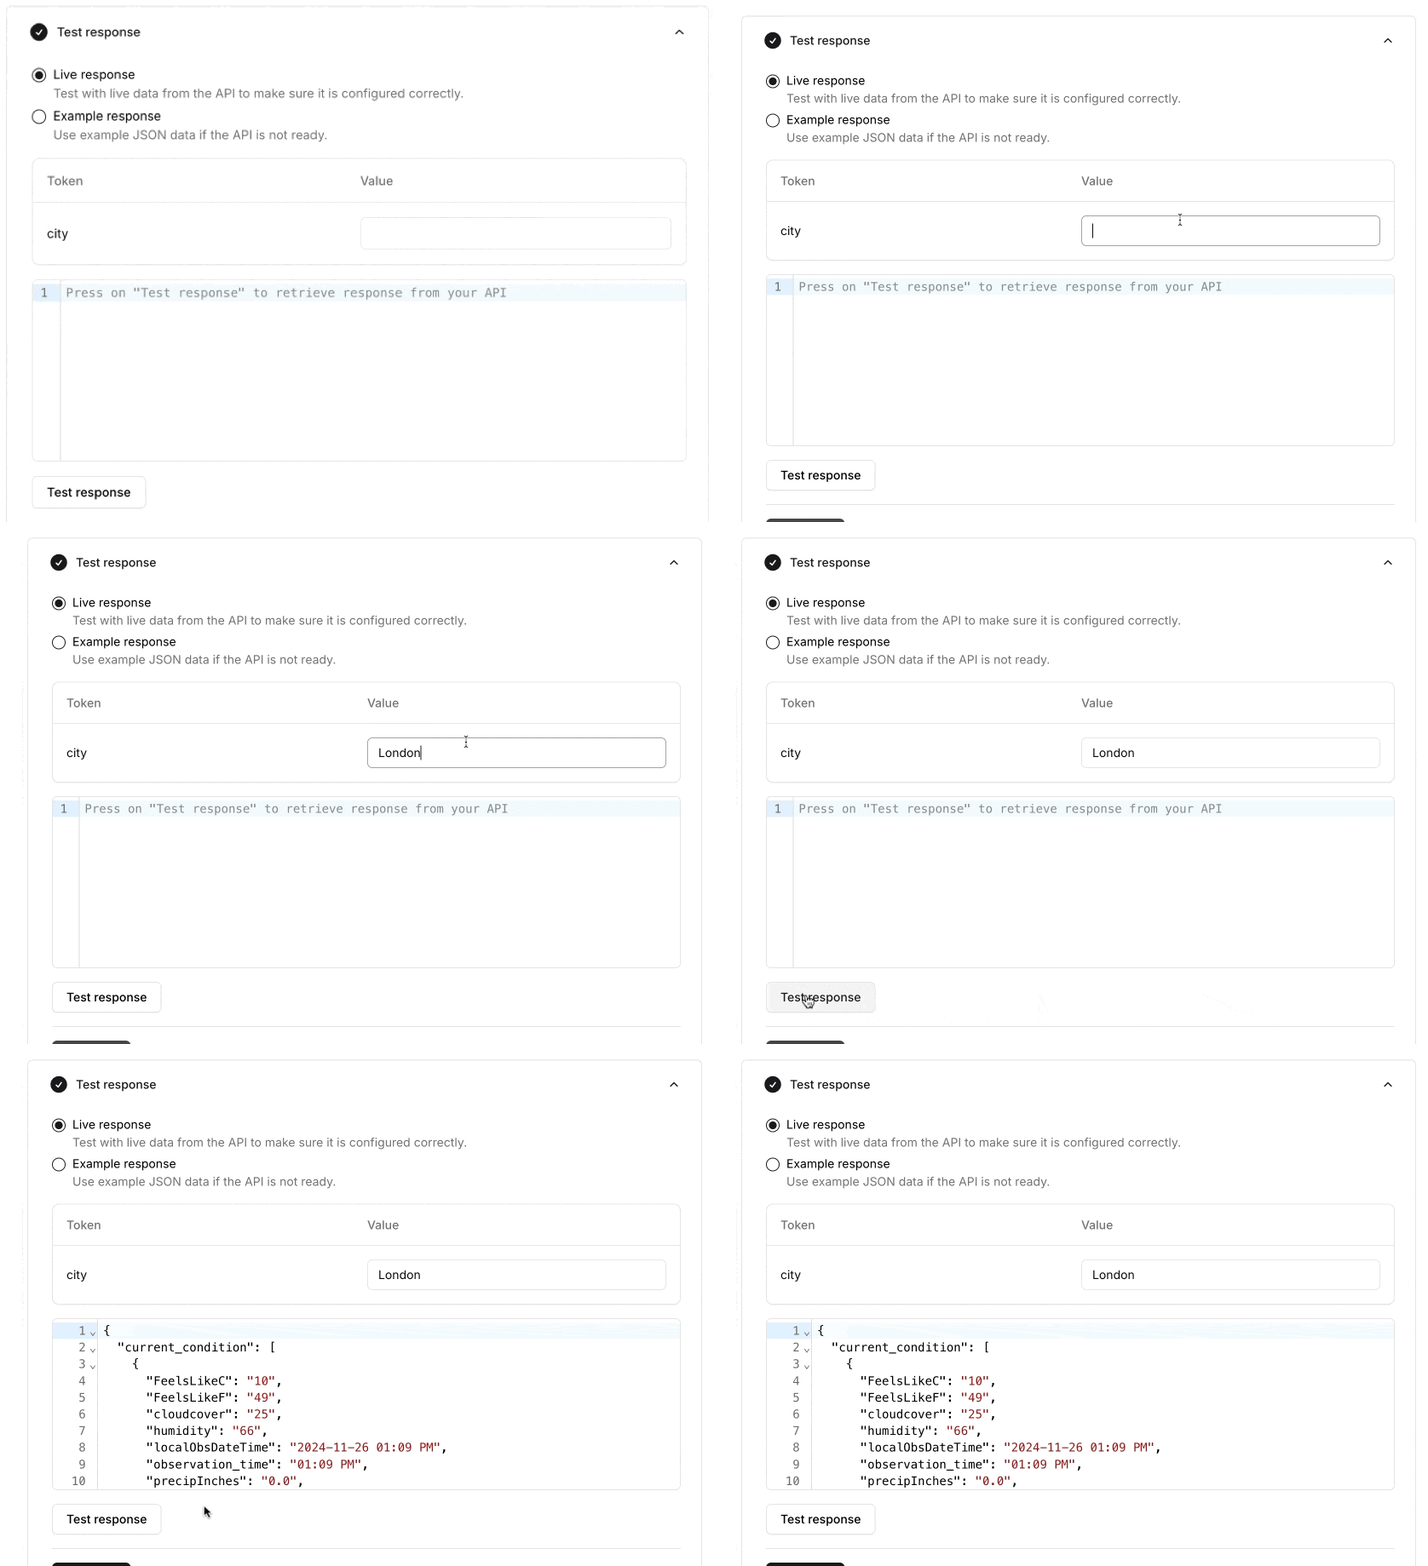
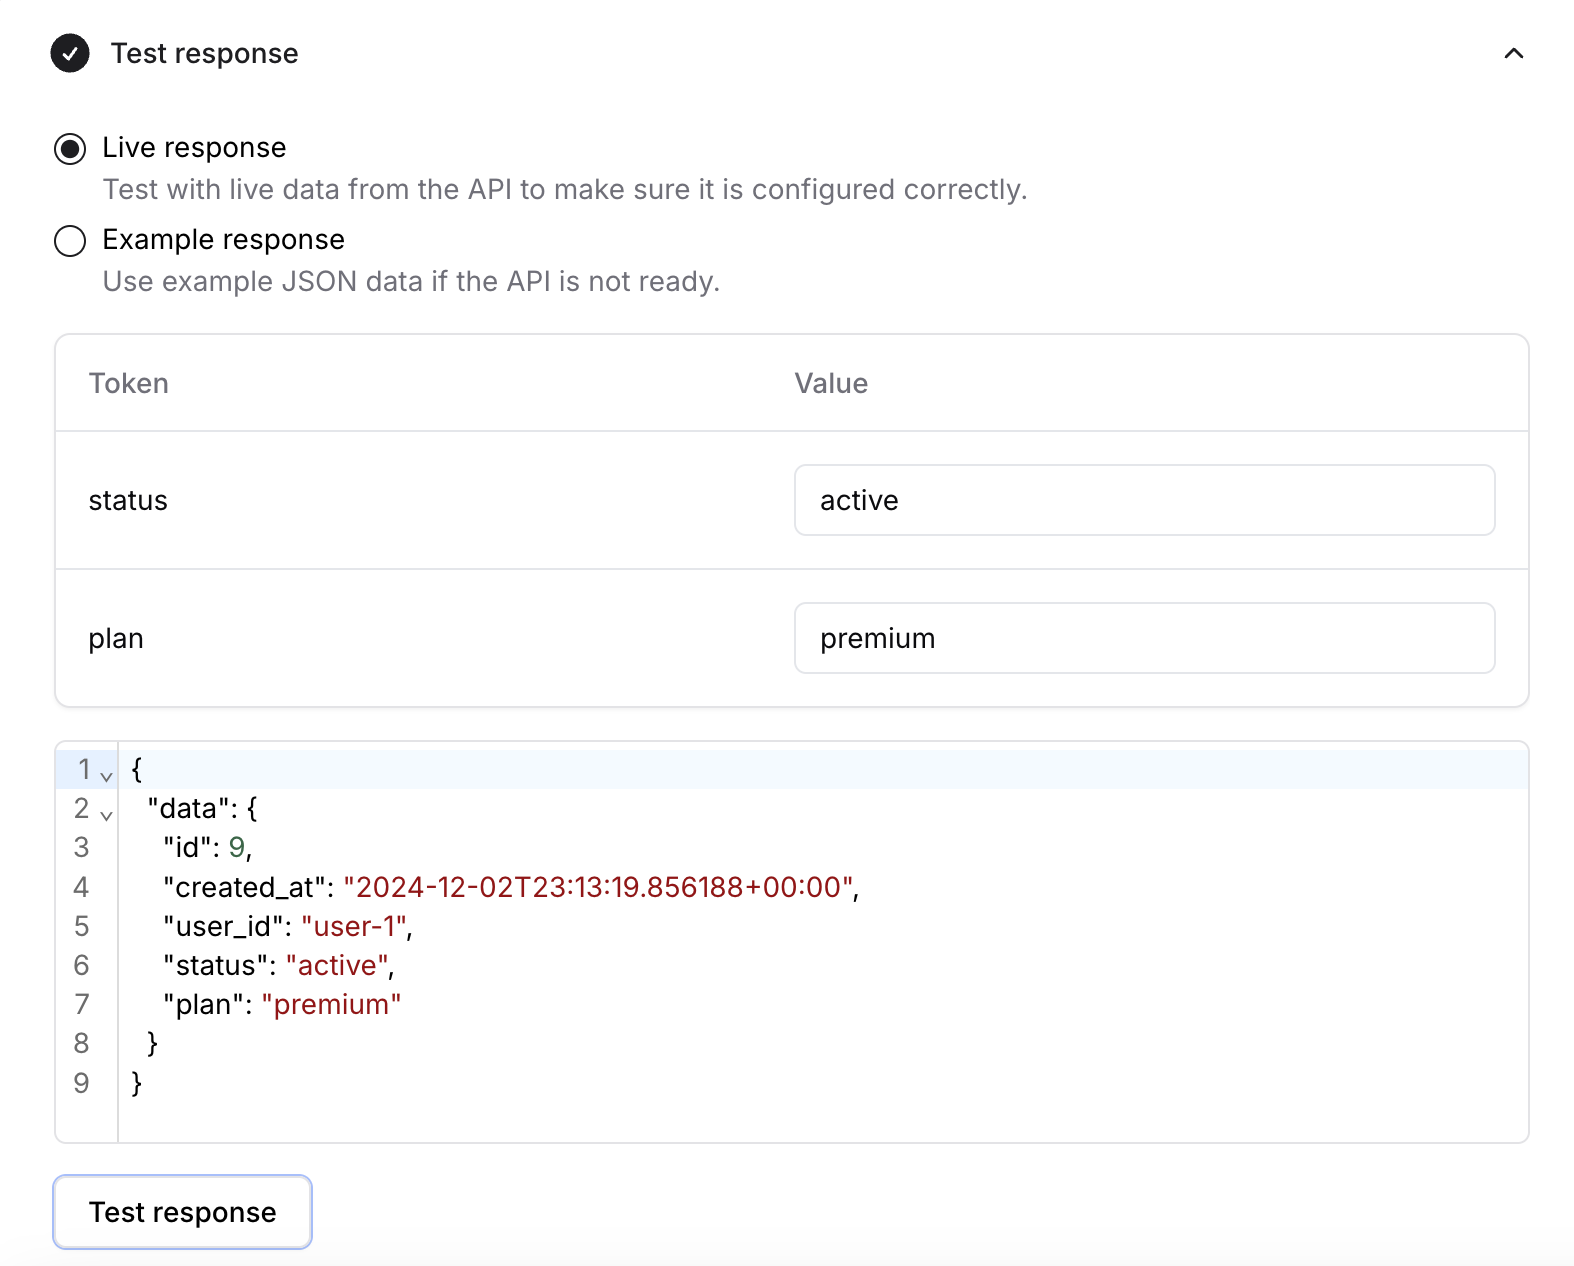
Test Response
- Live response: Test with live data from the API to make sure it is configured correctly.
- Example response: Use example JSON data if the API is not ready.
- You should click on the Save and Continue button after completing the above configuration.
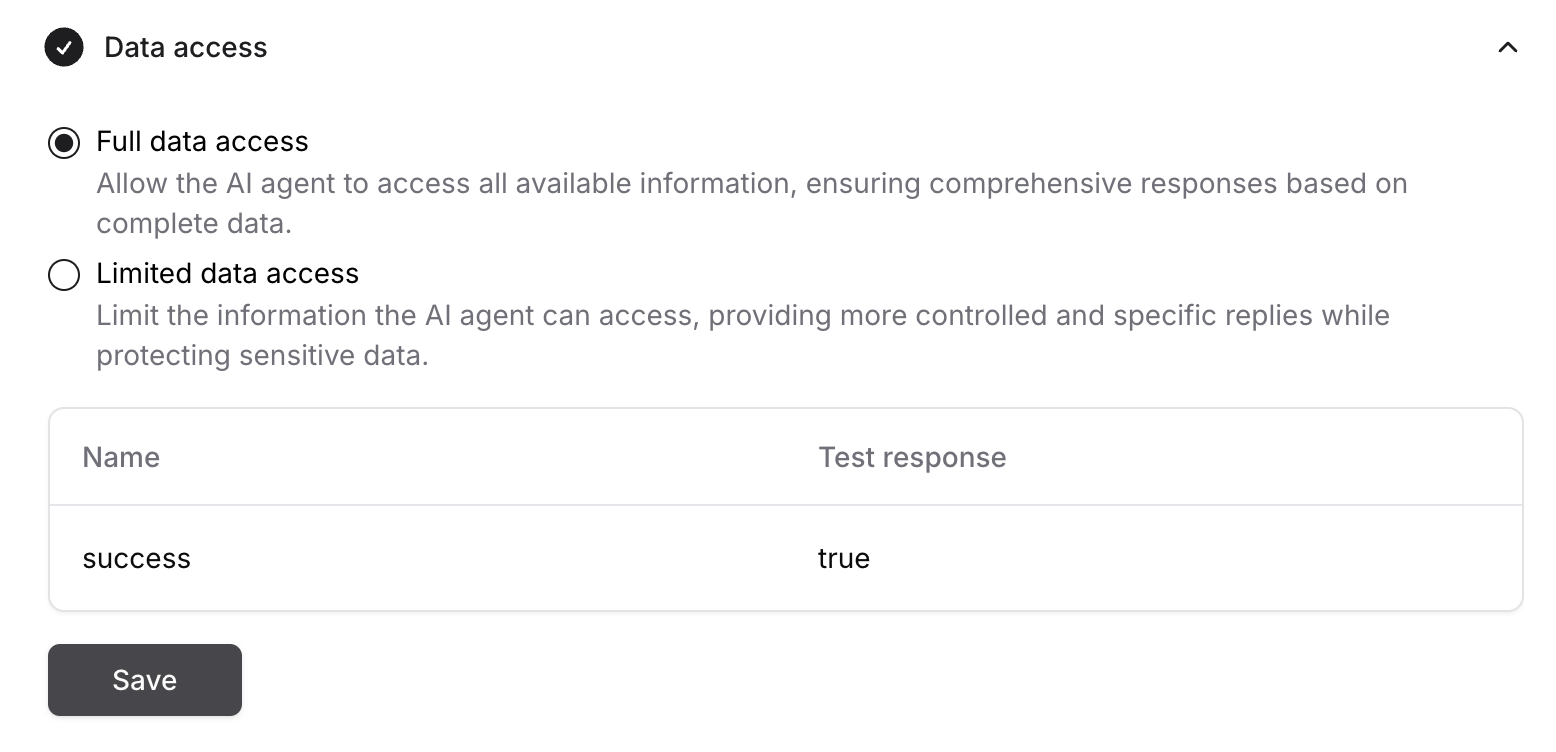
Data Access
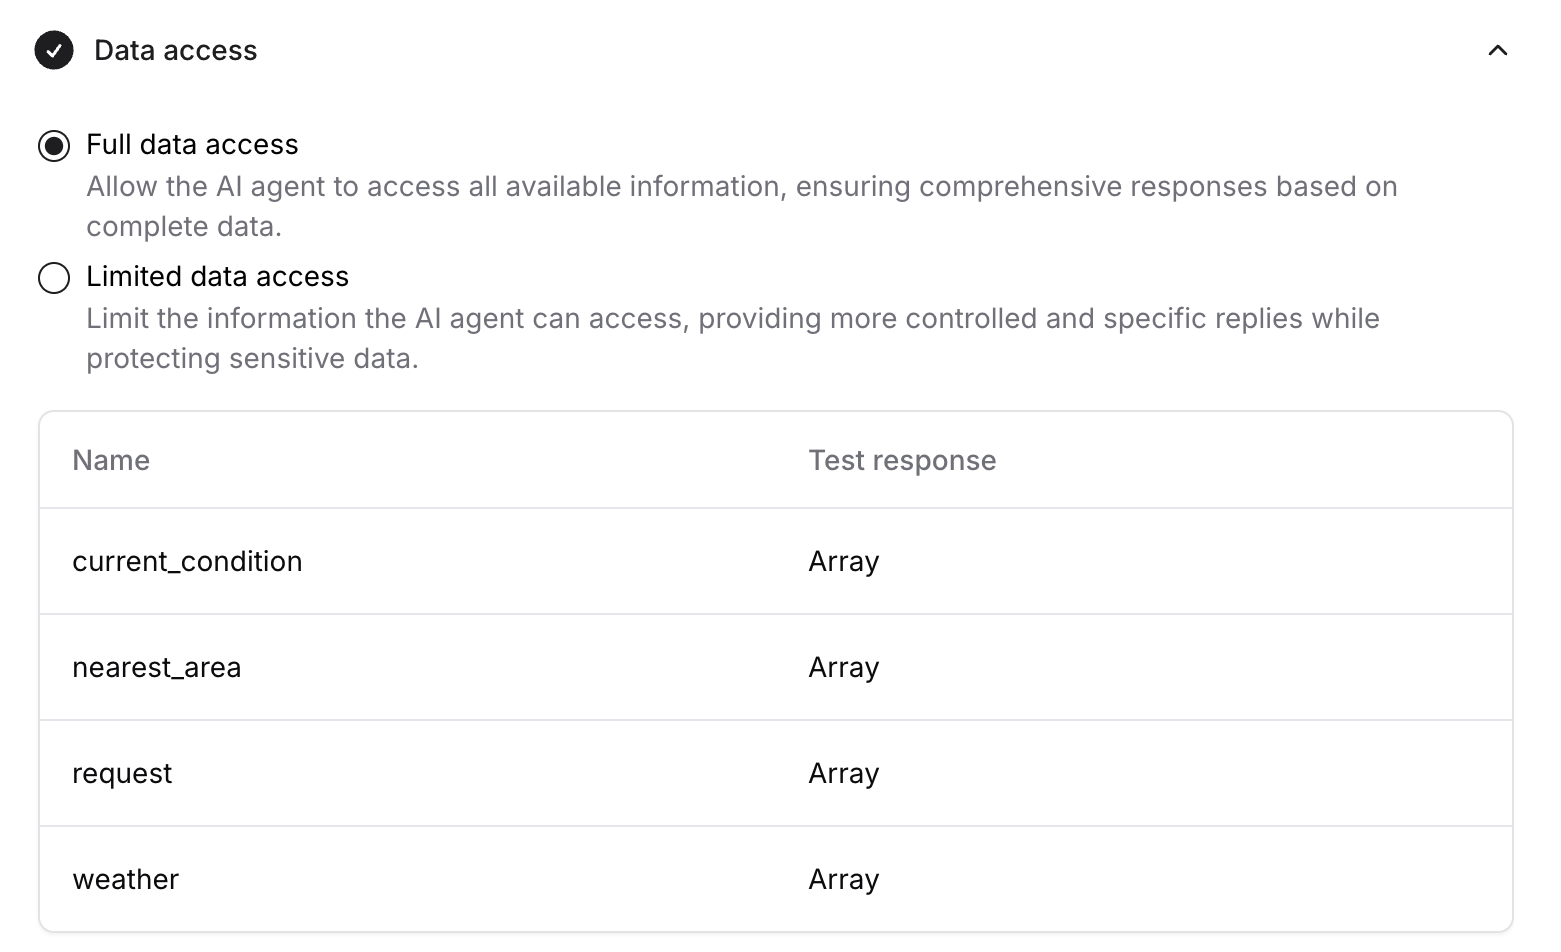
- Full data access: Allow the AI agent to access all available information from the API’s response, ensuring comprehensive responses based on complete data.
- Limited data access: Limit the information the AI agent can access, providing more controlled and specific replies while protecting sensitive data.
- You should click on the Save and Continue button after completing the above configuration.
Note: The maximum response size is 20KB. Anything exceeding that will return an error.
Use Cases
Upgrade Subscription
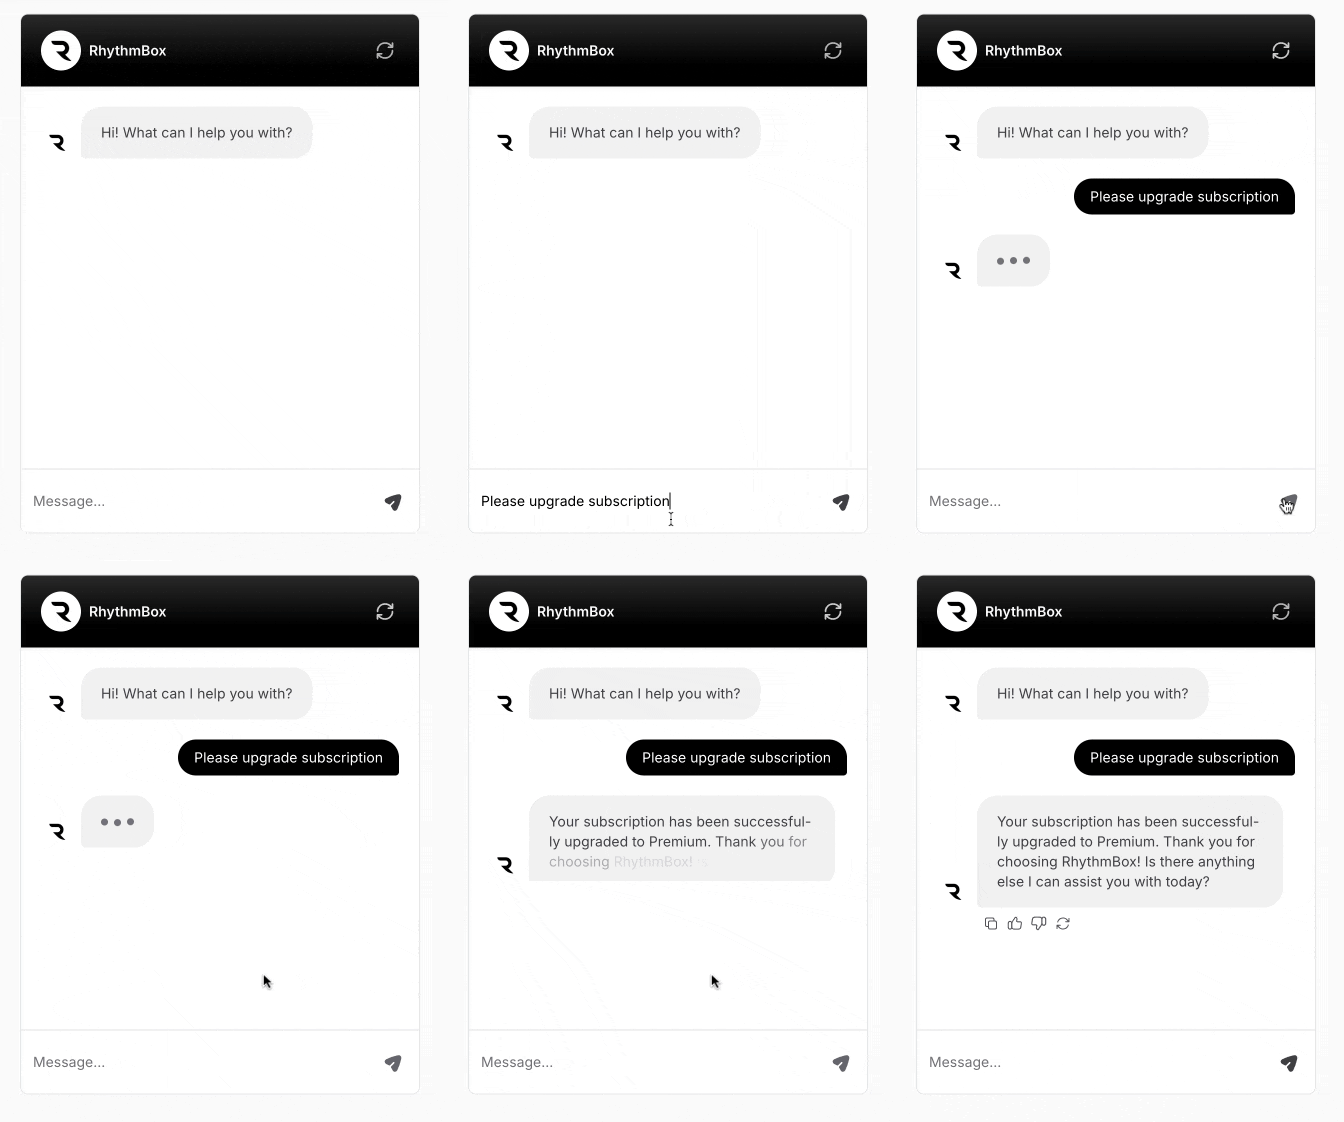
In this example, we use an Upgrade Subscription to allow the user to ask from the AI agent to upgrade their subscription to the premium plan. In the General section, we added Update_Subscription as the name of the action. We provided the “When to use” information for the AI agent to use this API whenever the user wants to upgrade the subscription.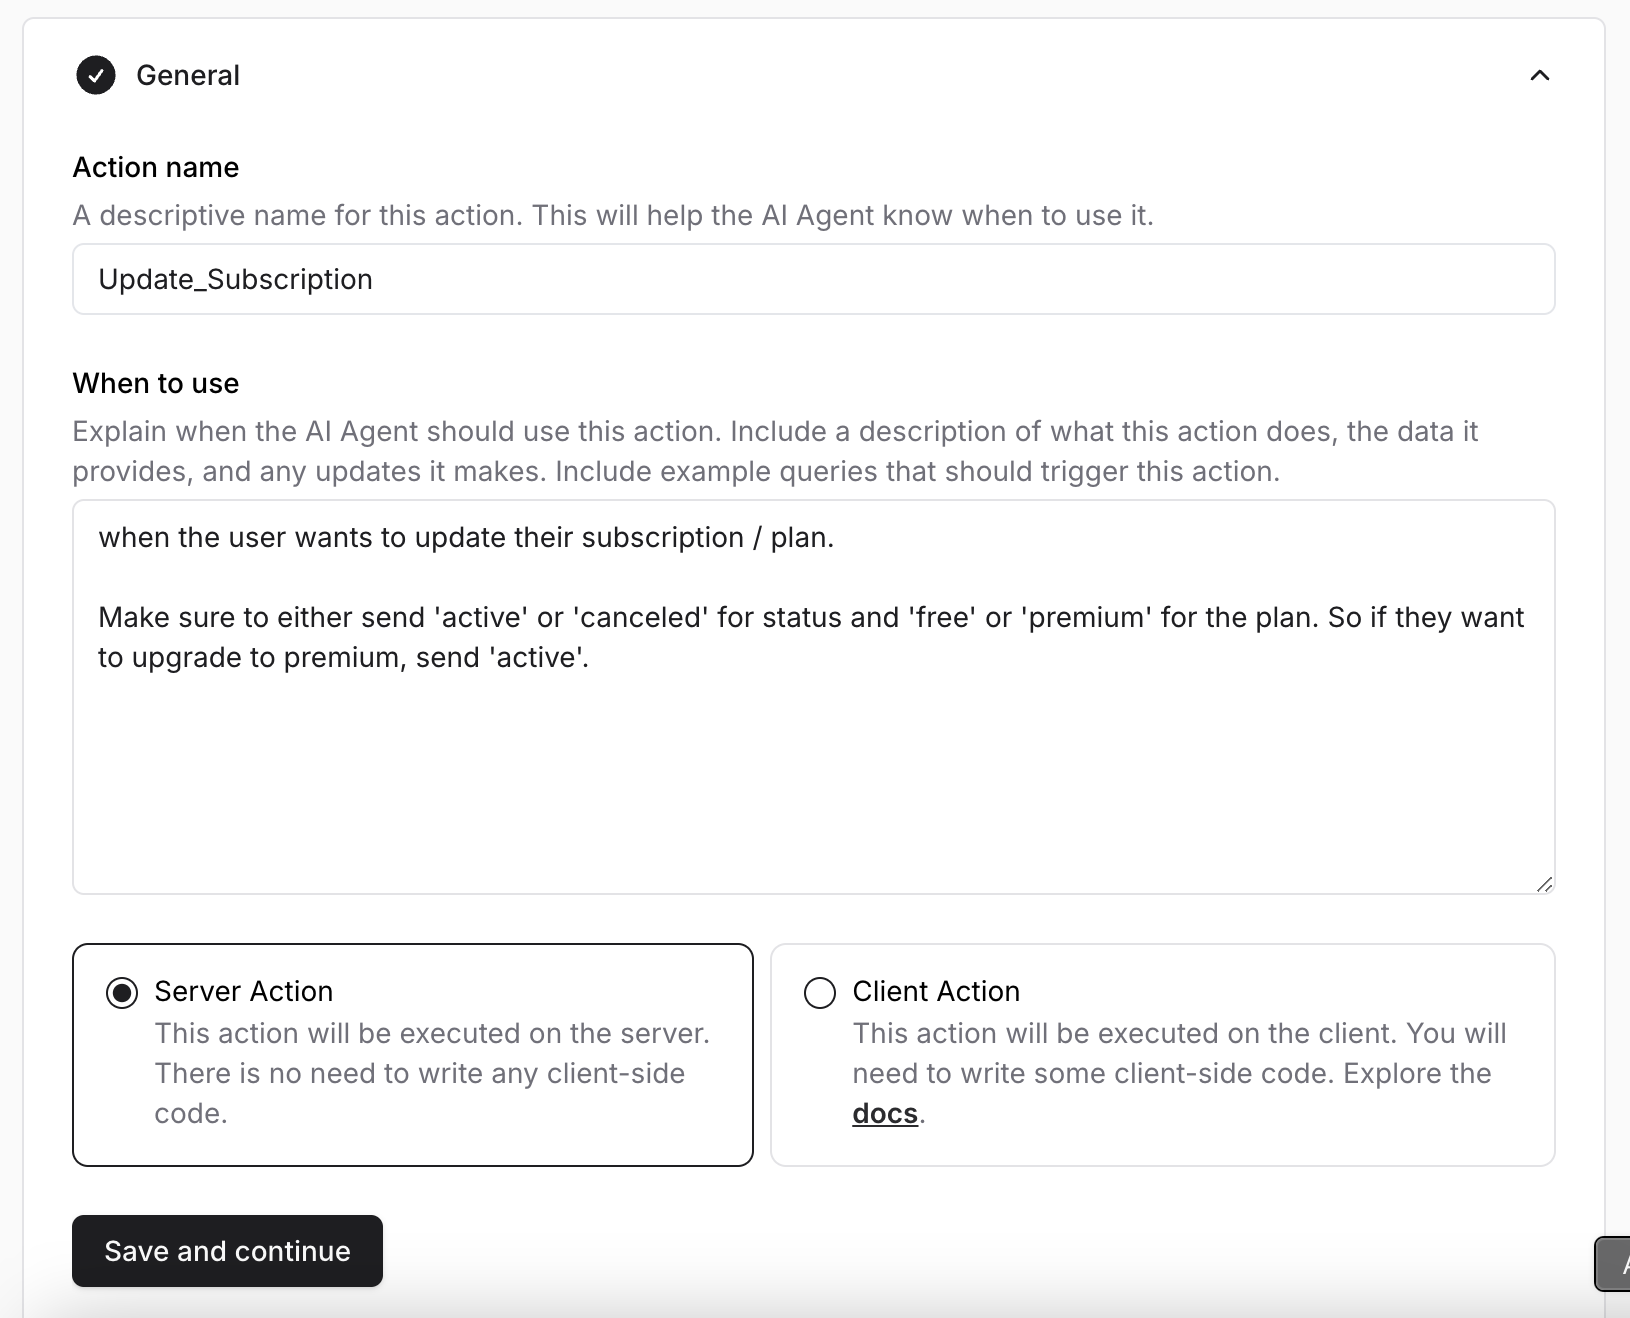
Weather API
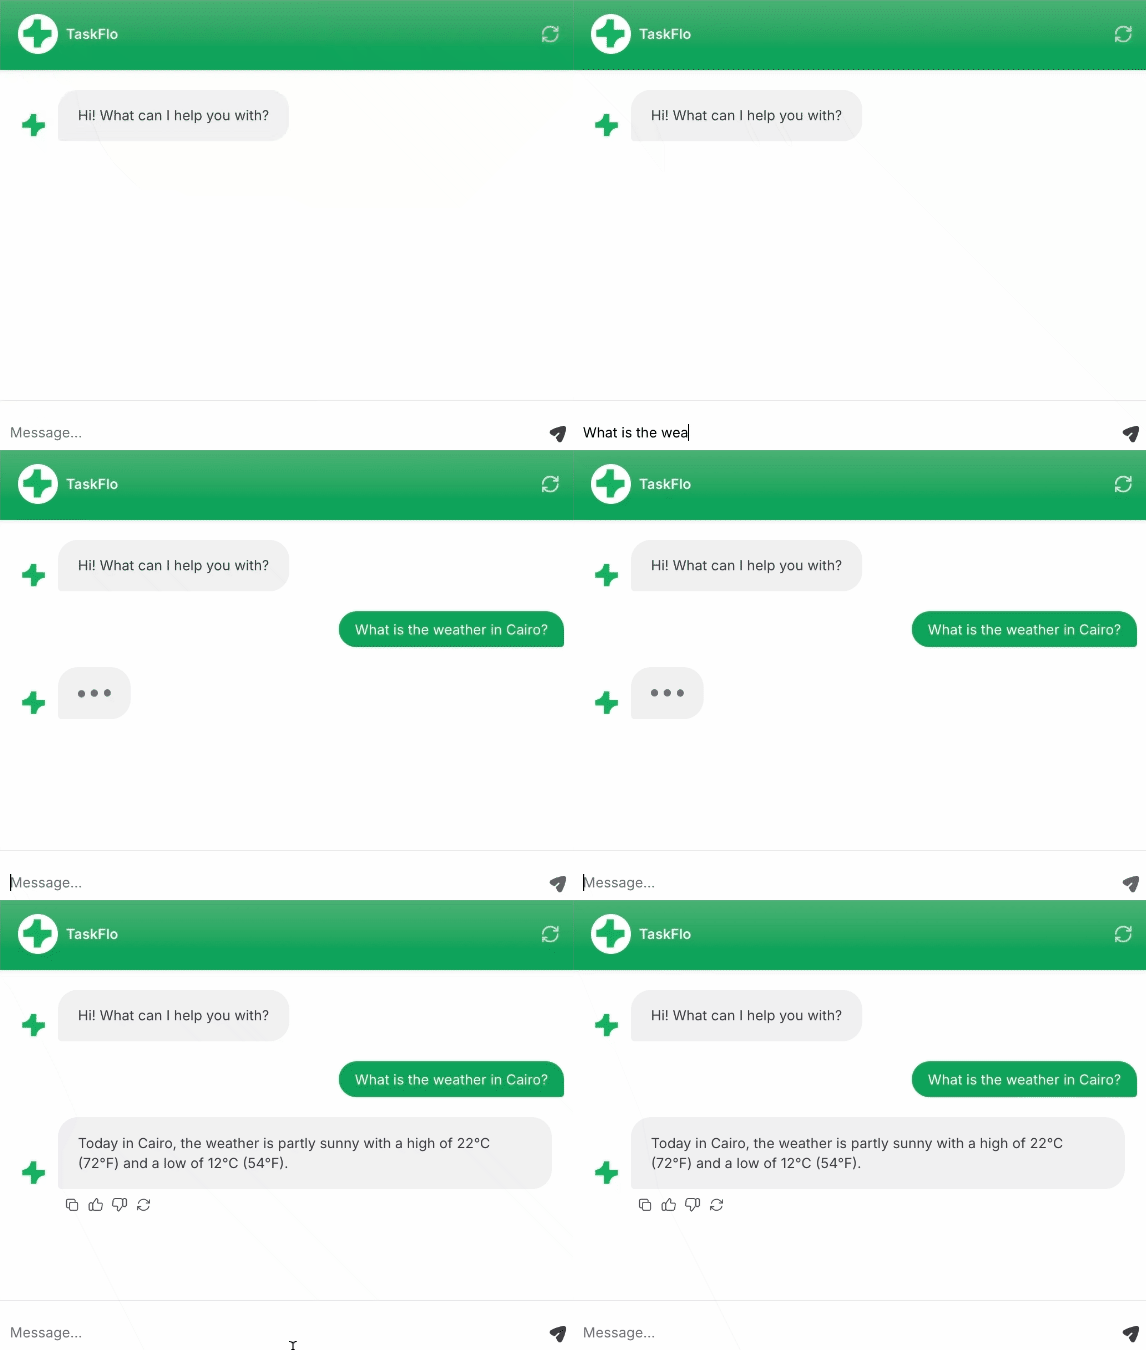
In this example, we use a Get Weather API to provide the weather information for the cities asked by the user to the AI agent. In the General section, we added Get_Weather as a name of the action. We provided the When to use information for the AI agent to use this API whenever it’s asked about the weather of any city.