

Overview
The Collect Leads action captures a visitor’s contact details as a lead during the conversation. You control when the lead form appears, which details are collected, and where they’re sent. The AI agent can either display a form inside the chat bubble or ask for the details naturally in conversation.Best for:
Turning an interested visitor into a contactable lead before they leave, and routing that lead straight to your CRM or inbox.
- Capturing details when a visitor asks about pricing or a demo
- Following up with someone whose question needs a human answer
- Qualifying interest with custom fields like company name or budget
How to create the action
1
Navigate to Actions
Go to your Chatbase dashboard and select your AI agent. Click Build > Actions in the left sidebar.
2
Create the Action
Click Create action, then select Collect Leads.
3
Configure General Settings
When to use: Specify when the form should show during the conversation. You can also add other instructions related to the action, such as Show only the leads form without listing the form’s fields. Previewing the action will help you spot the edits you may want to make.To restrict the action to procedure steps only, turn on Only use in procedures. When it’s on, the When to use field is hidden, because the AI agent no longer decides when to call the action.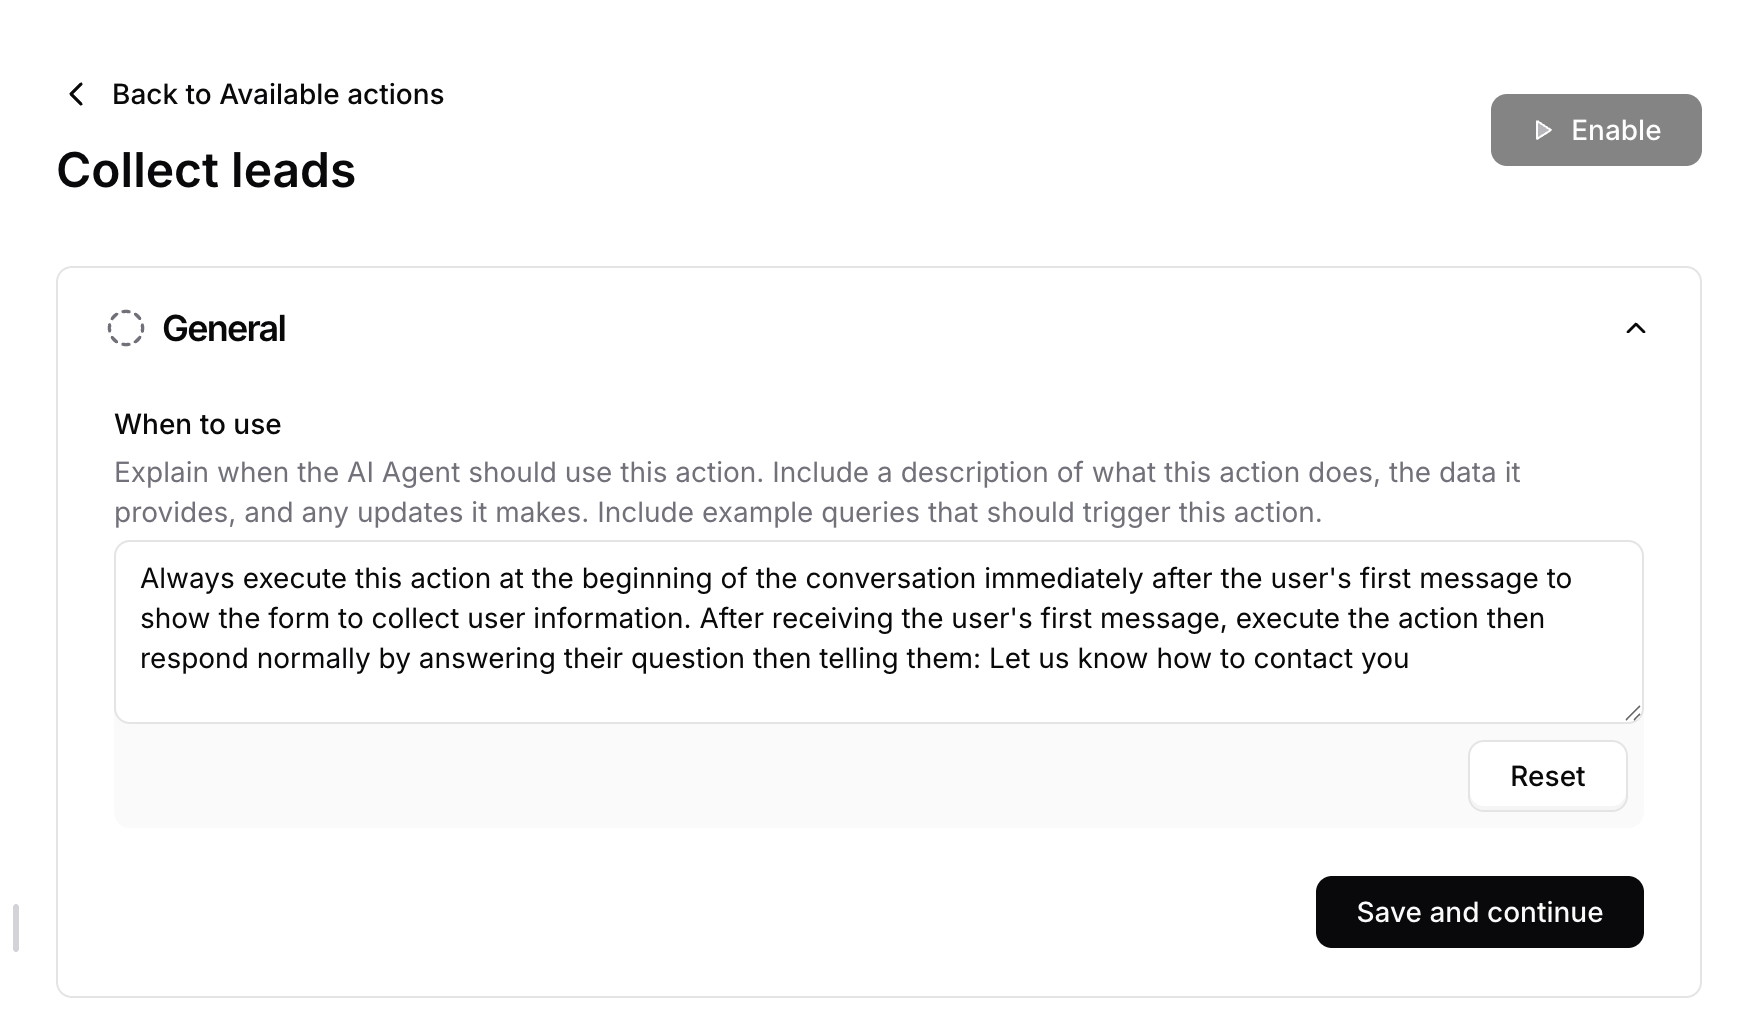
4
Define your fields
In the Fields section, choose how the AI agent collects details and which fields it asks for. See Fields below.
5
Set your destinations
In Destinations, choose where collected leads should be sent. See Destinations below. This step is optional.
6
Choose Channels
This action is compatible with every channel. Toggle it on or off for each configured channel, then click Save. See Channels for what configured, unconfigured, and incompatible mean.
7
Enable and Test
Preview your settings in the AI agent on the Action page, then click Save and enable.
Fields
In the Fields section, you first choose how the AI agent collects the lead’s details:Whichever mode you pick, either E-mail or Phone Number must be enabled and set as required. This guarantees every saved lead has a way to be contacted, and the action cannot be saved without it.
Form mode
You can enable or disable any of the three available fields in the form (Name, E-mail, and Phone Number) and set any or all of them as required.A lead form holds a maximum of three fields, and custom fields are not available in this mode.
Conversational mode
In conversational mode, the AI agent gathers the lead’s details in chat on every channel. The fields table has two parts:- Identity fields: Name, E-mail, and Phone Number. Each can be toggled on or off and marked as required. Their types are fixed, and you can add a description to guide the AI agent on how to ask for them.
- Custom fields: any extra details you want collected, such as company name or budget. Each custom field has a name, a type (text, number, email, date, or boolean), a description that tells the AI agent what to ask for, and a Required checkbox.
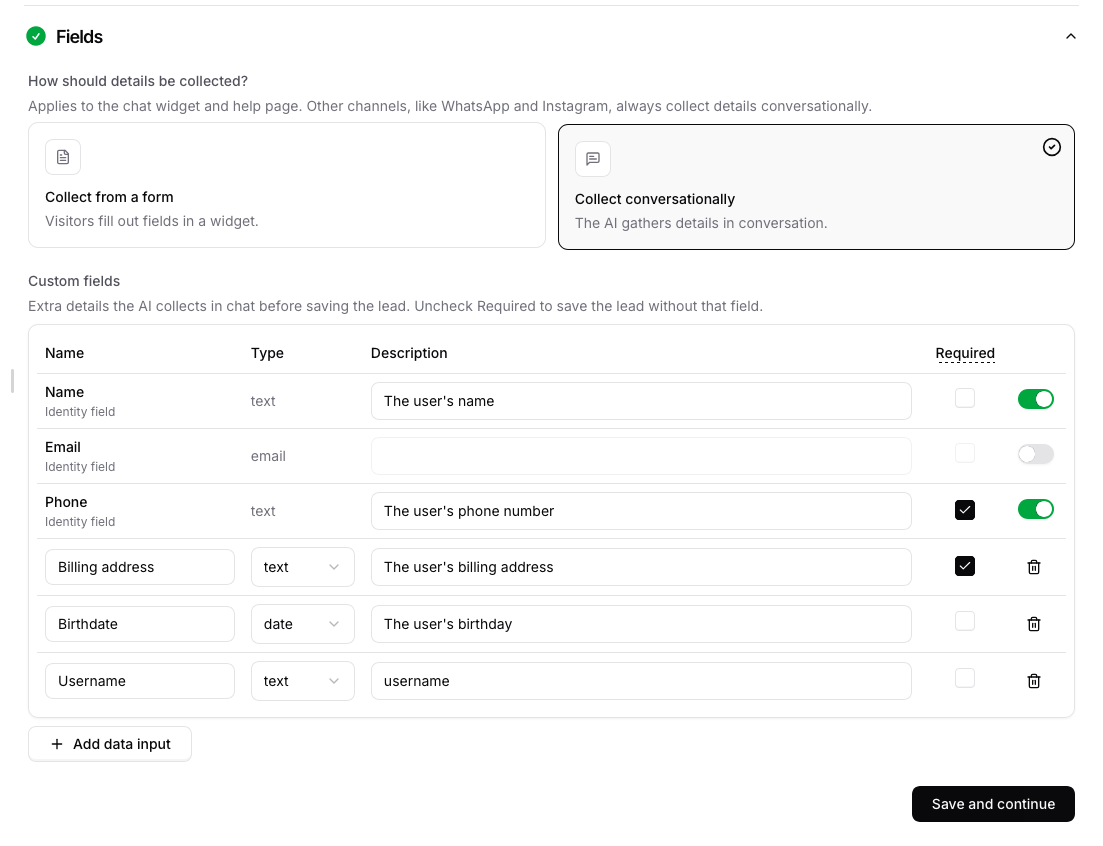
leads.submit webhook.
Messages
Success Message: The message displayed once the customer submits the form. Dismiss Message: The message shown once the customer dismisses the form by clicking the X button. This only applies to form mode, since conversational mode has no form to dismiss.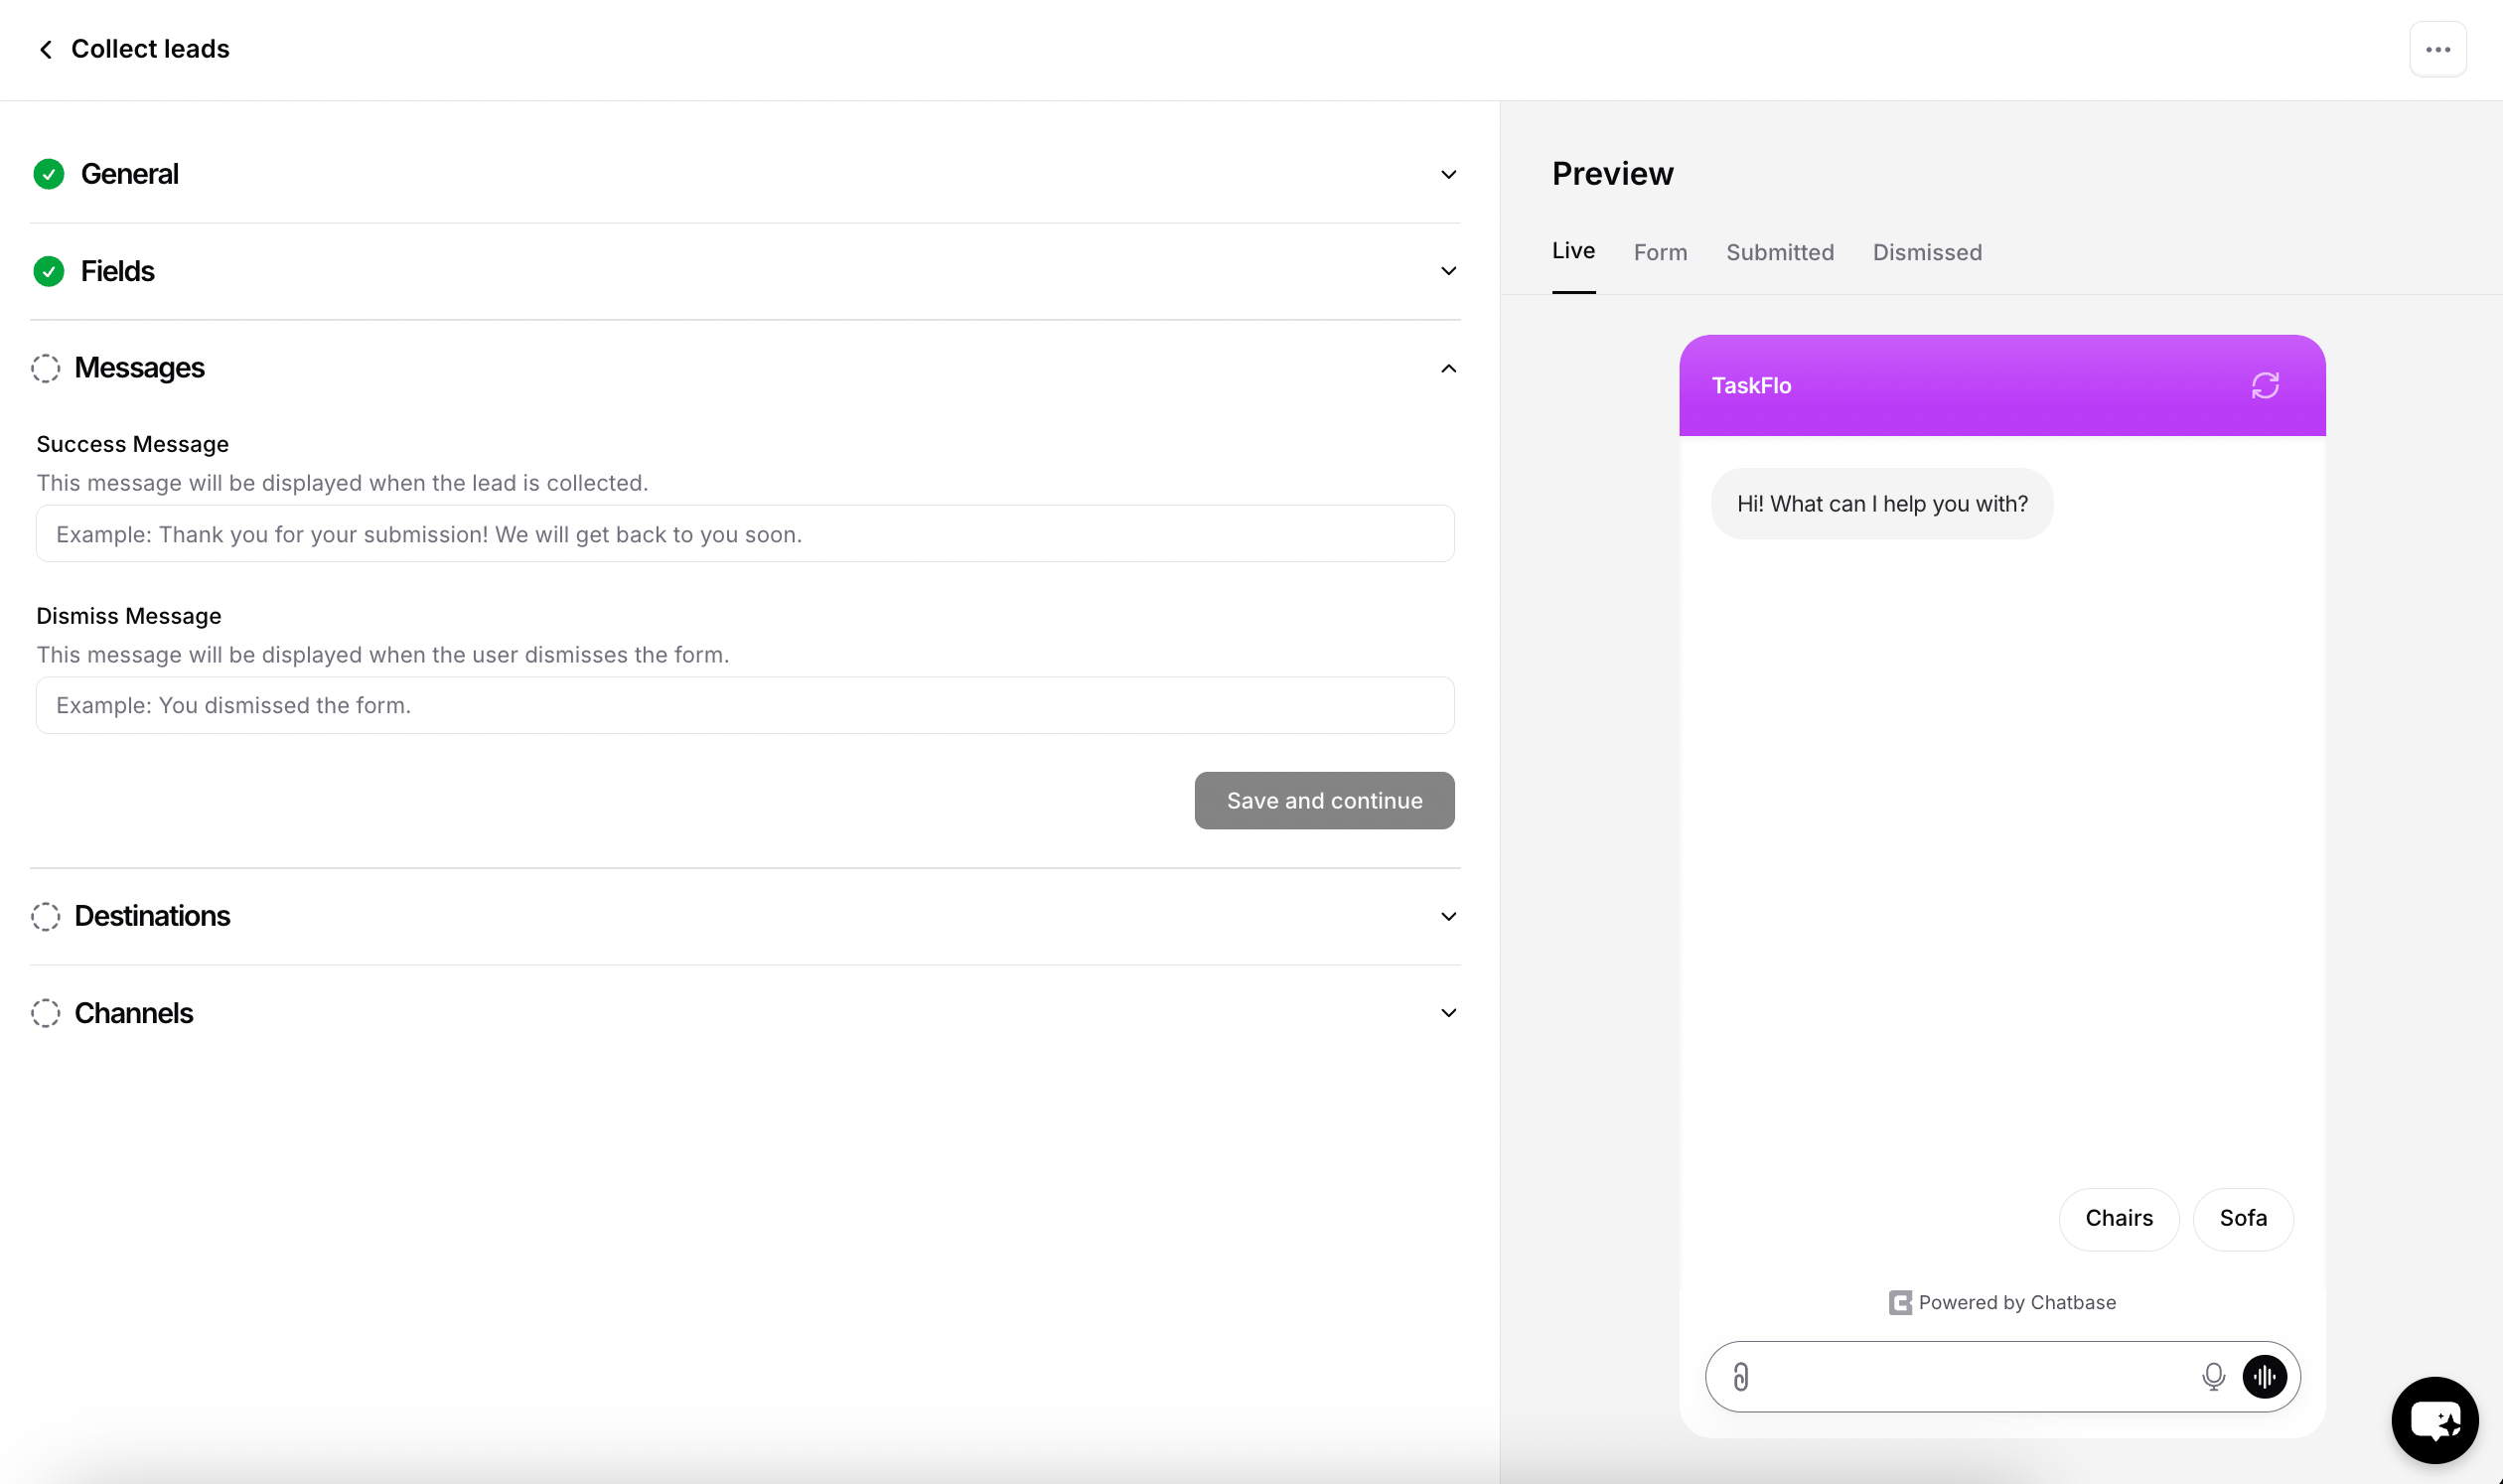
Destinations
Use Destinations to specify where collected lead information should be sent. You can skip this step if you don’t want to send leads anywhere external.Webhooks
Add one or more webhook endpoints to receive each collected lead as aPOST request.
1
Expand Destinations
Open the Destinations section of the action.
2
Enter the endpoint URL
Add the URL that should receive the lead.
3
Create the webhook
Click Create webhook, then save your changes.
Email notifications
Enable Email notification to receive an email every time a lead is collected through this action. You can add one or more email addresses, and each successful lead submission triggers an email containing the collected lead information.This is different from the Daily leads email notification available under Settings → Notifications. Email notifications configured here are sent immediately for each collected lead, whereas the daily leads notification sends a summary of leads collected throughout the day.
Test the action by having a conversation that should trigger it, and confirm the lead appears under Activity > Leads with every field populated.
Channels
The Collect Leads action is compatible with every channel. Use Channels in the action’s configuration to enable or disable it per channel, then click Save. See Channels for what configured, unconfigured, and incompatible mean.Best Practices
Pick the Right Mode
Use Form for a quick, familiar capture in the chat bubble, and Conversational when you need custom fields or a less abrupt ask.
Ask at the Right Moment
Trigger the form once the visitor has shown intent, not at the start of every conversation.
Use Natural Language
Keep When to use instructions short and simple, include examples, start with action verbs, and say what you want the AI agent to do rather than what to avoid.
Keep Required Fields Few
Every required field is another reason a visitor abandons the form. Require the contact method and little else.