

Step 1: Sign Into Your Chatbase Account and Set up your agent
To embed your Chatbase agent into your Weebly website, first sign in to your Chatbase account. If you don’t have an account yet, you can create one for free. Once signed in, you can set up your agent in Chatbase by uploading data sources like files, text snippets, websites, or Q&A pairs that the agent can learn from. Here is a step-by-step guide for setting up your Chatbase agent.Step 2: Generate and Copy the agent’s Embed Code
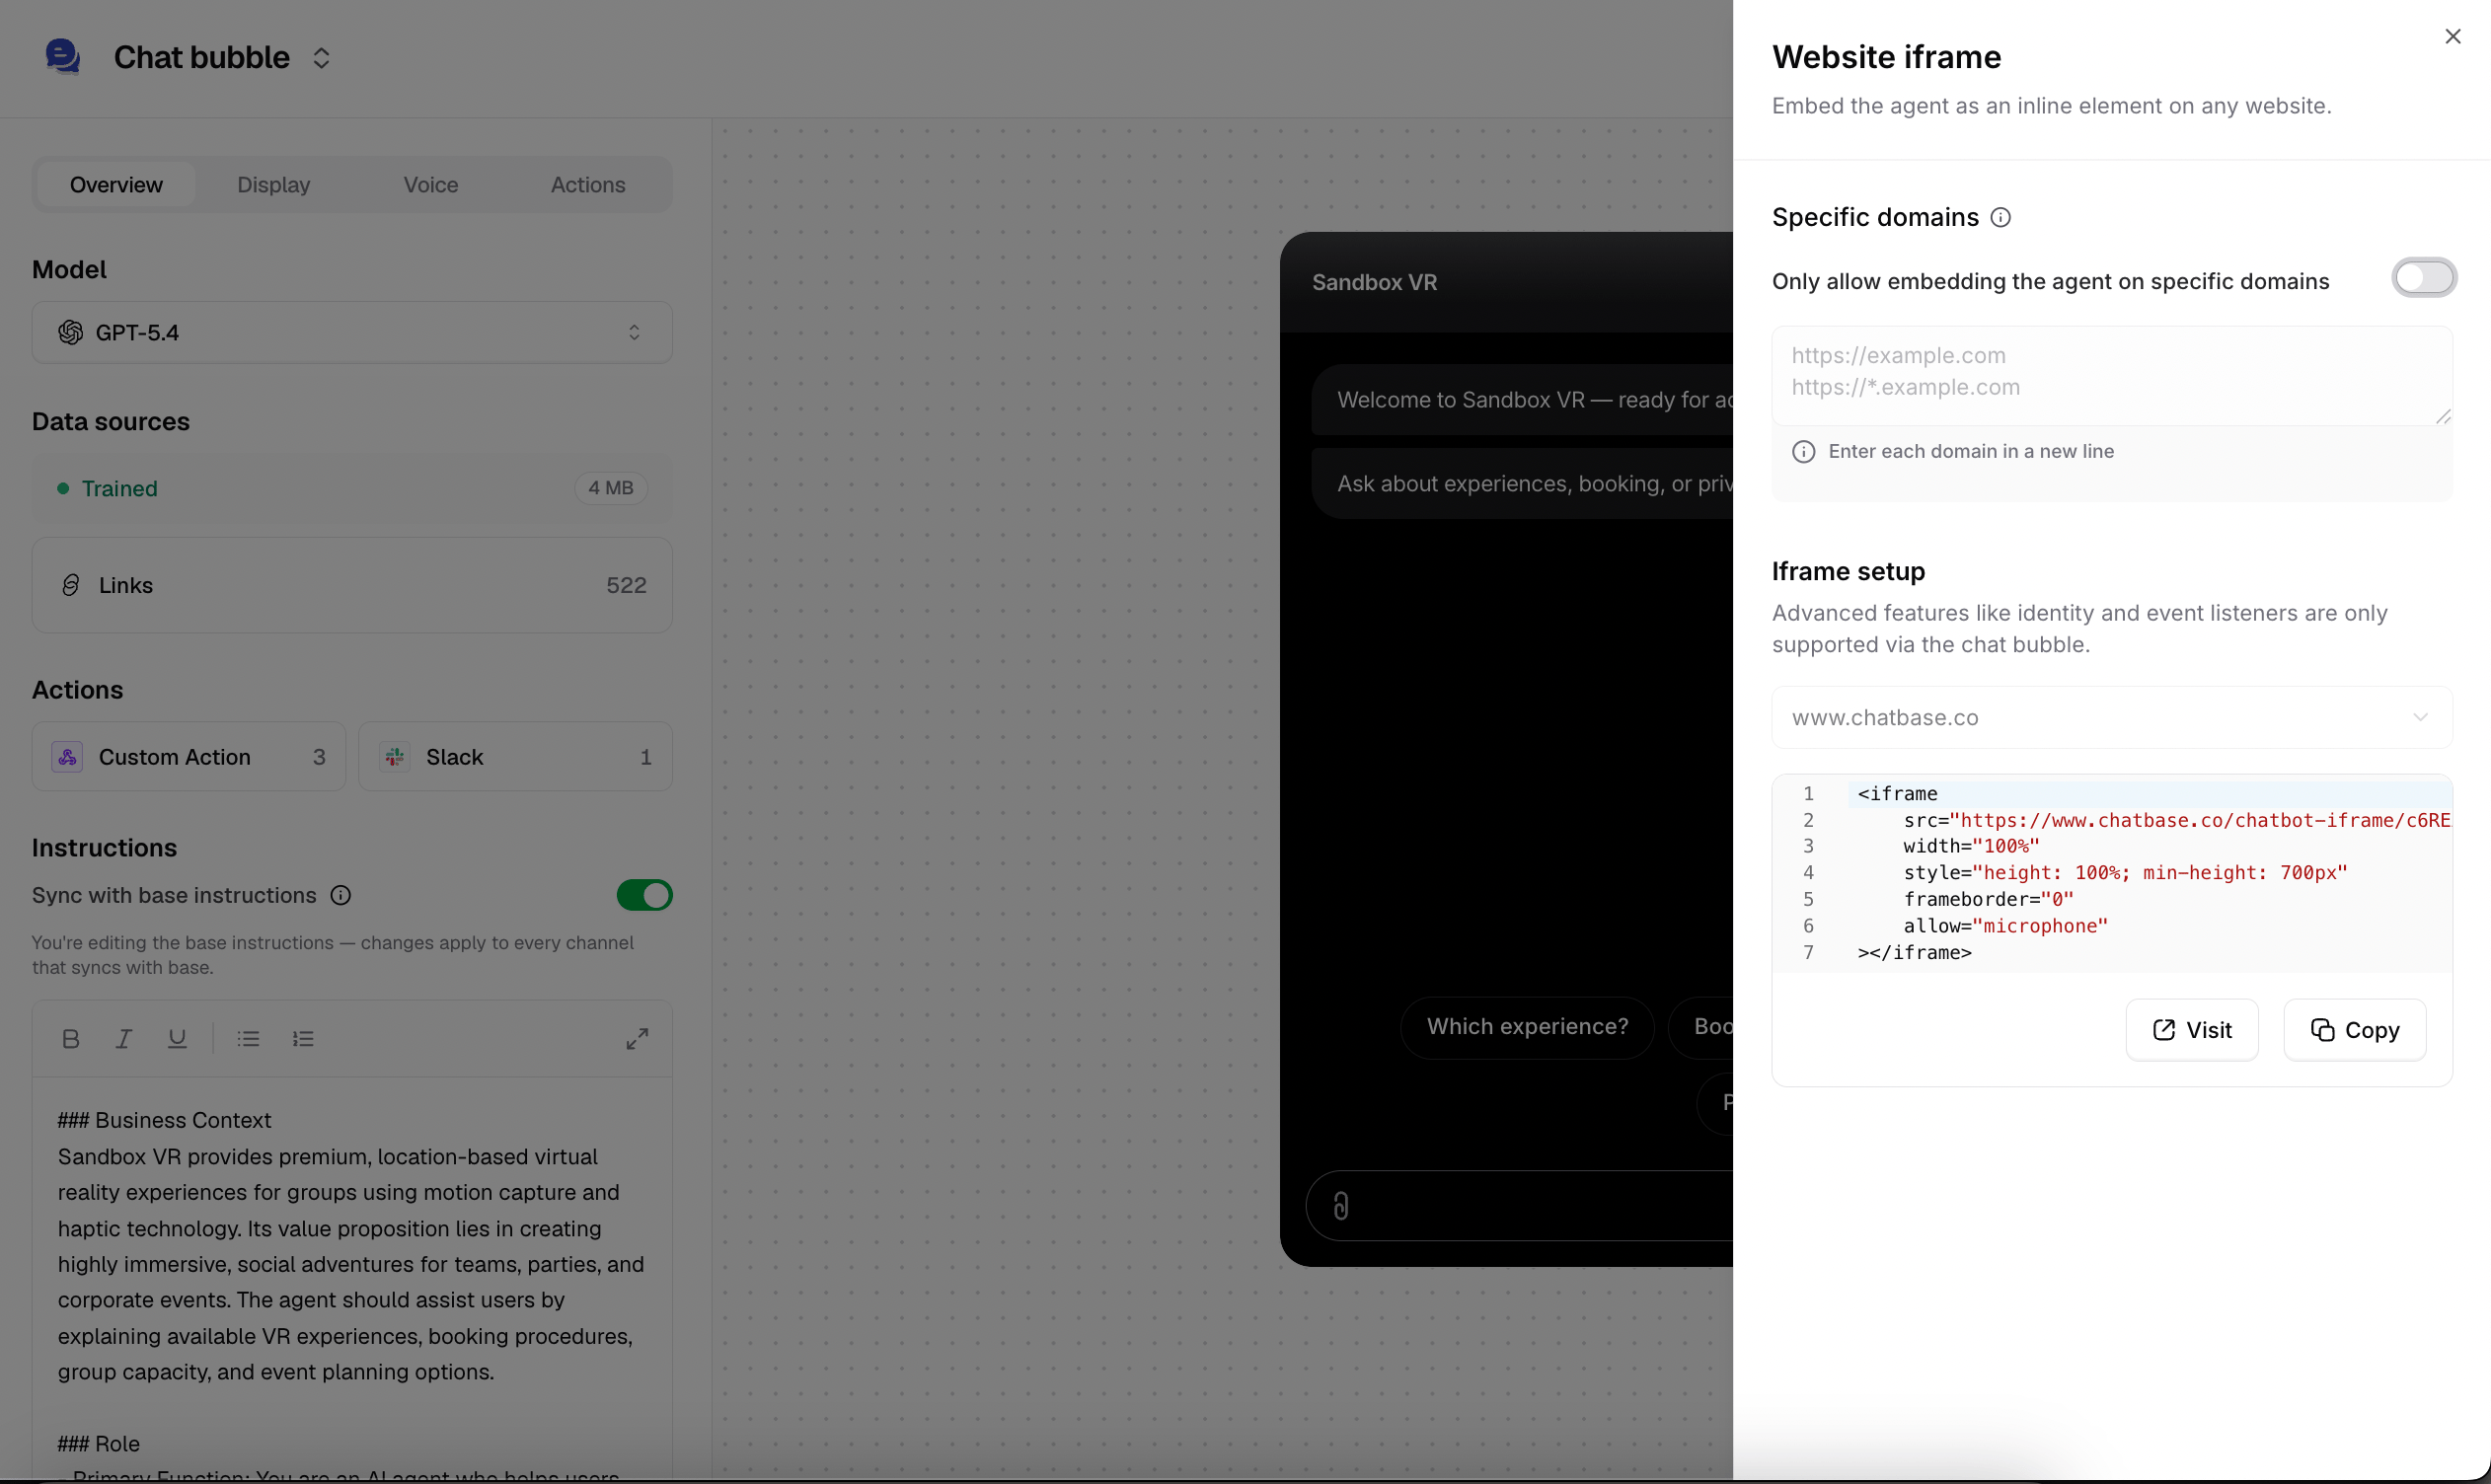
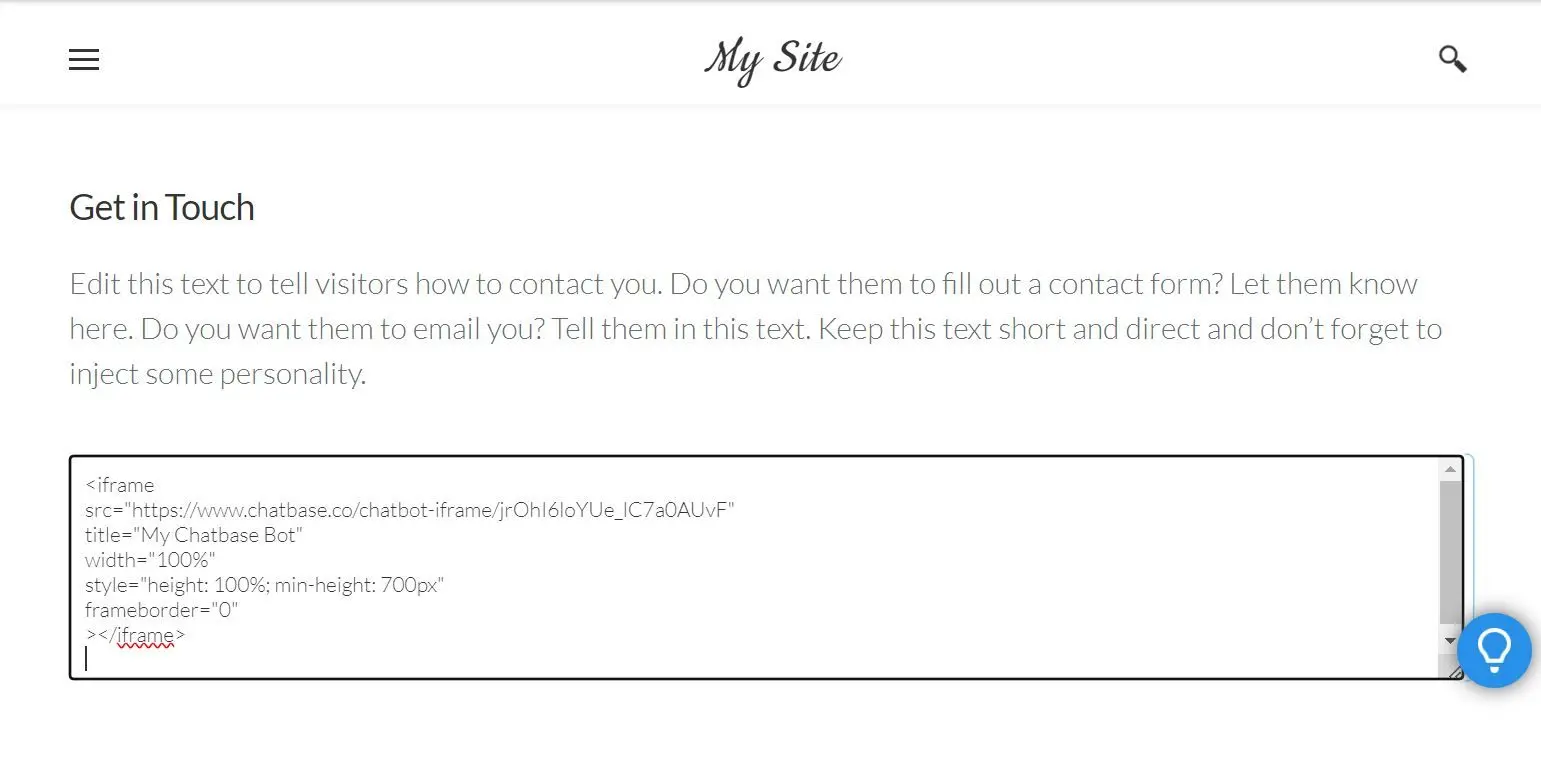
1. After configuring your agent, navigate to your dashboard page and select the specific agent you wish to embed. 2. Click Channels in the left sidebar, then click Manage on the Chat bubble card (or Setup, if you haven’t configured it yet). 3. Click on Deploy and select the iFrame embed type. Scroll down and Click Copy to copy the provided HTML code.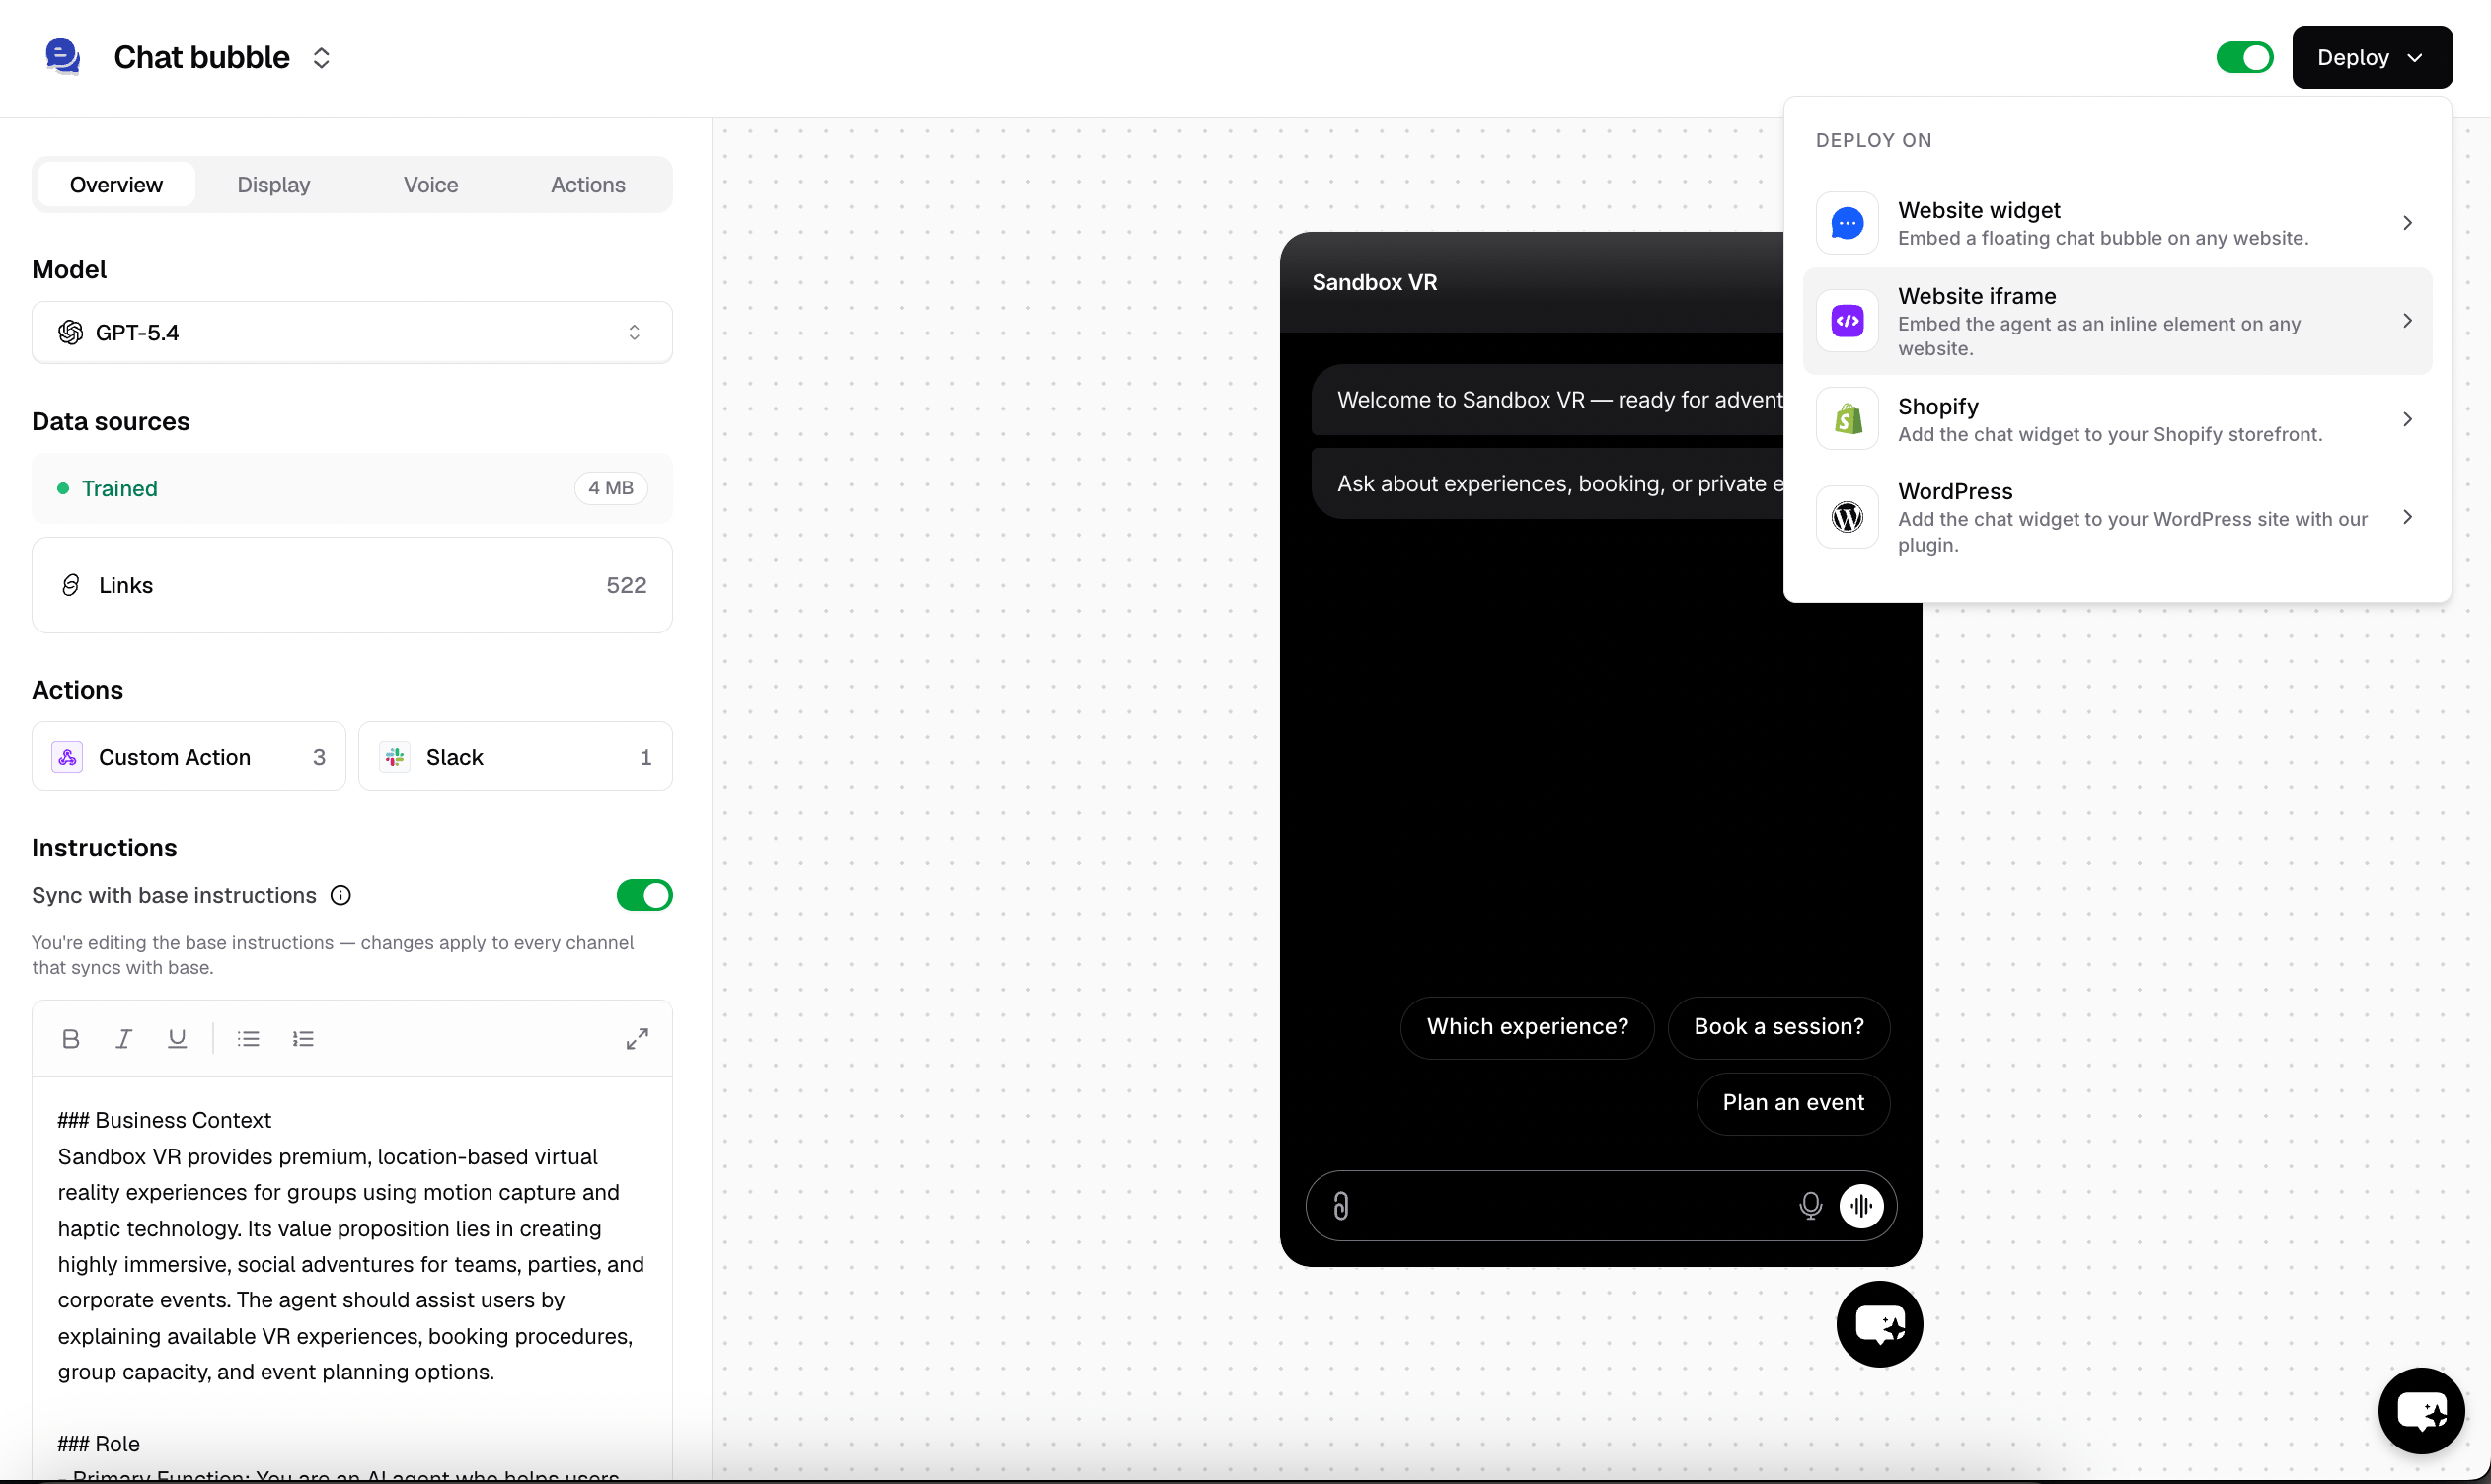
Step 3: Add Embed Code to Your Weebly Website
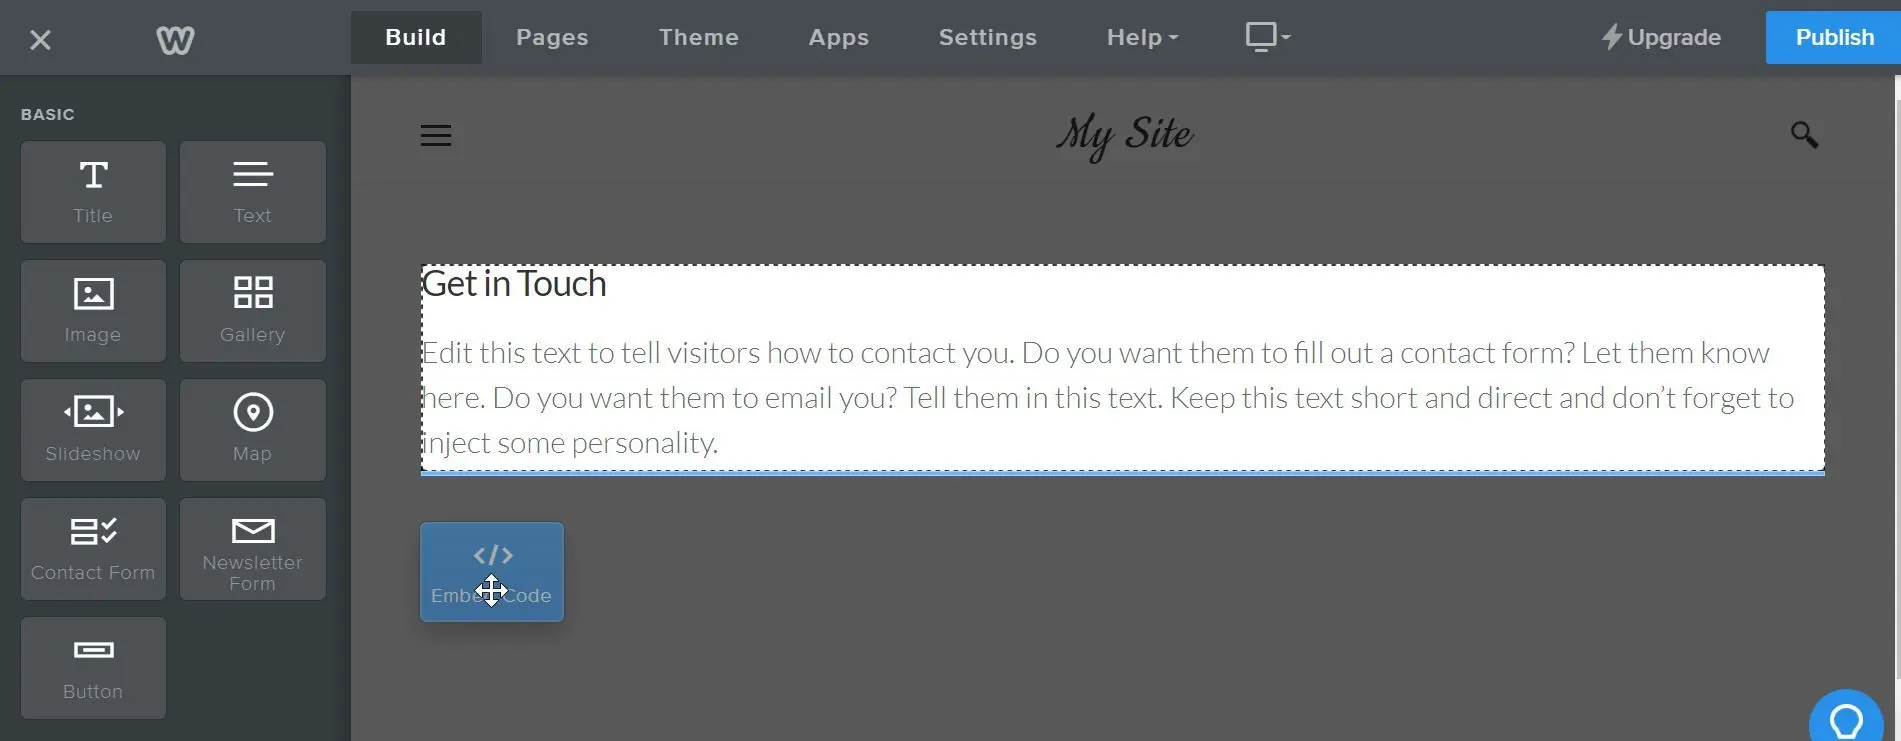
To add a Chatbase agent to your Weebly website: 1. Sign in to your Weebly account and head to the Edit site page. 2. Select the page to edit. 3. From the Basic toolbar on the left side of the editing page, locate the widget that says Embed Code.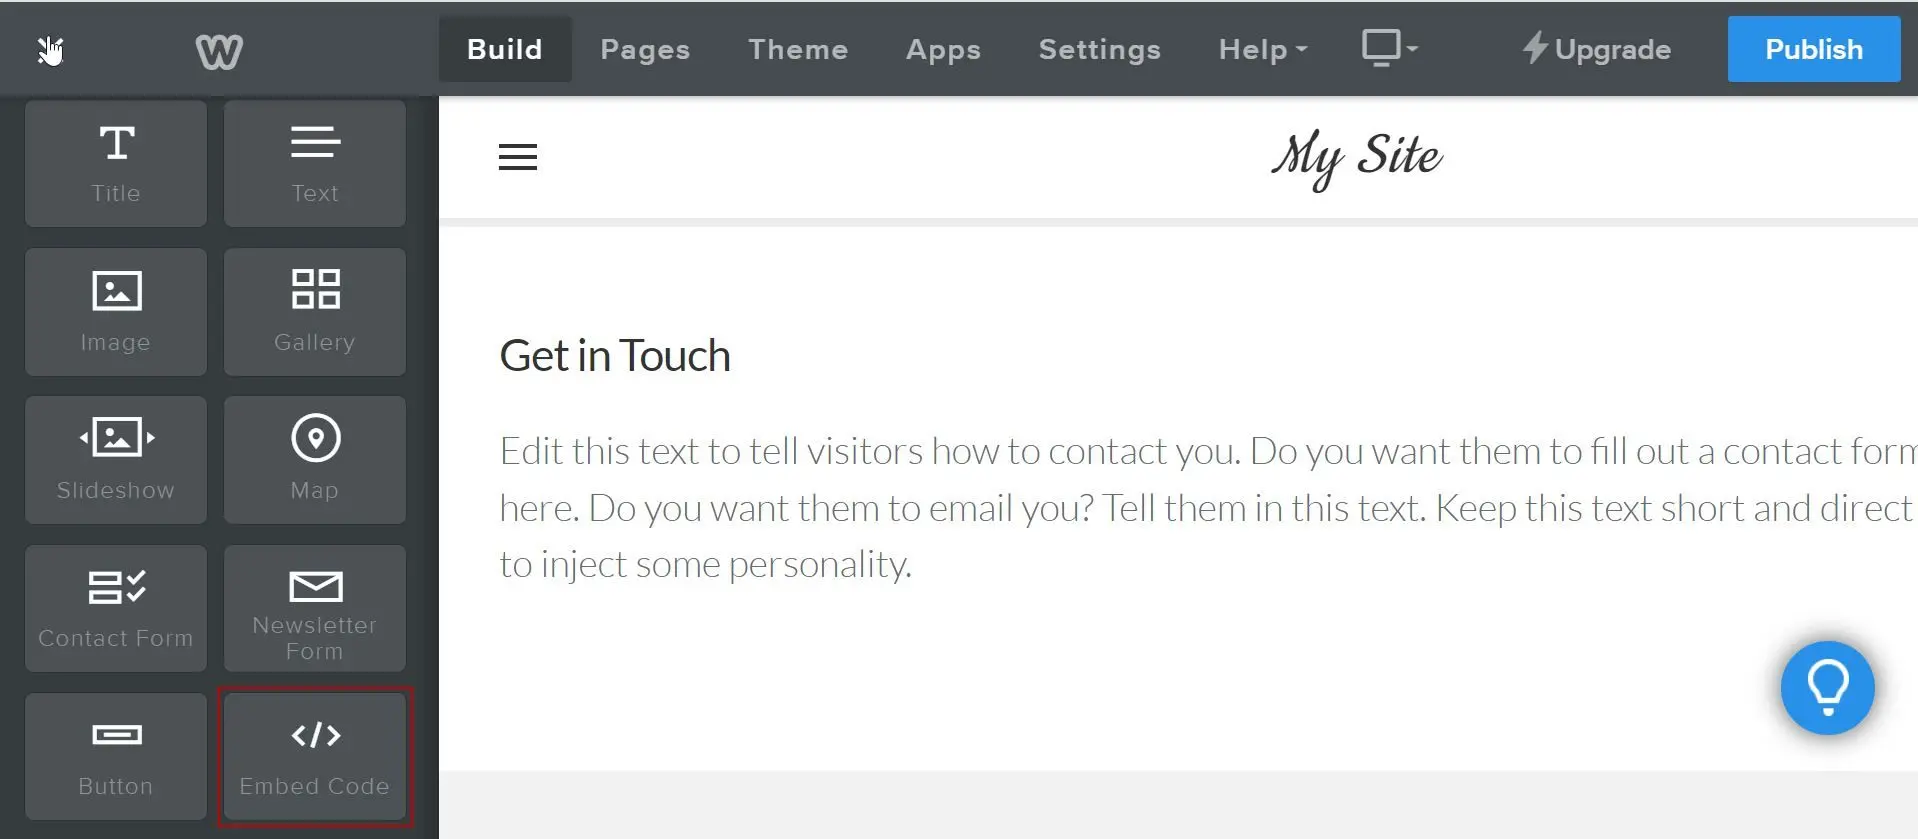
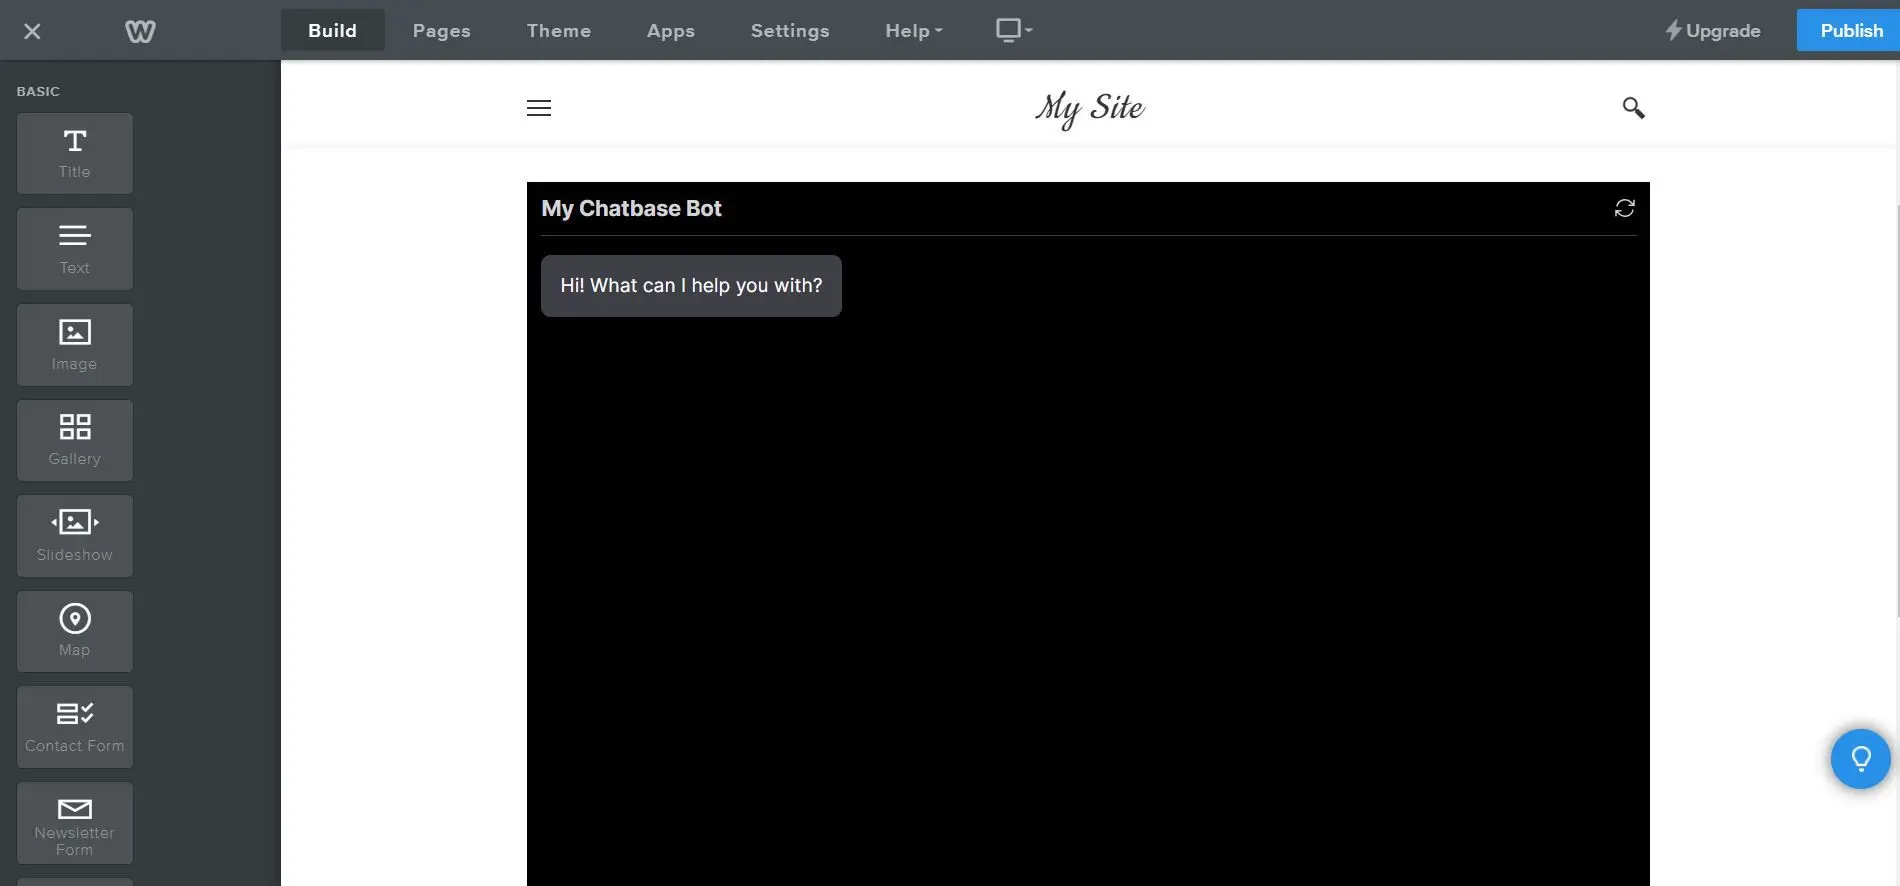
You can customize the appearance and colors of your agent on your Chatbase dashboard. To do this, go to your dashboard, choose an agent, click Channels in the left sidebar, click Manage on the Chat bubble card, then open the Display tab to edit Content, Capabilities, Colors, Floating bubble, and Localization.