

Step 1: Set Up Your Chatbase AI agent
To integrate your Chatbase AI agent into your Bubble application, begin by logging into your Chatbase account. If you haven’t already created an account, you can sign up for a free account. After signing in, you can configure you agent within the Chatbase platform by uploading relevant data sources, such as files, text snippets, websites, or question-and-answer pairs, which the agent can use to build its knowledge base. Here is a step-by-step roadmap for successfully deploying your Chatbase agent.Step 2: Generate and Copy Your Chatbase AI agent Embed Code
1. Log into your Chatbase account and navigate to your dashboard. 2. On the list of available agents, click on the one you want to integrate into your Bubble website. 3. Click Channels in the left sidebar, then click Manage on the Chat bubble card (or Setup, if you haven’t configured it yet). 4. Click on Deploy and select the Website widget embed type. Scroll down and Click Copy to copy the provided script.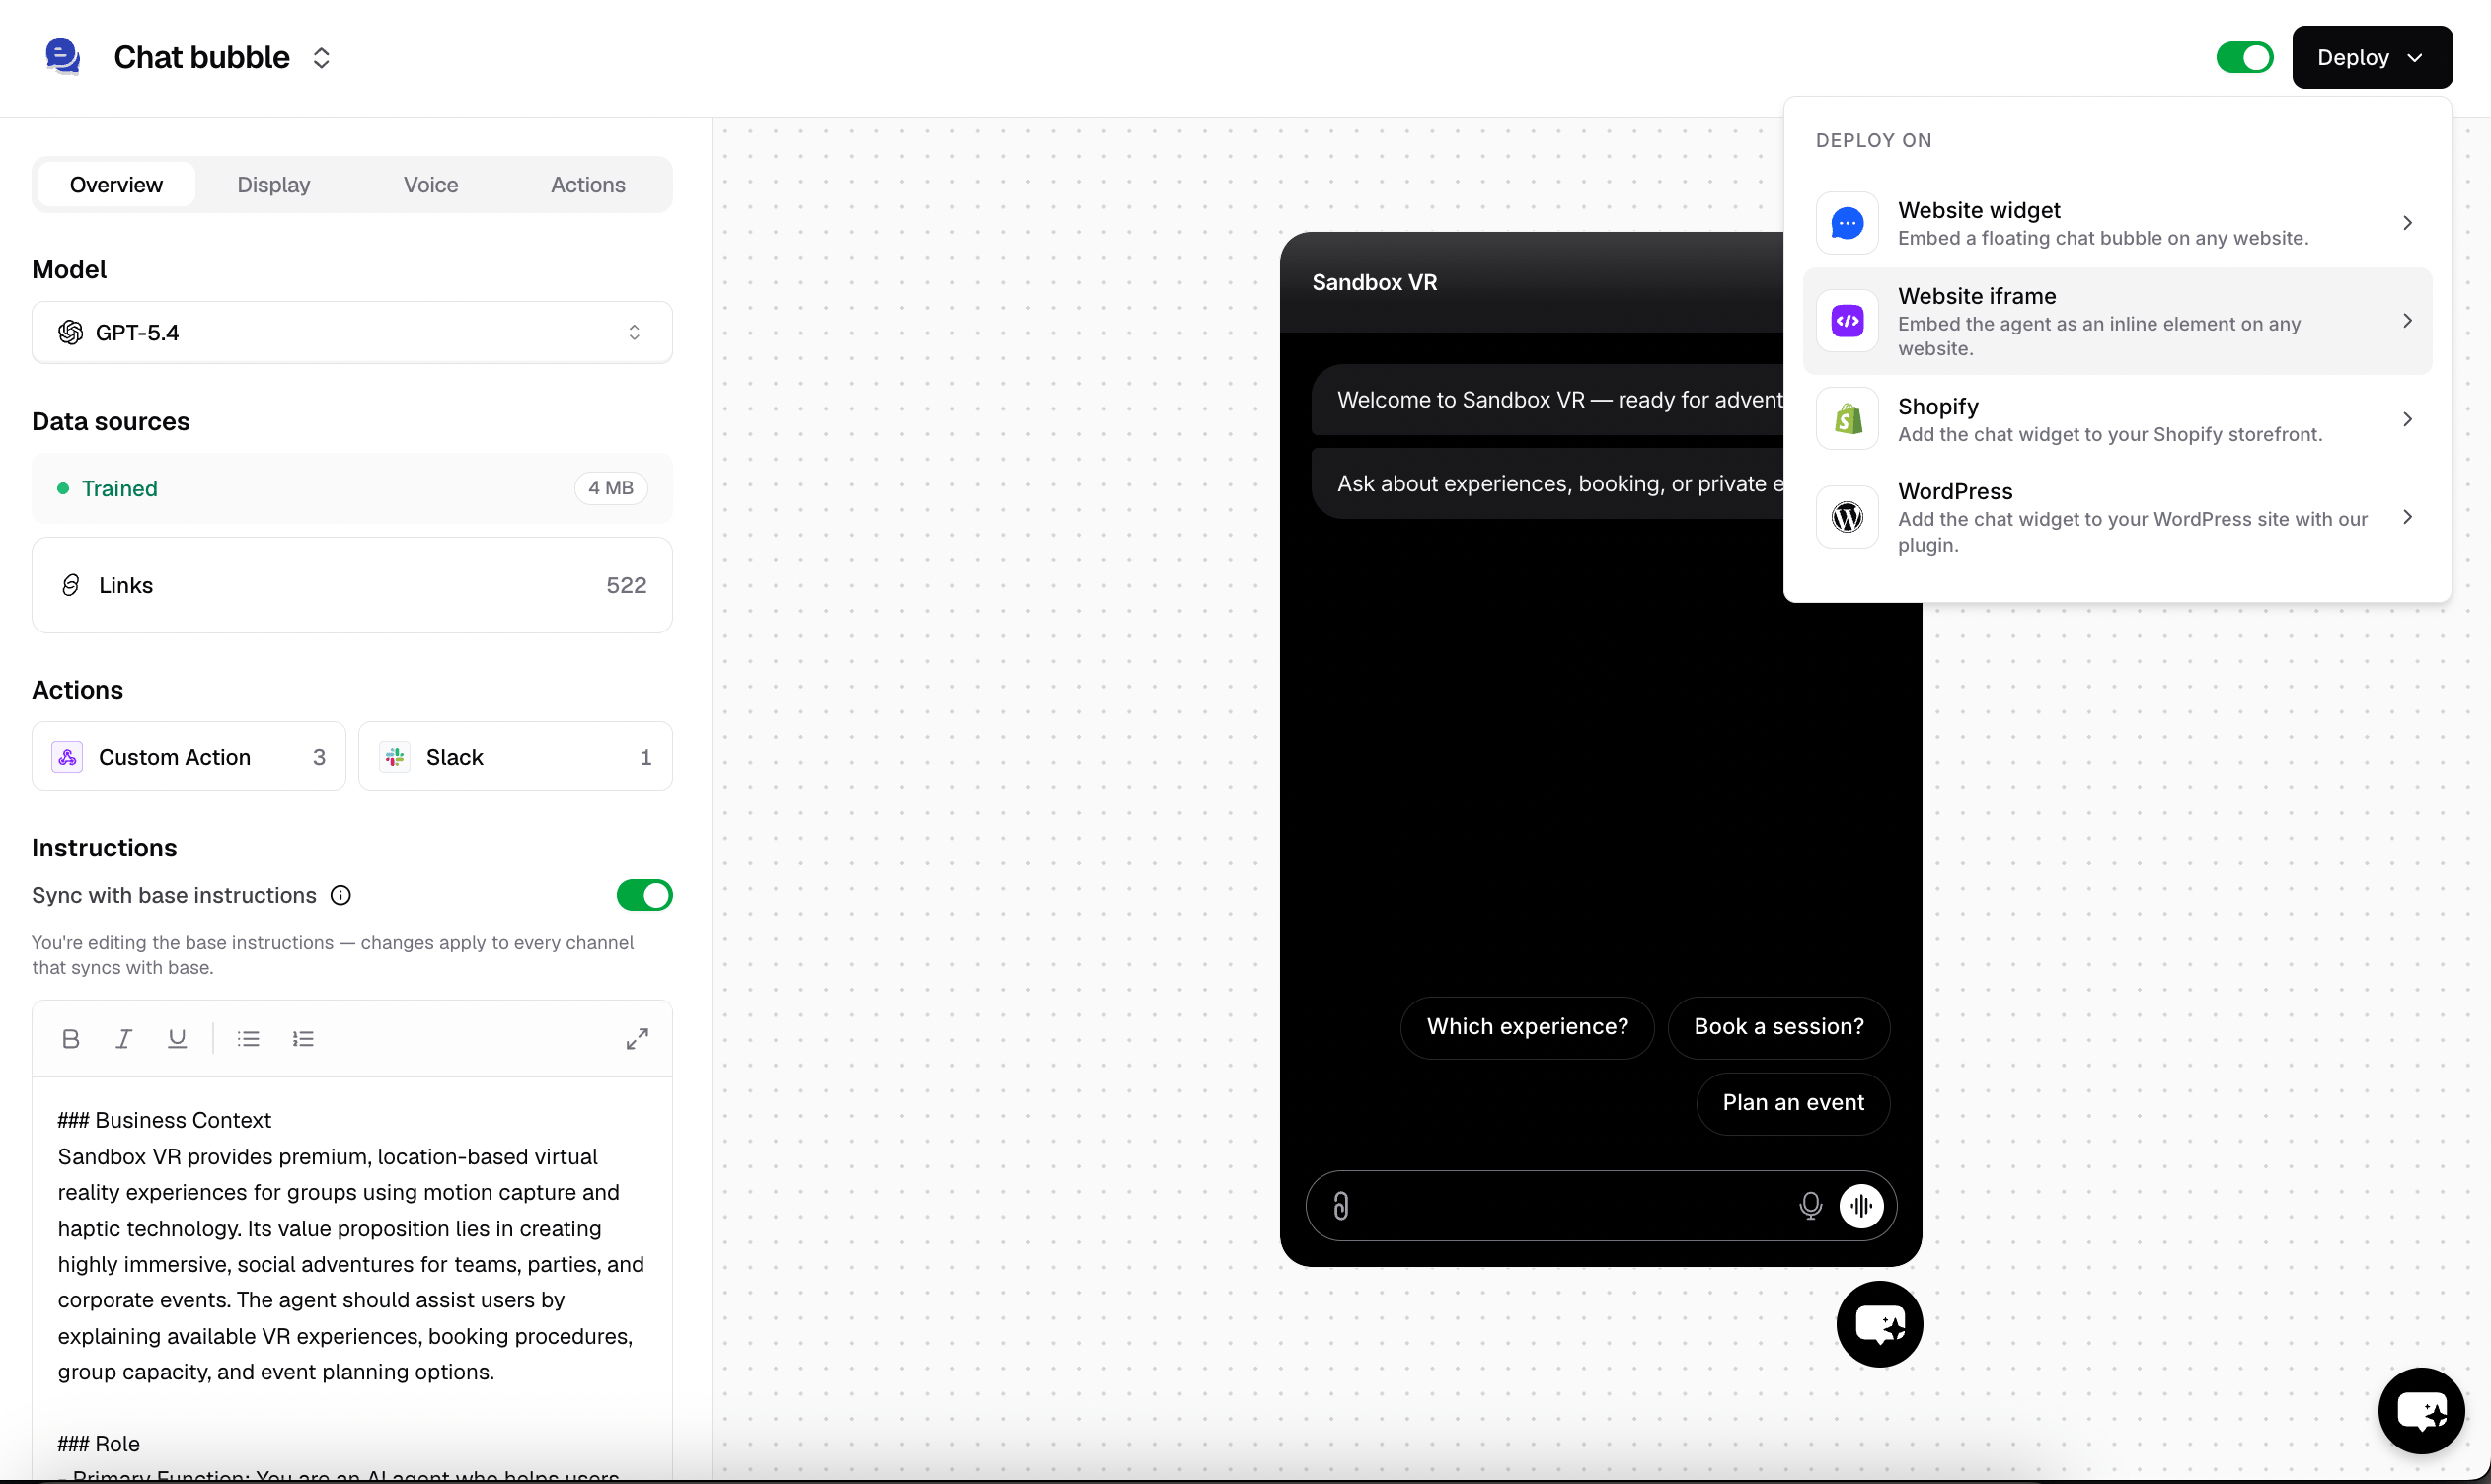
Step 3: Embed Chatbase AI agent on Your Bubble App
1. Once you’ve copied your Chatbase embed code, sign into your Bubble account and head to your account dashboard. 2. On your dashboard, pick out the Bubble app or website you wish to embed the agent on and click the Launch Editor button next to it.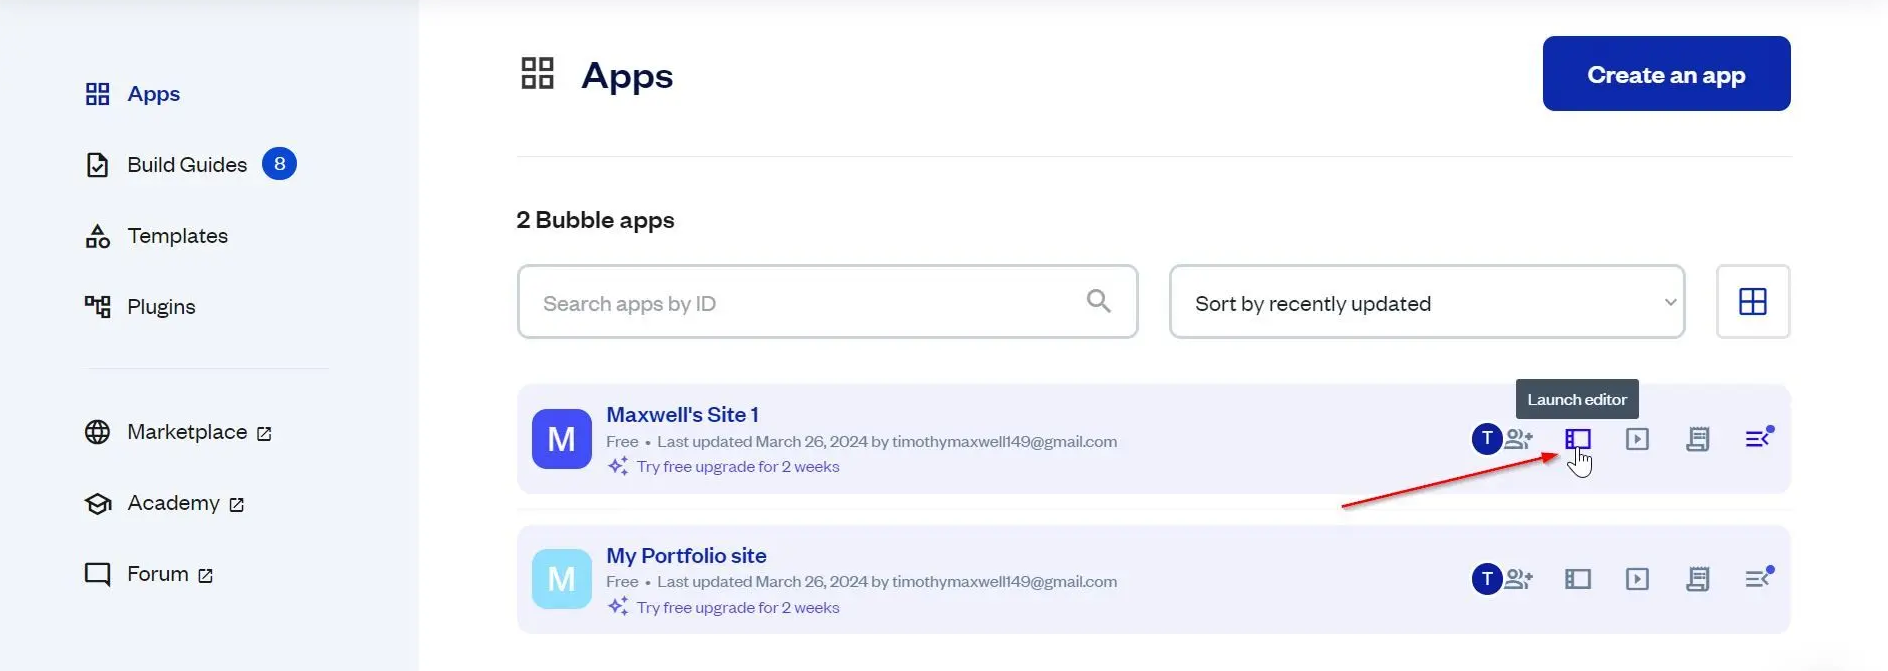
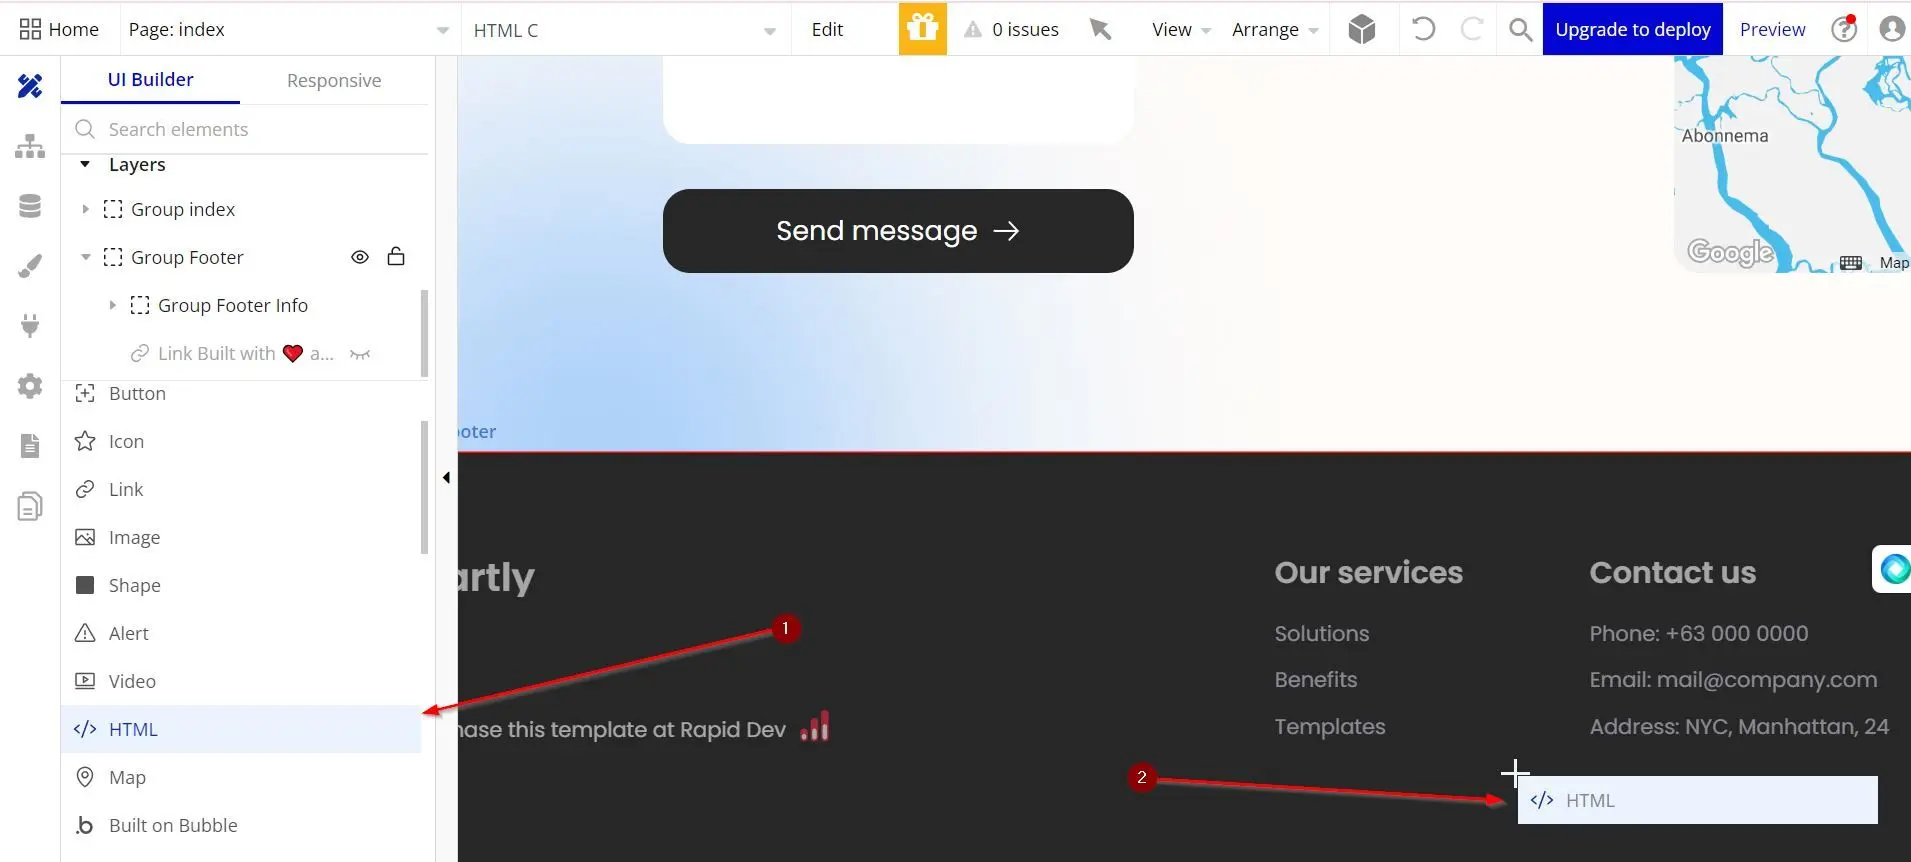
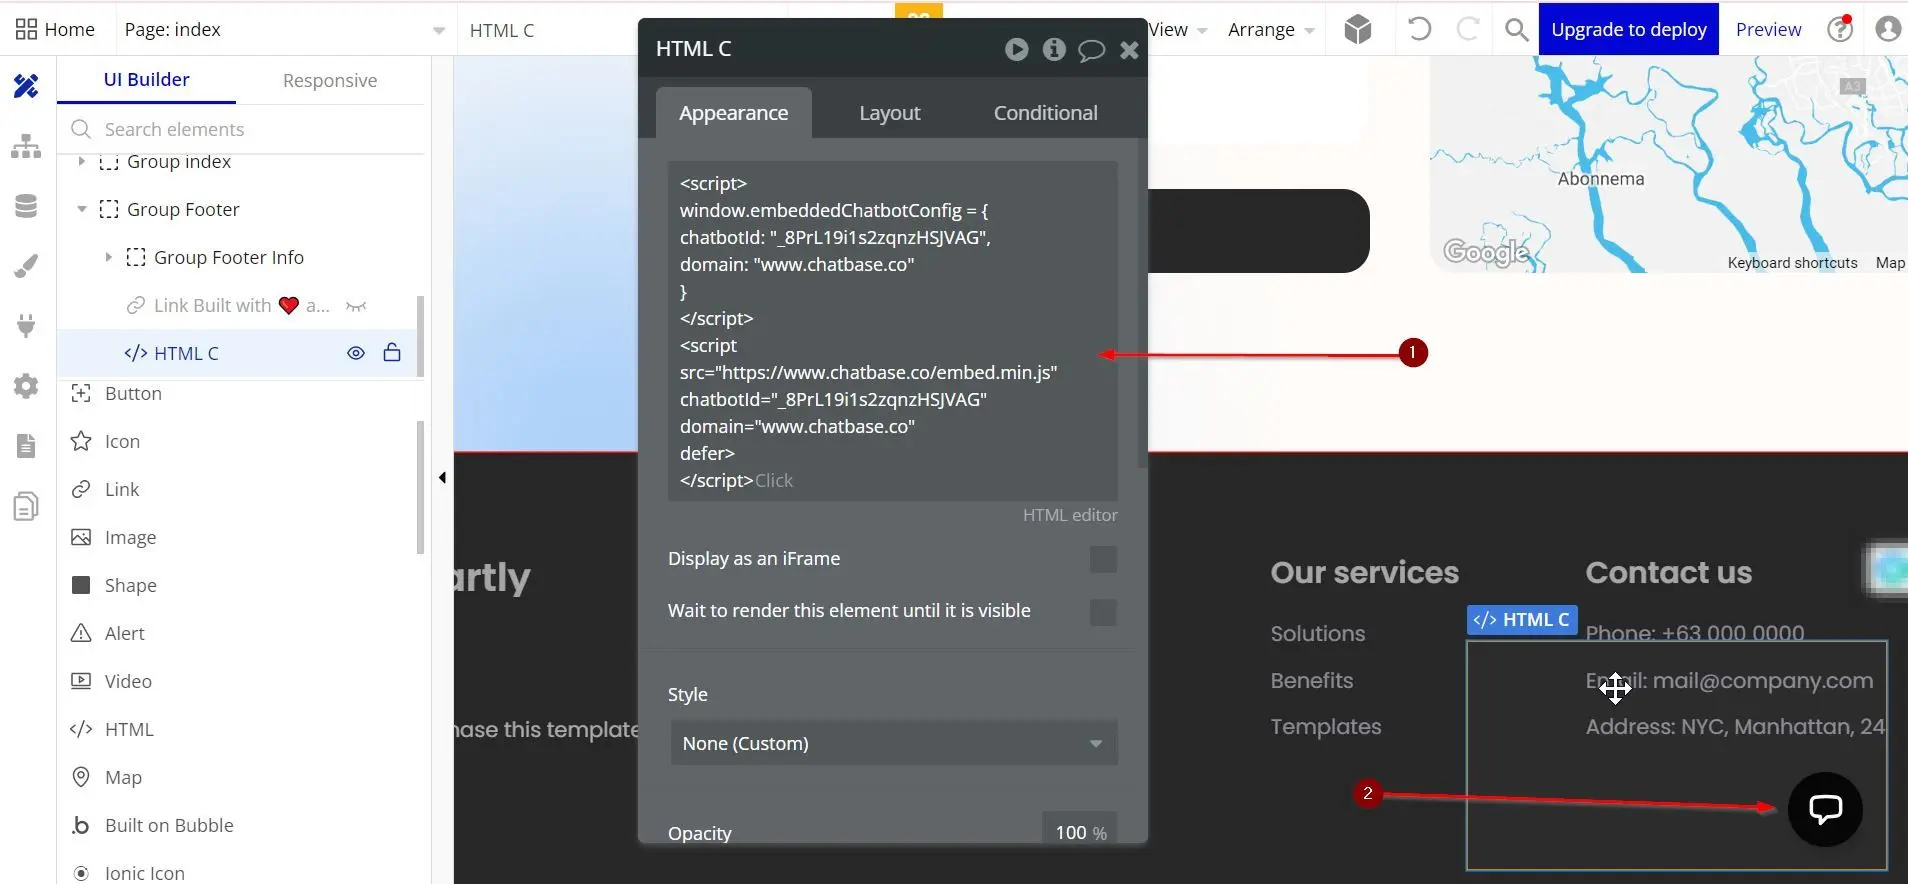
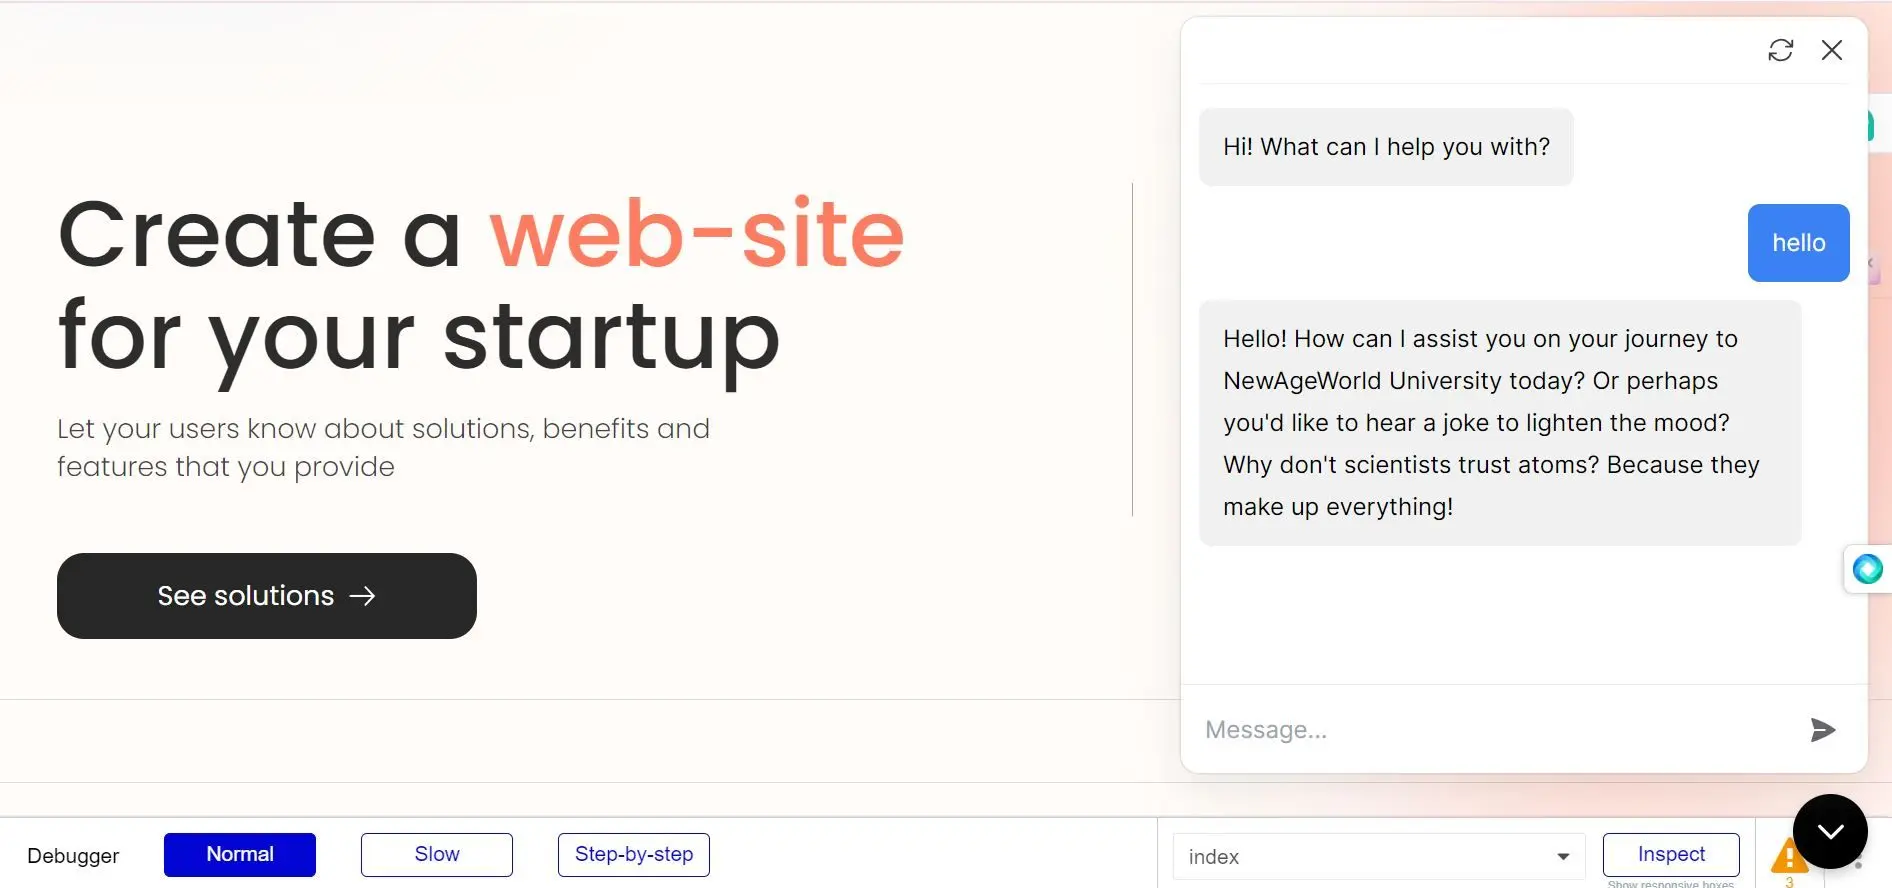
You can customize the appearance and colors of your agent on your Chatbase dashboard. To do this, go to your dashboard, choose an agent, click Channels in the left sidebar, click Manage on the Chat bubble card, then open the Display tab to edit Content, Capabilities, Colors, Floating bubble, and Localization.