

Introduction
Triggers are automation rules for your help desk. Each trigger watches for tickets that are created or updated, checks them against the conditions you define, and runs the actions you choose - like setting a status, assigning a team or agent, or adding an internal note - without anyone lifting a finger. The mental model is simple: WHEN a ticket matches your conditions, THEN run these actions. Triggers run in order, top to bottom, and every matching trigger fires. This lets you stack rules - one to route billing questions, another to prioritize angry customers - and they all apply to the same ticket in the order you set. You configure triggers from Help desk settings → Triggers.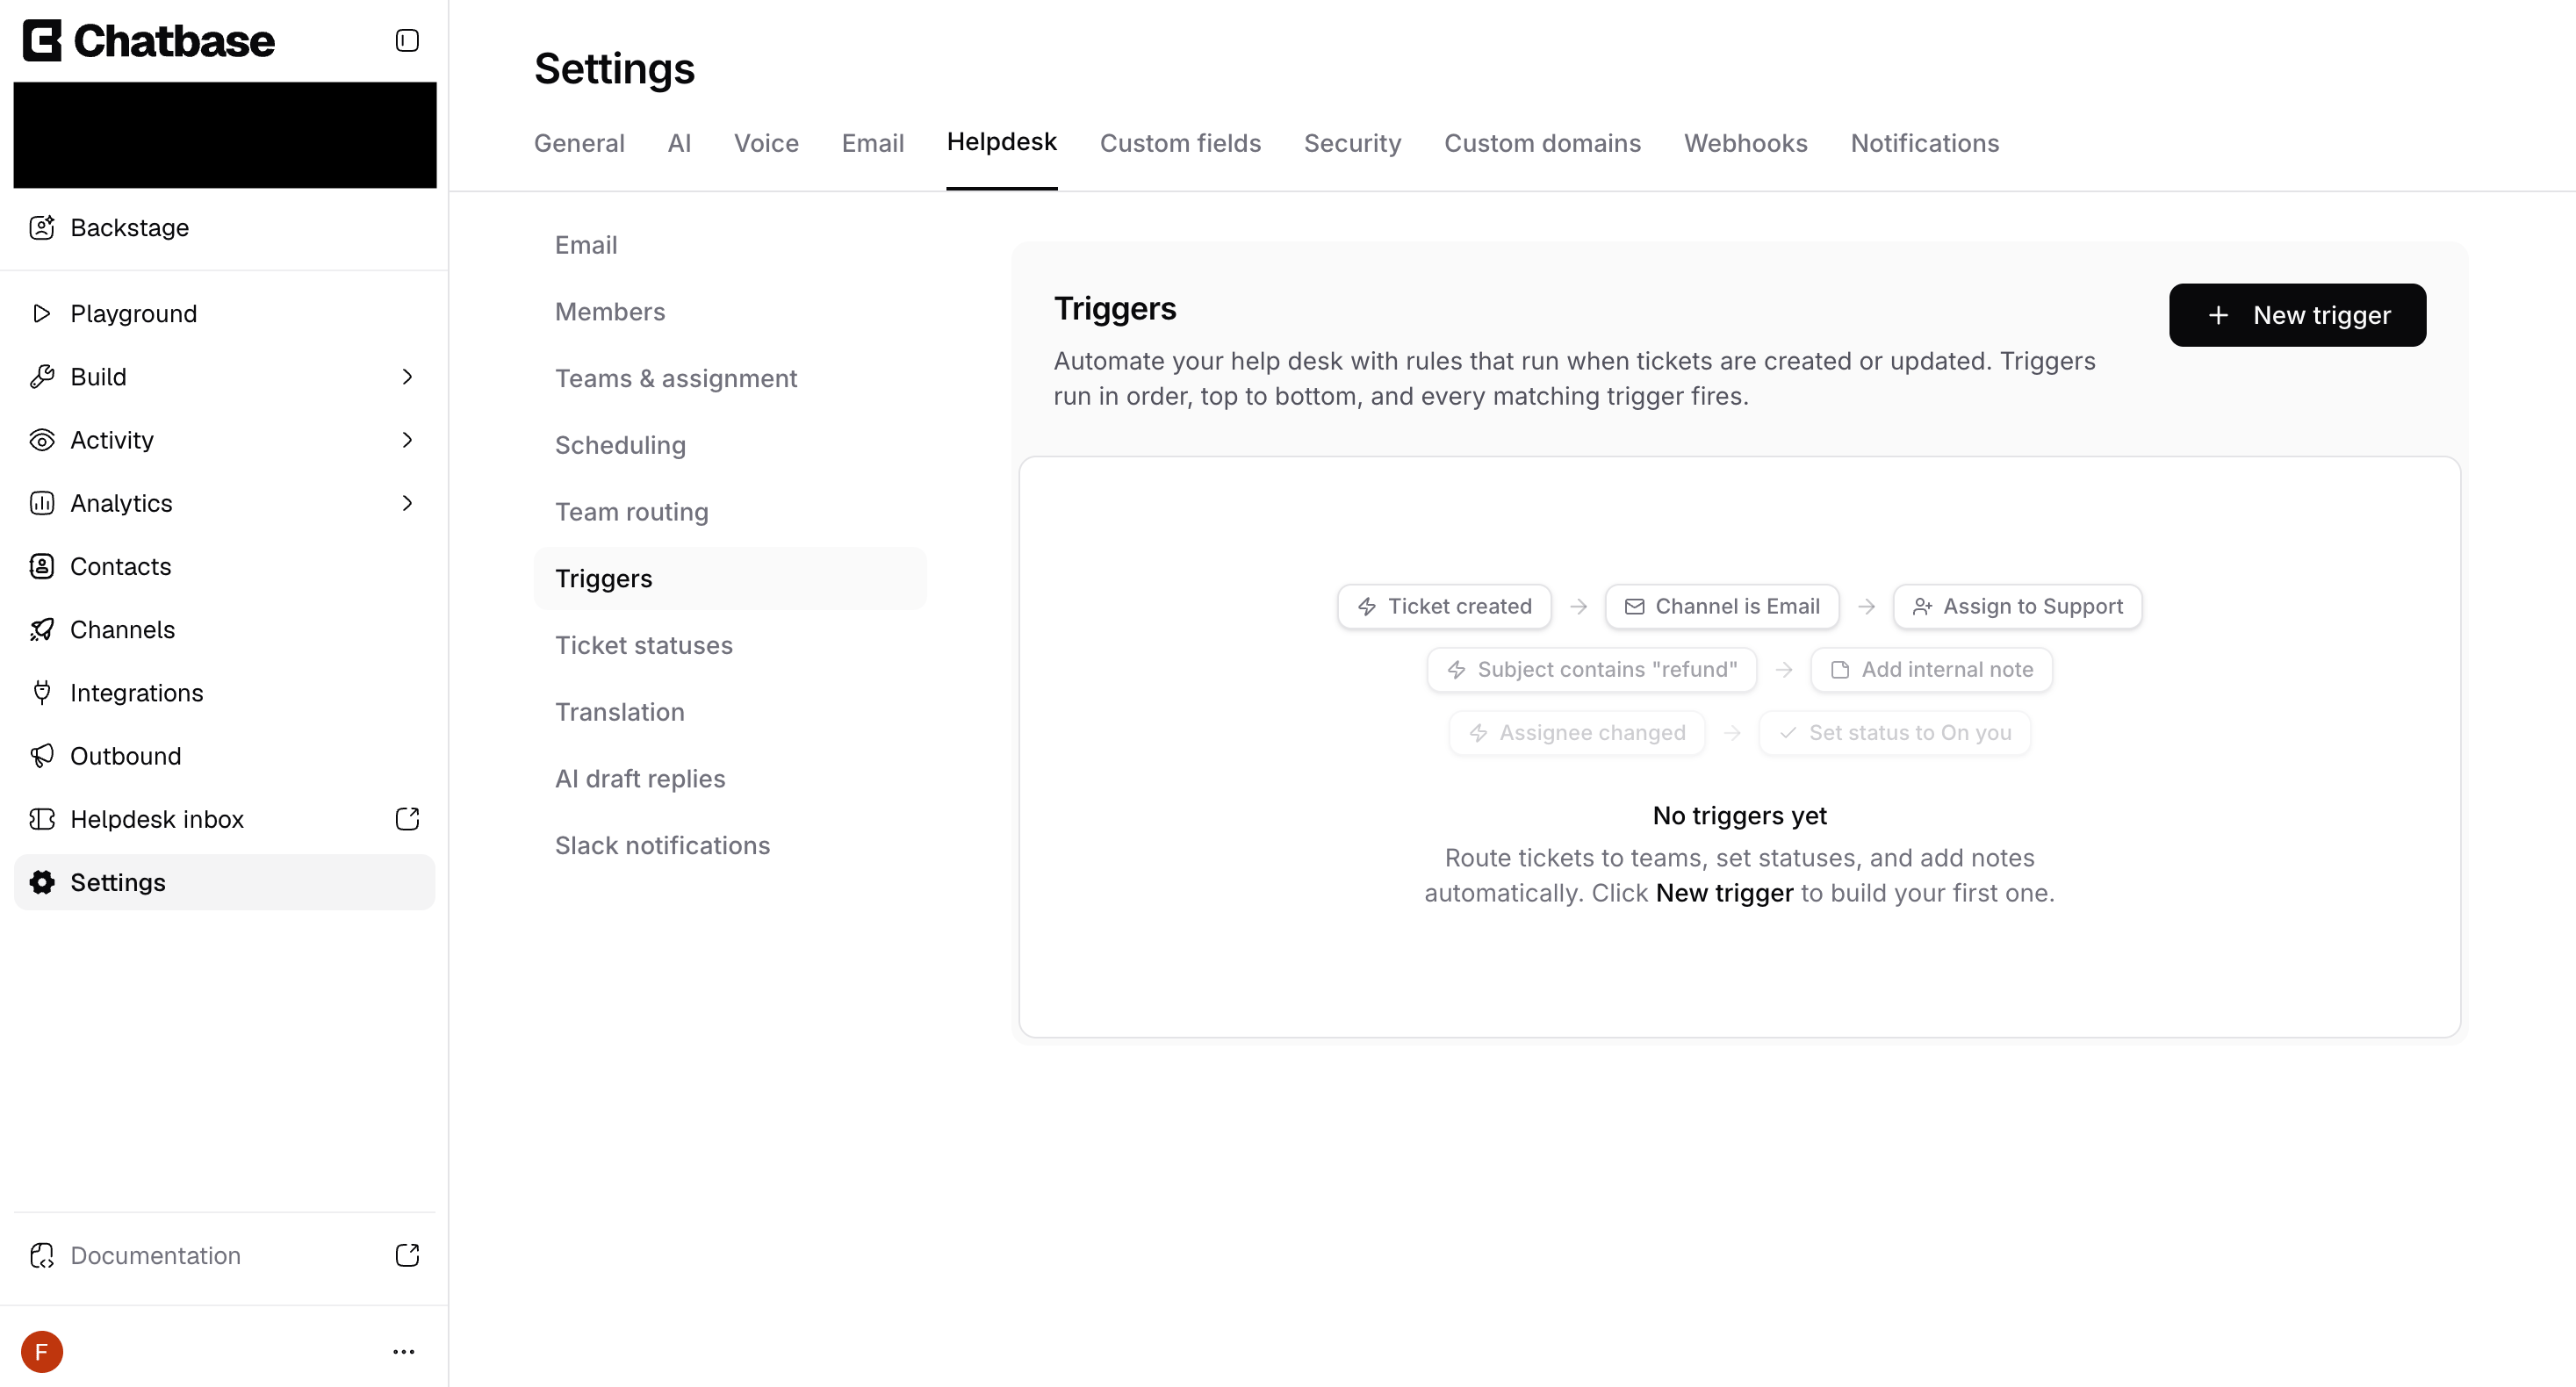
Triggers require the Help Desk to be enabled for your agent. If you haven’t set it up yet, see the Help Desk overview.
How a Trigger Works
Every trigger is made of four parts:Details
A name and optional description so your team knows what the rule does and why.
Conditions (WHEN)
The rules that decide whether a ticket matches - based on its status, channel, assignee, team, subject, and more.
Actions (THEN)
What happens when a ticket matches - set a status, assign work, add a note, send an email or a webhook. Actions run in order.
Status
Whether the trigger is Active or Paused. Only active triggers run.
How Triggers Run (Cycles)
Triggers don’t just run once from top to bottom - they run in cycles. This lets one trigger’s action feed into another trigger’s conditions, so your rules can build on each other. Here’s what happens each time a ticket is created or updated:1
Scan from the top
Chatbase checks every active trigger in order, top to bottom, against the ticket.
2
Matching triggers fire
Each trigger whose conditions match runs its actions.
3
A change restarts the scan
If any trigger changes the ticket (for example, it sets a new status or assigns a team), the scan starts over from the top. Triggers that hadn’t matched before now get another chance, because they’re re-checked against the ticket’s updated state.
4
Repeat until nothing changes
The cycle keeps restarting until a full pass makes no further change. At that point the ticket is done and the final result is saved.
Creating a Trigger
1
Open Triggers
Go to Help desk settings → Triggers and click New trigger. A panel opens from the right.
2
Name your trigger
Give it a clear Name (for example, “Route billing tickets”) and an optional Description explaining what it does.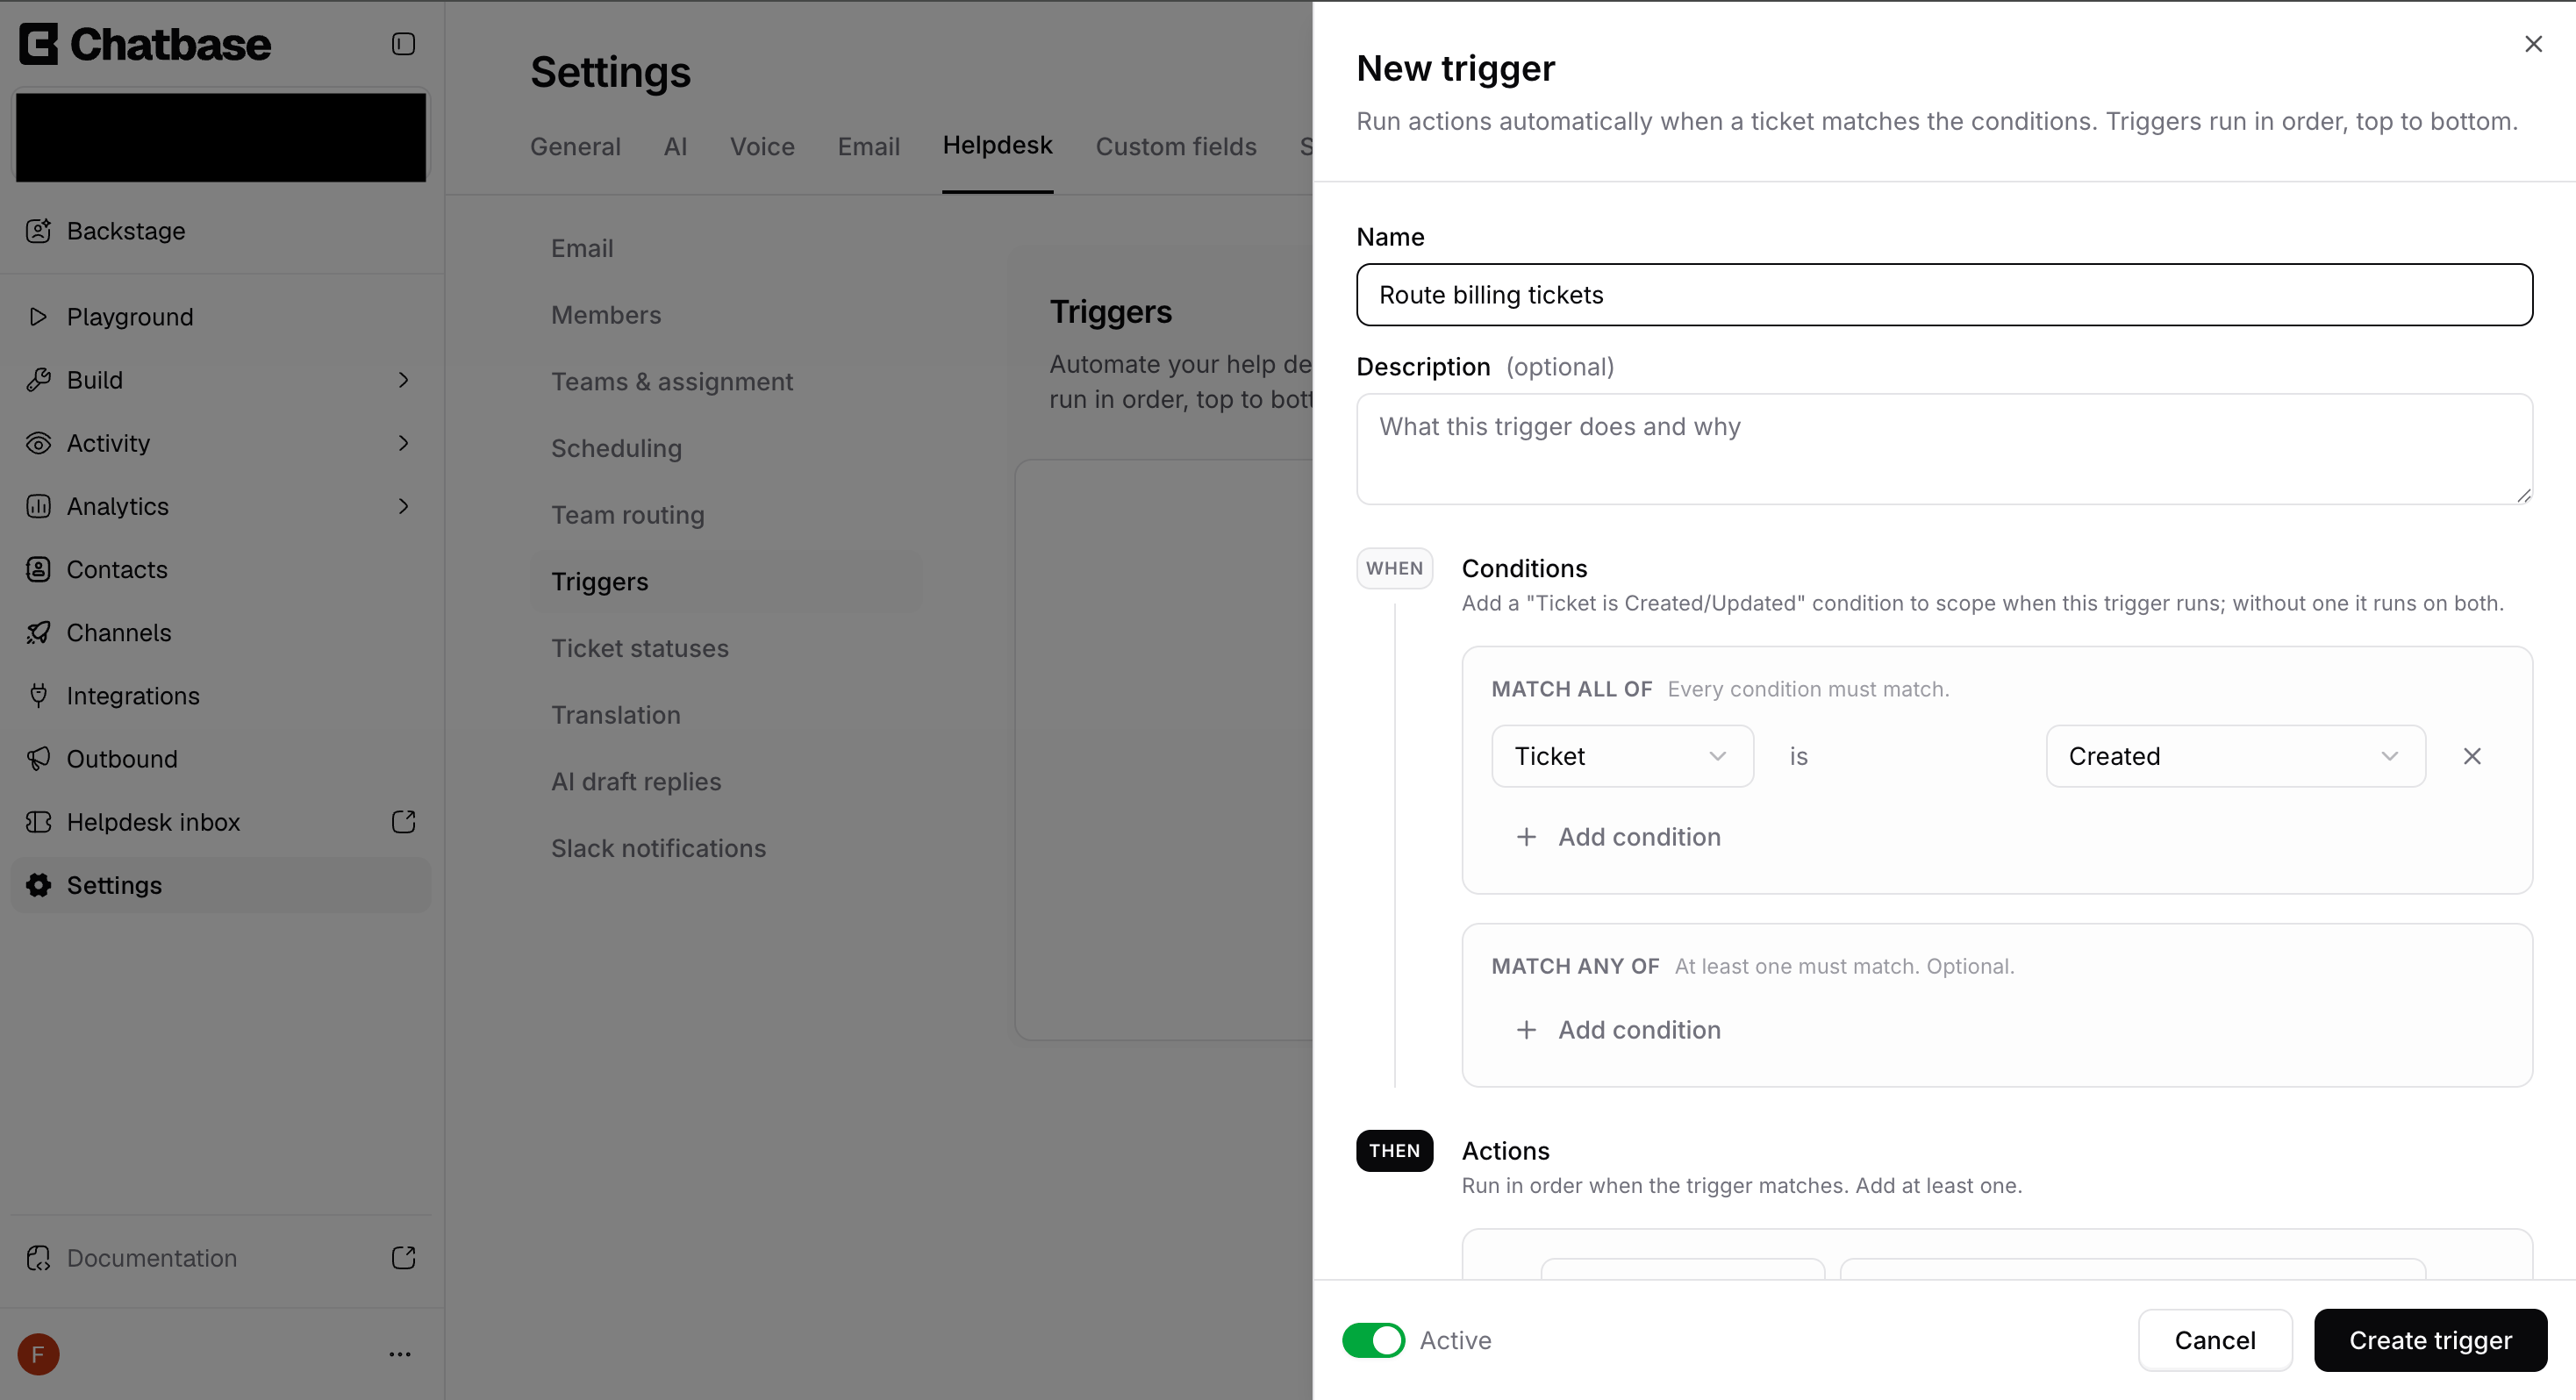
3
Set the conditions (WHEN)
Add the conditions that decide when the trigger should run. See Conditions below for every available field and operator.
4
Add the actions (THEN)
Add at least one action to perform when a ticket matches. See Actions below for the full list.
5
Activate and save
Use the Active / Paused toggle to decide whether the trigger runs, then click Create trigger. New triggers are active by default.
Conditions
Conditions decide which tickets a trigger applies to. They’re organized into two groups:- Match ALL of - every condition in this group must match.
- Match ANY of - at least one condition in this group must match. This group is optional and is combined with the ALL group using AND.
When does a trigger run?
Add a Ticket is Created or Ticket is Updated condition to control when a trigger fires. If you don’t add one, the trigger runs on both create and update.Ticket condition fields
Contact condition fields
Match on the ticket requester’s contact record. These look up the person who opened the ticket, so a ticket from an unidentified visitor (no contact record) matches nothing. Contact fields appear under the Contact group in the field picker.Routing condition fields
These describe how the ticket arrived (its delivery “envelope”) and are only meaningful on ticket creation - they’re how you replace Team Routing with triggers. Pair them with aTicket is Created condition and an Assign team action.
About operators
The
changed* operators only make sense on updates - they compare the value before and after the change. On ticket creation there’s no previous value, so a changed condition won’t match.Actions
Actions are what the trigger does when a ticket matches. Add at least one; they run in order, top to bottom.Send webhook
The Send webhook action posts an HTTP request to an external endpoint - to notify another system, kick off an automation, or sync ticket data. The action itself is just a selector: you pick one of the webhooks you’ve configured under Settings → Webhooks. The endpoint URL, headers, request body, and signing secret all live on the webhook connection, so several triggers can reuse the same one.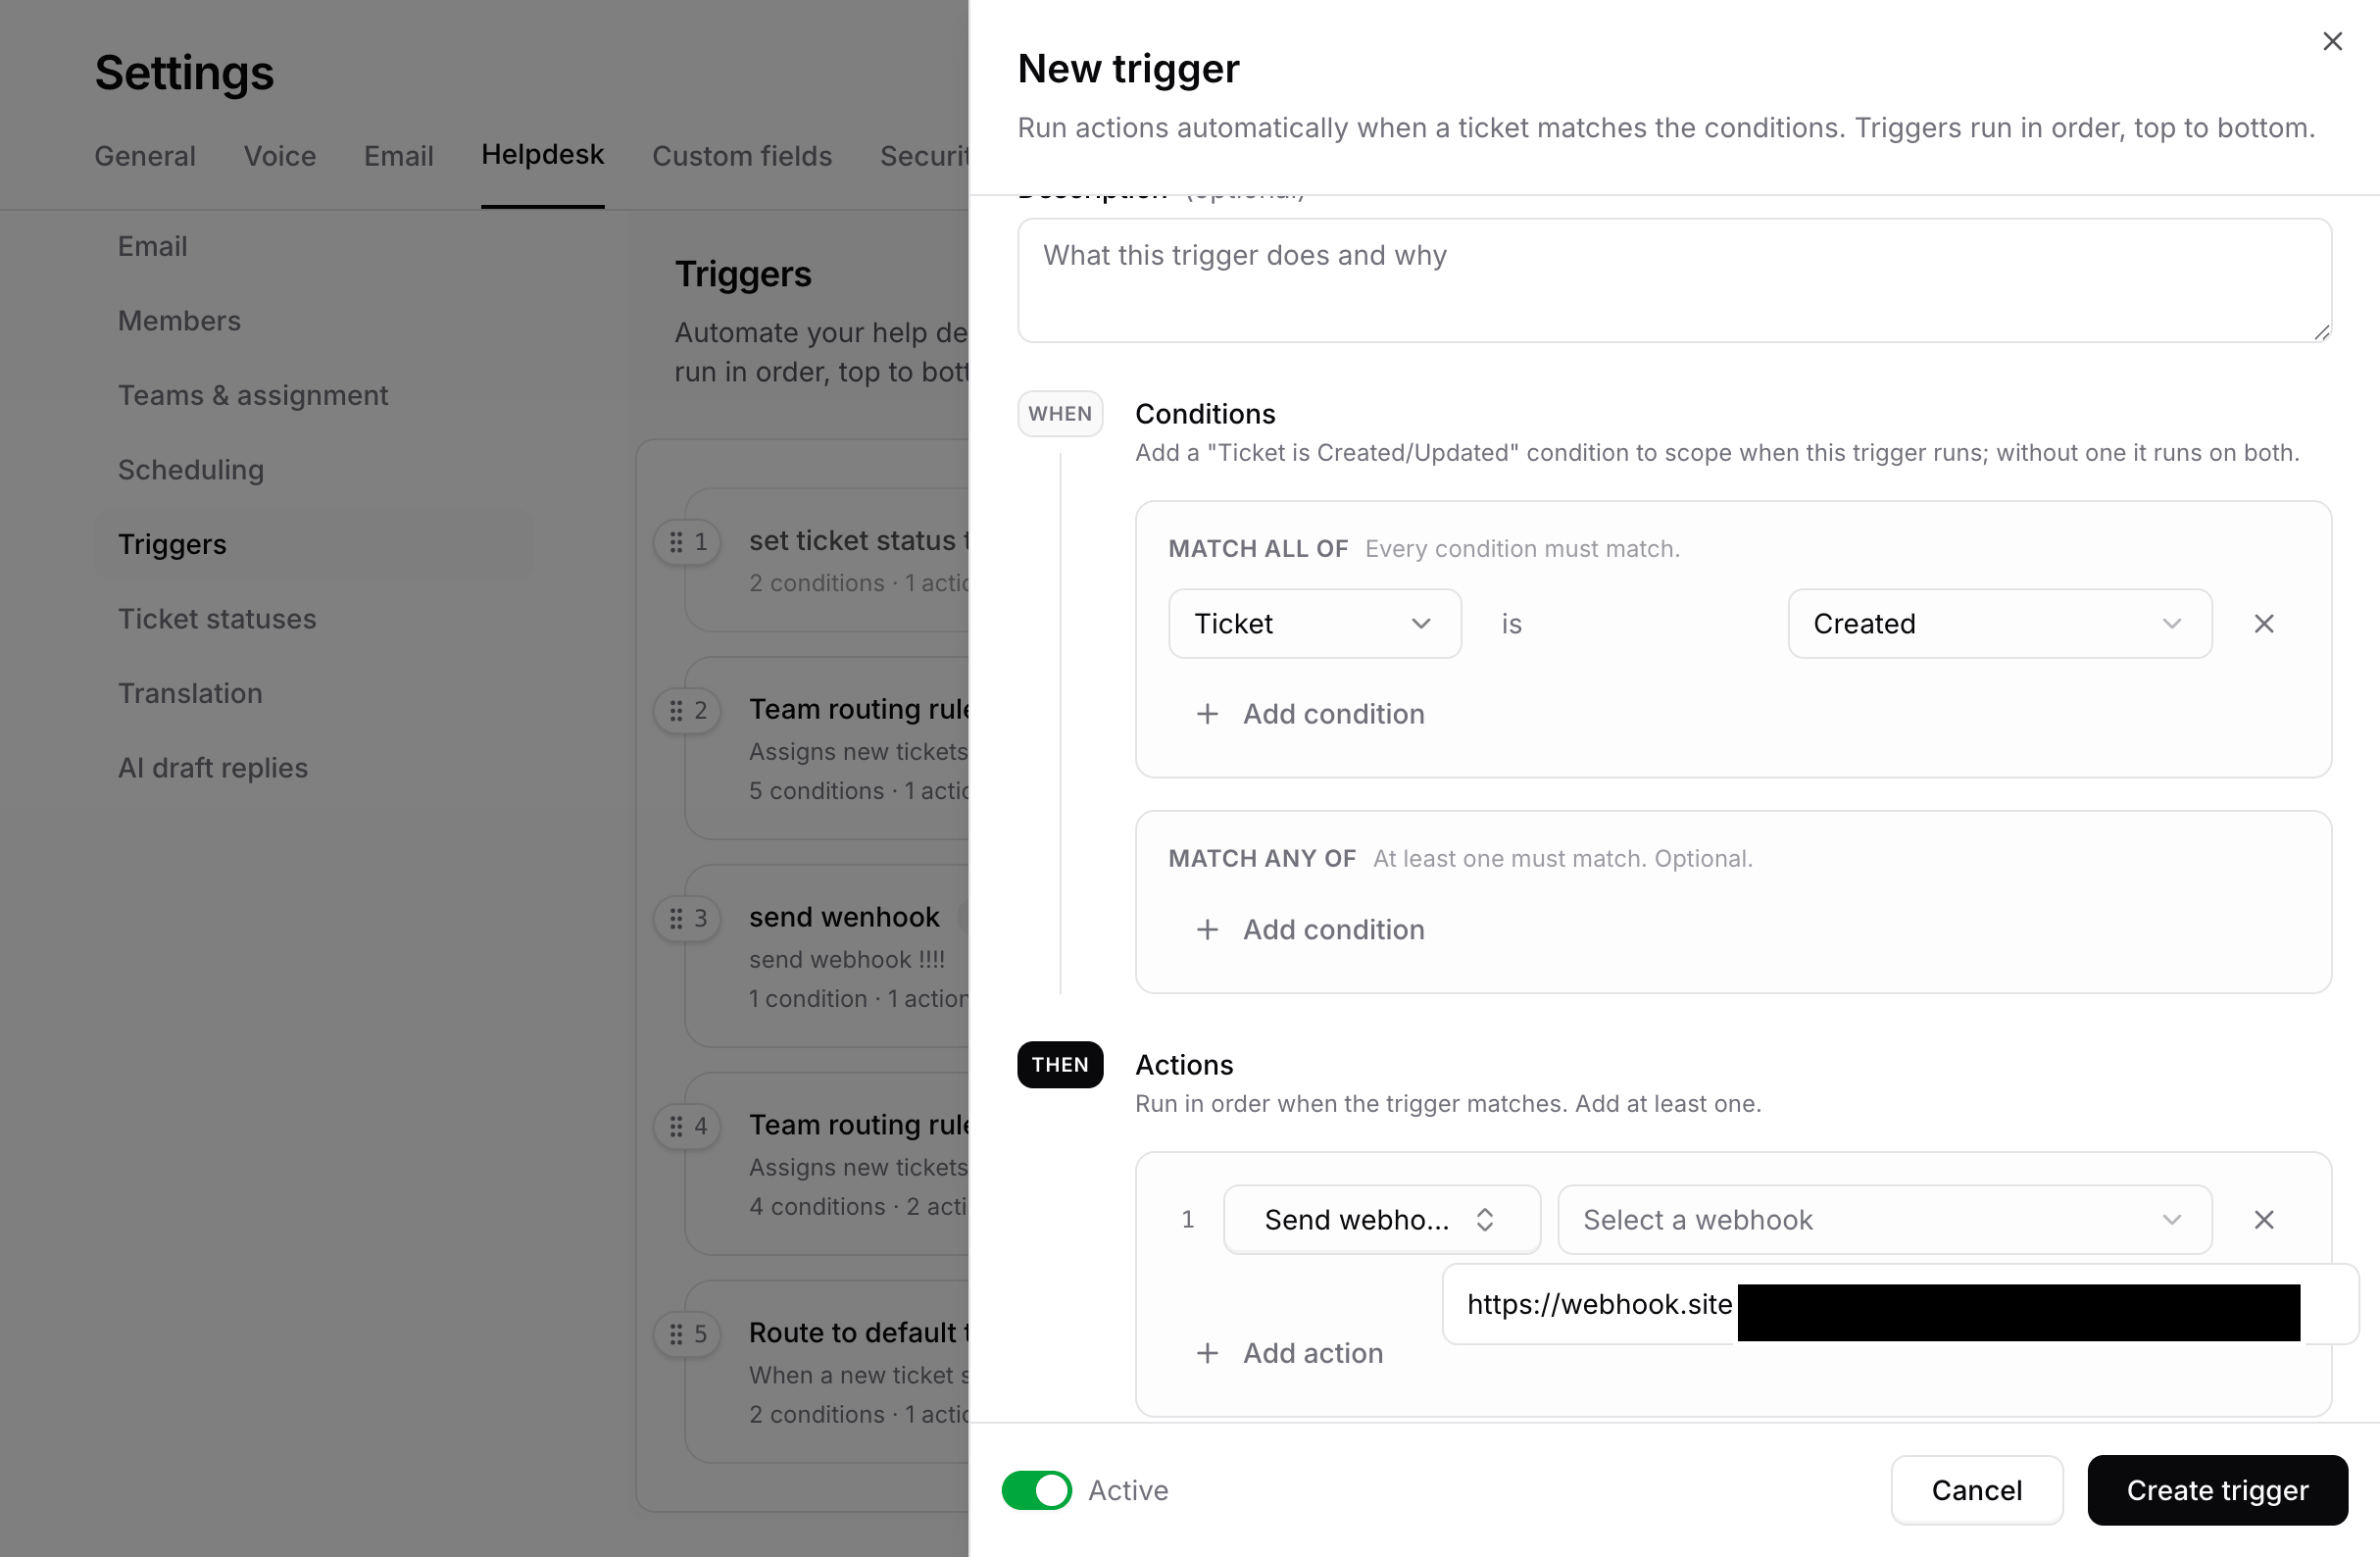
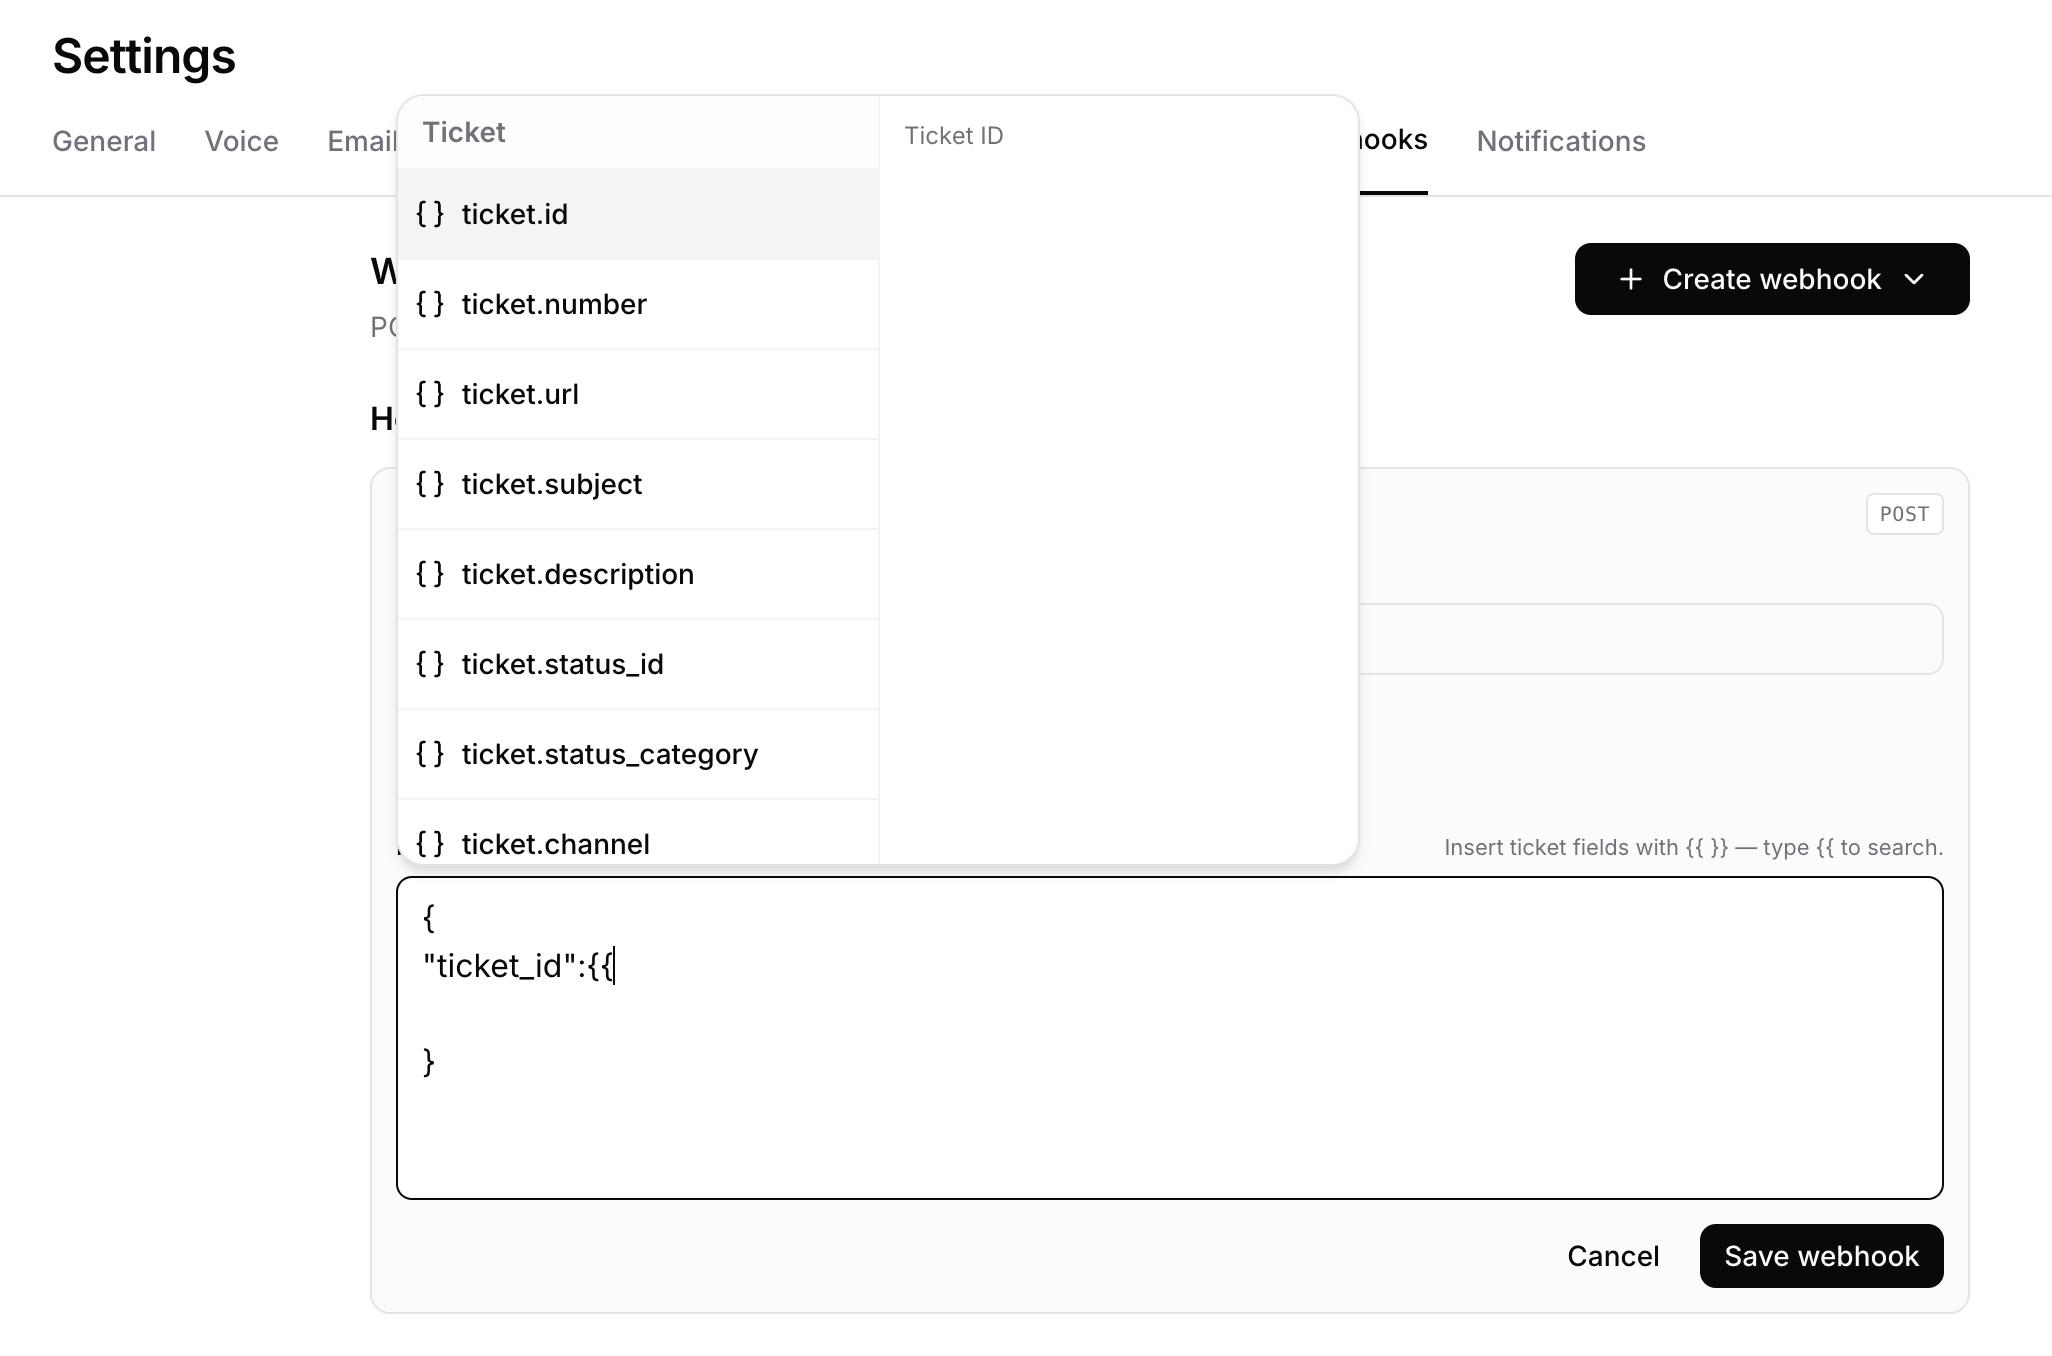
- Configure the endpoint, custom headers, and a request body template (with
{{ticket.*}}placeholders) once under Settings → Webhooks, then reference it from as many triggers as you like. - Each delivery is signed with the connection’s secret via an
X-Chatbase-Signatureheader so your endpoint can verify it came from Chatbase. - Webhooks are delivered after the ticket change is saved and are retried on transient failures, so your endpoint may receive the same event more than once - dedupe on the delivery id.
Send email
The Send email action sends an email when a ticket matches - to keep the customer posted on a status change, alert a team about a new high-priority ticket, or notify an outside address that doesn’t use the help desk. Everything is configured right on the action: who receives it, the subject, and the body.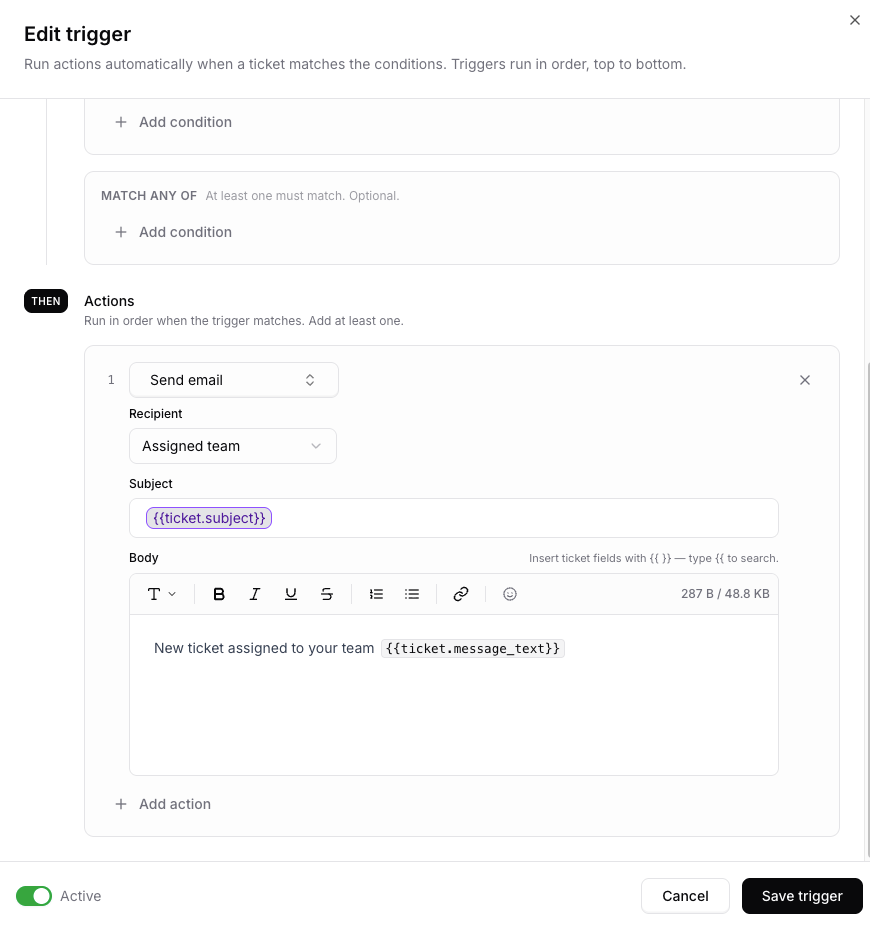
Recipient
Team recipients send one email per member. A recipient that can’t be resolved to a valid address - an unassigned ticket with an Assignee recipient, for example - is skipped without failing the rest of the trigger.
Subject and body
The Subject is a single line and the Body is a rich-text editor with formatting, lists, and links. Both accept ticket fields as{{ }} placeholders - type {{ to search and insert one. Placeholders are filled in with the ticket’s values at send time, after every trigger in the run has finished, so the email reflects the ticket’s final state (for example, the status your trigger just set).
A placeholder with no value (for example,
{{ticket.requester_name}} for a contact without a name) is replaced with an empty string. Ticket values are inserted as plain text, so formatting in a customer’s message can’t alter your email’s layout.
Managing Triggers
Ordering
Triggers run in the order they appear in the list. Drag the handle on the left of any trigger to reorder it. Because every matching trigger fires, the order matters when two triggers touch the same field - the later one wins.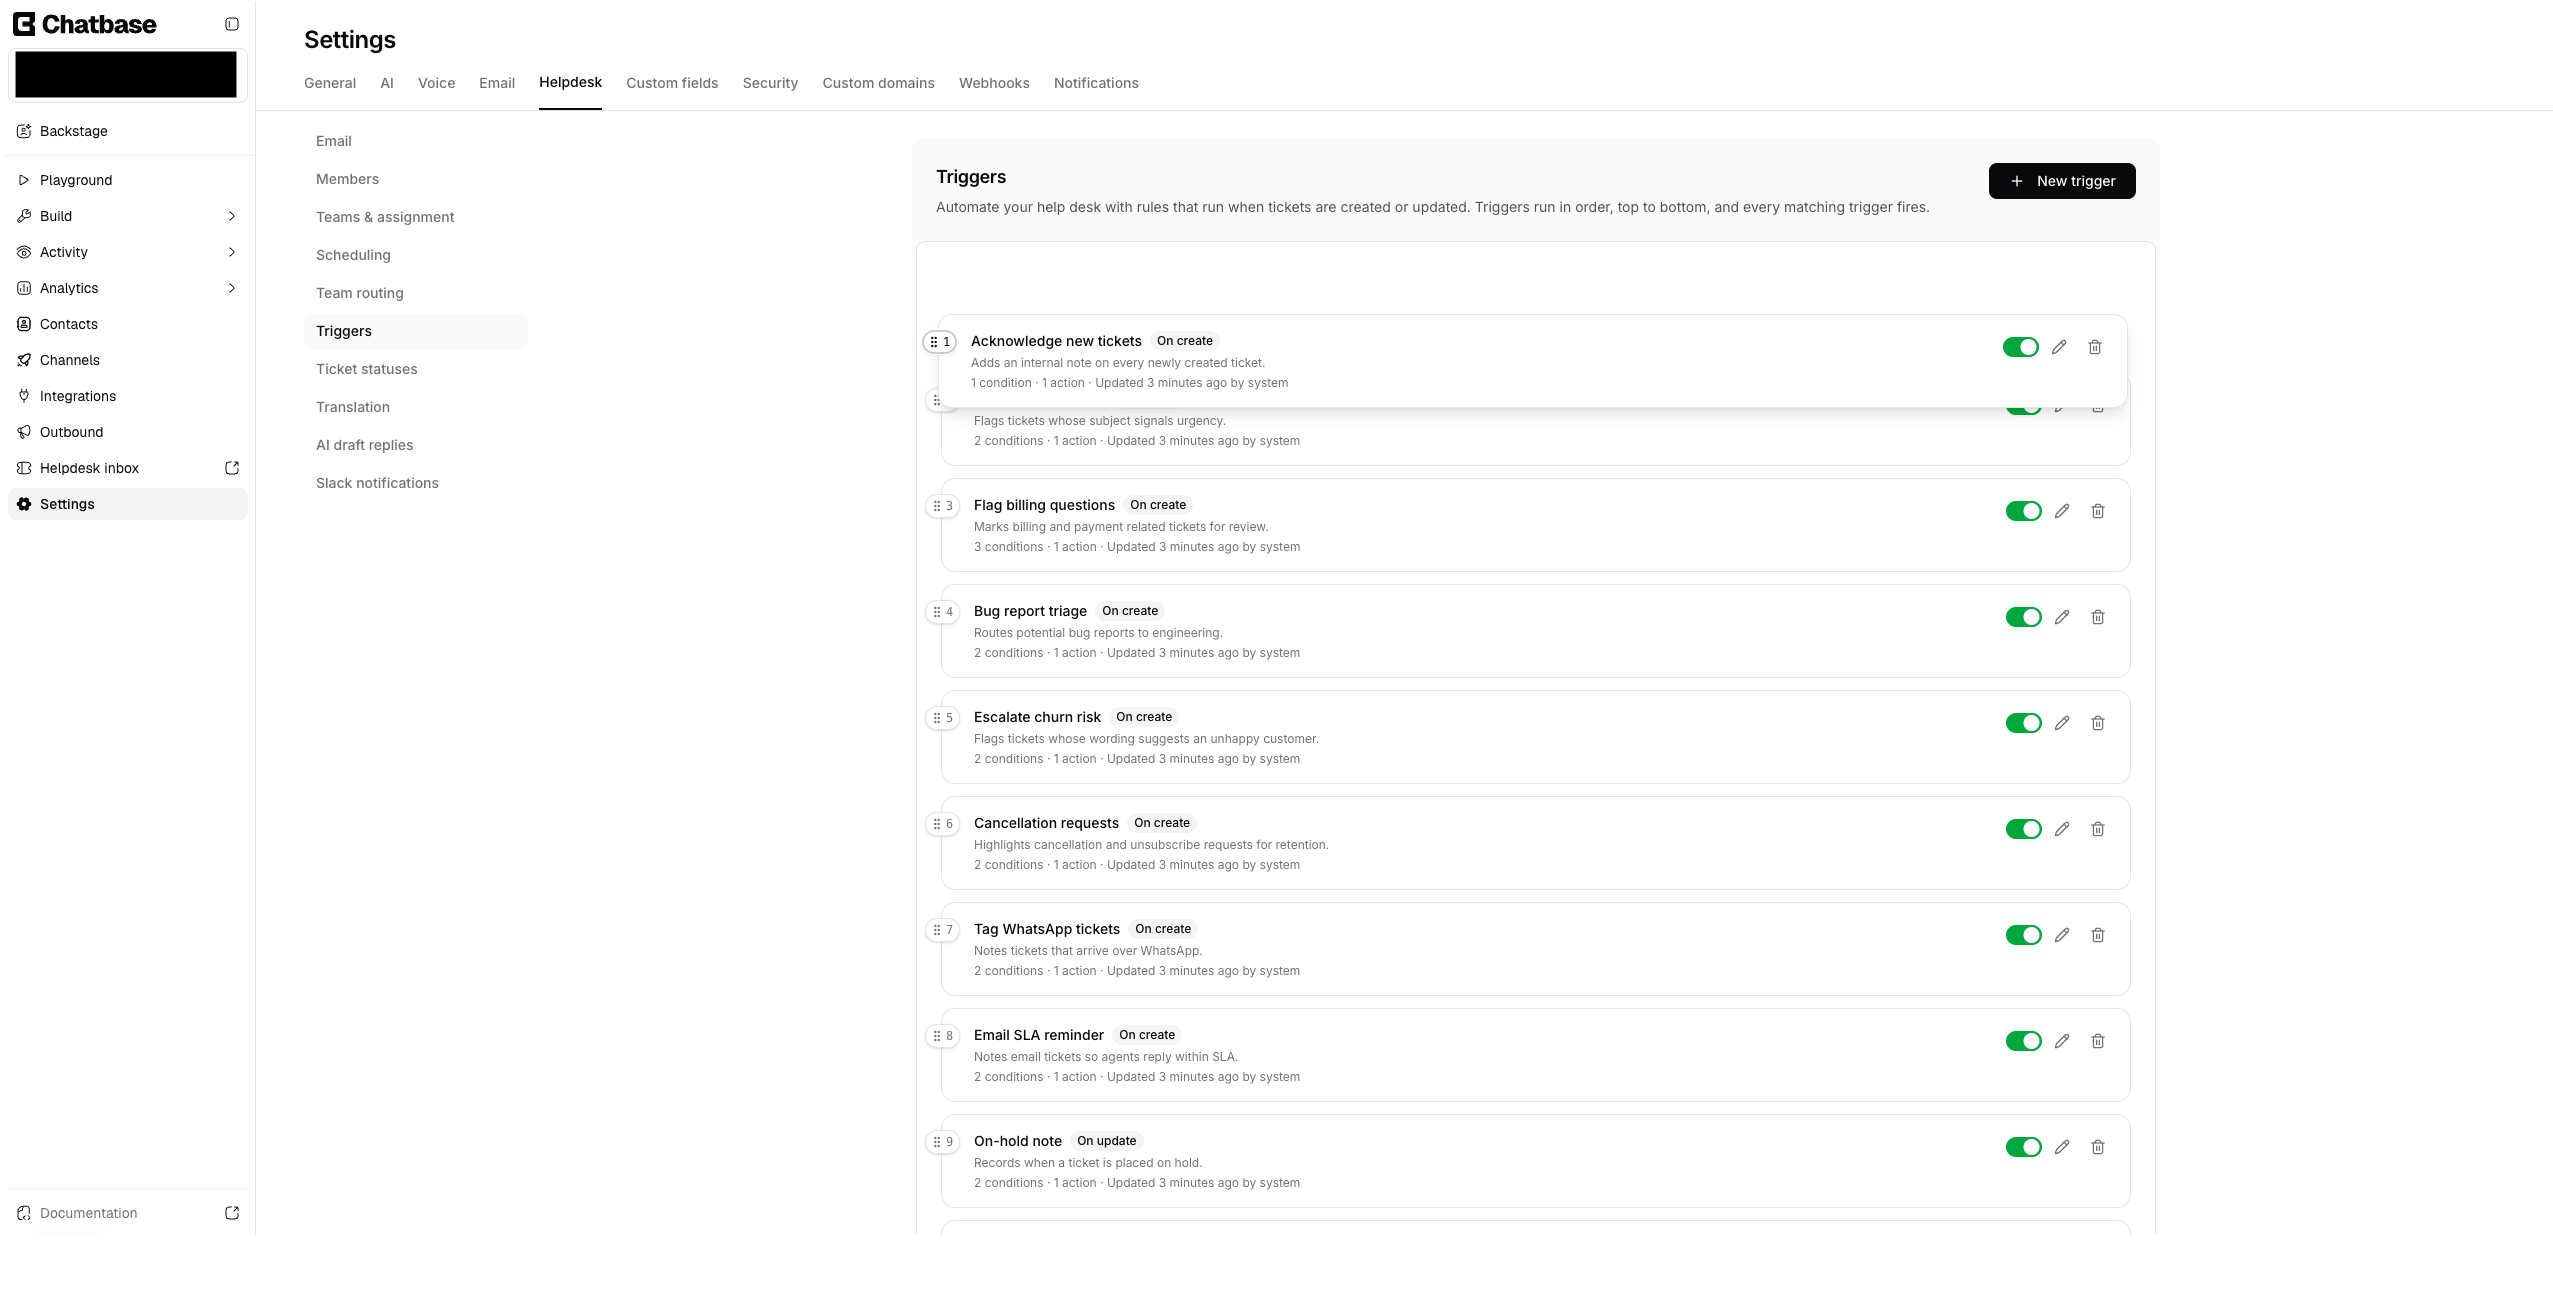
Activate or pause
Use the switch on each trigger row to turn it Active or Paused. Paused triggers stay in your list but don’t run, so you can temporarily disable a rule without deleting it.Edit or delete
Open a trigger to edit its name, conditions, or actions at any time. To remove a trigger, use the delete control and confirm - deleted triggers stop running on new and updated tickets, and this can’t be undone.Needs attention
If a trigger references something that no longer exists - a deleted team, an archived status, or a removed agent - it’s flagged with a Needs attention badge. Open the trigger and update the affected condition or action to fix it.Good to Know
- Every matching trigger fires. Triggers aren’t exclusive - all rules whose conditions match will run, in order. Use ordering to control which action takes precedence.
- Triggers run after the ticket is saved. They apply once a create or update is committed, so they never block or fail the underlying ticket change. Webhook and email actions are sent after the save, too.
- Only active triggers run. Pause a trigger to disable it without losing its configuration.
- Triggers replace Team Routing. Route tickets to teams with a
Ticket is Createdcondition, a Recipient address / Channel condition, and an Assign team action. See the Team Routing page for the field-by-field mapping.