Integration Methods
You can connect your Shopify store to Chatbase in two ways:| Feature | Via Chatbase (Recommended) | Via Shopify Marketplace |
|---|---|---|
| Billing | Through Chatbase | Through Shopify |
| Available Add-ons | Auto recharge credits, Extra message credits, Extra AI agents, Custom Domains, Remove ‘Powered By Chatbase’ | Auto recharge credits only |
| Number of Agents | Multiple Agents (only a single agent connected to the Shopify store though) | Single agent per account |
| Setup Location | Chatbase Dashboard | Shopify App Store |
We recommend connecting via Chatbase for full access to all features and add-ons.
Method 1: Connect via Chatbase (Recommended)
This method gives you access to all Chatbase features and add-ons.Step 1: Set Up Your Chatbase Agent
Before connecting Shopify, you’ll need a Chatbase account and an agent ready to use. If you haven’t set this up yet, create a free Chatbase account and build your first AI agent. Make sure to make your agent public. Read More: Create your first Chatbase agent in minutes.Step 2: Find the Shopify Integration
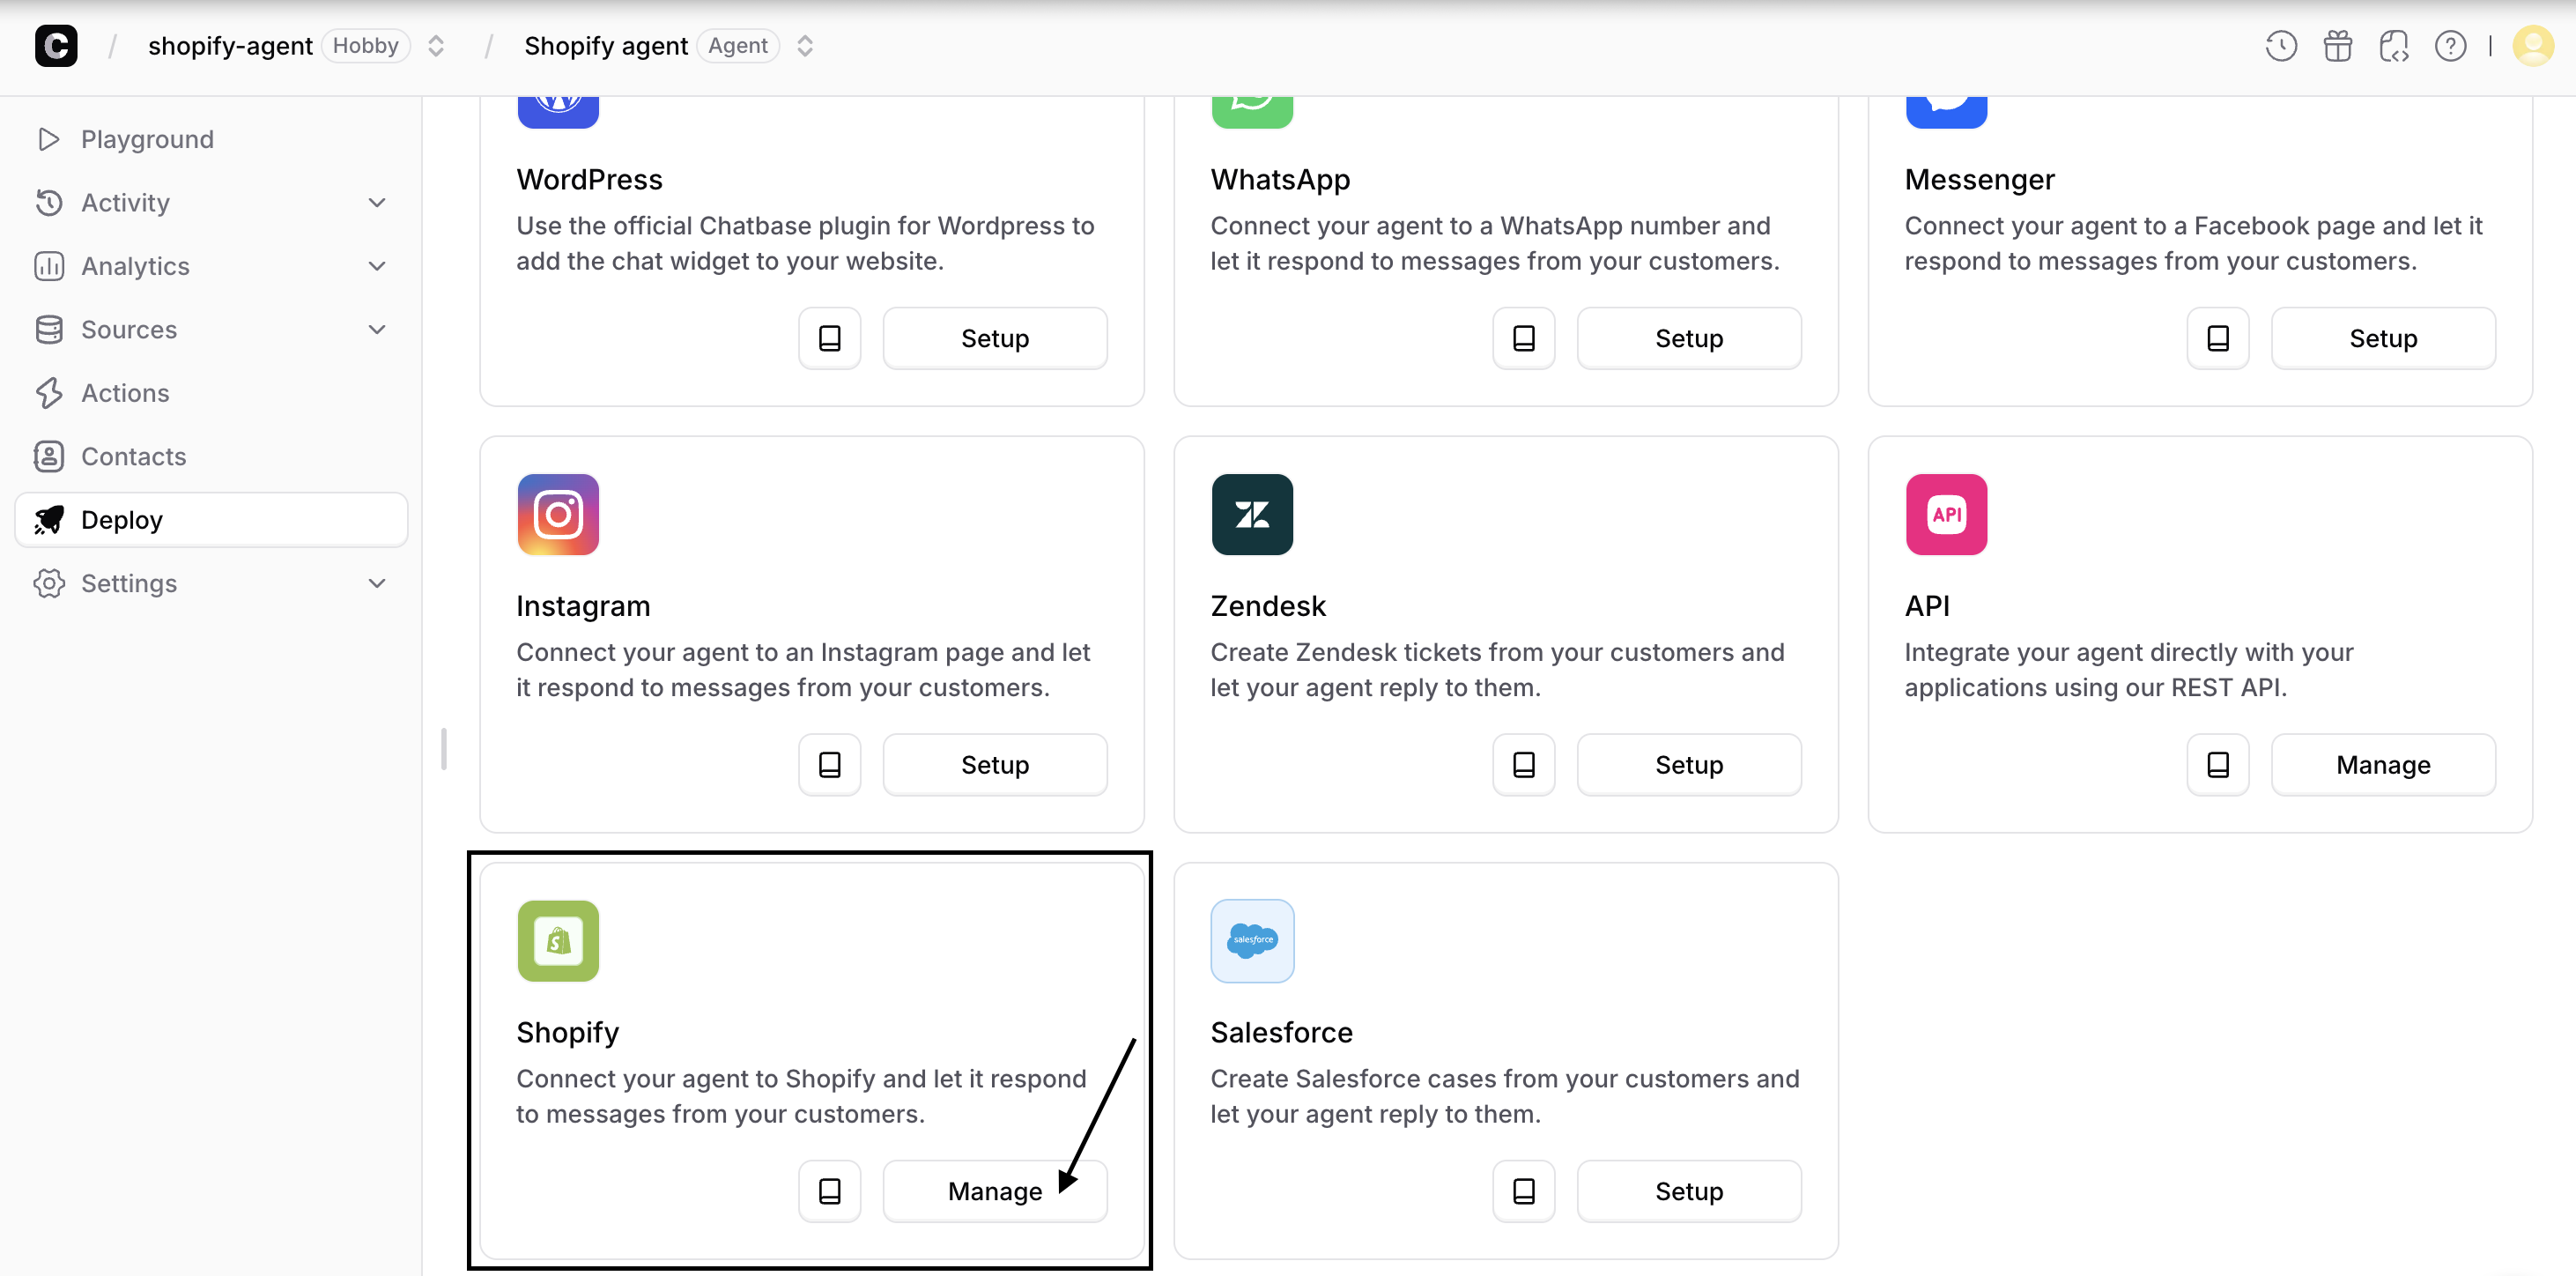
- Go to your Chatbase dashboard and select the agent you want to connect to Shopify.
- Click Deploy from the sidebar and make sure the Chat Widget toggle is switched on.
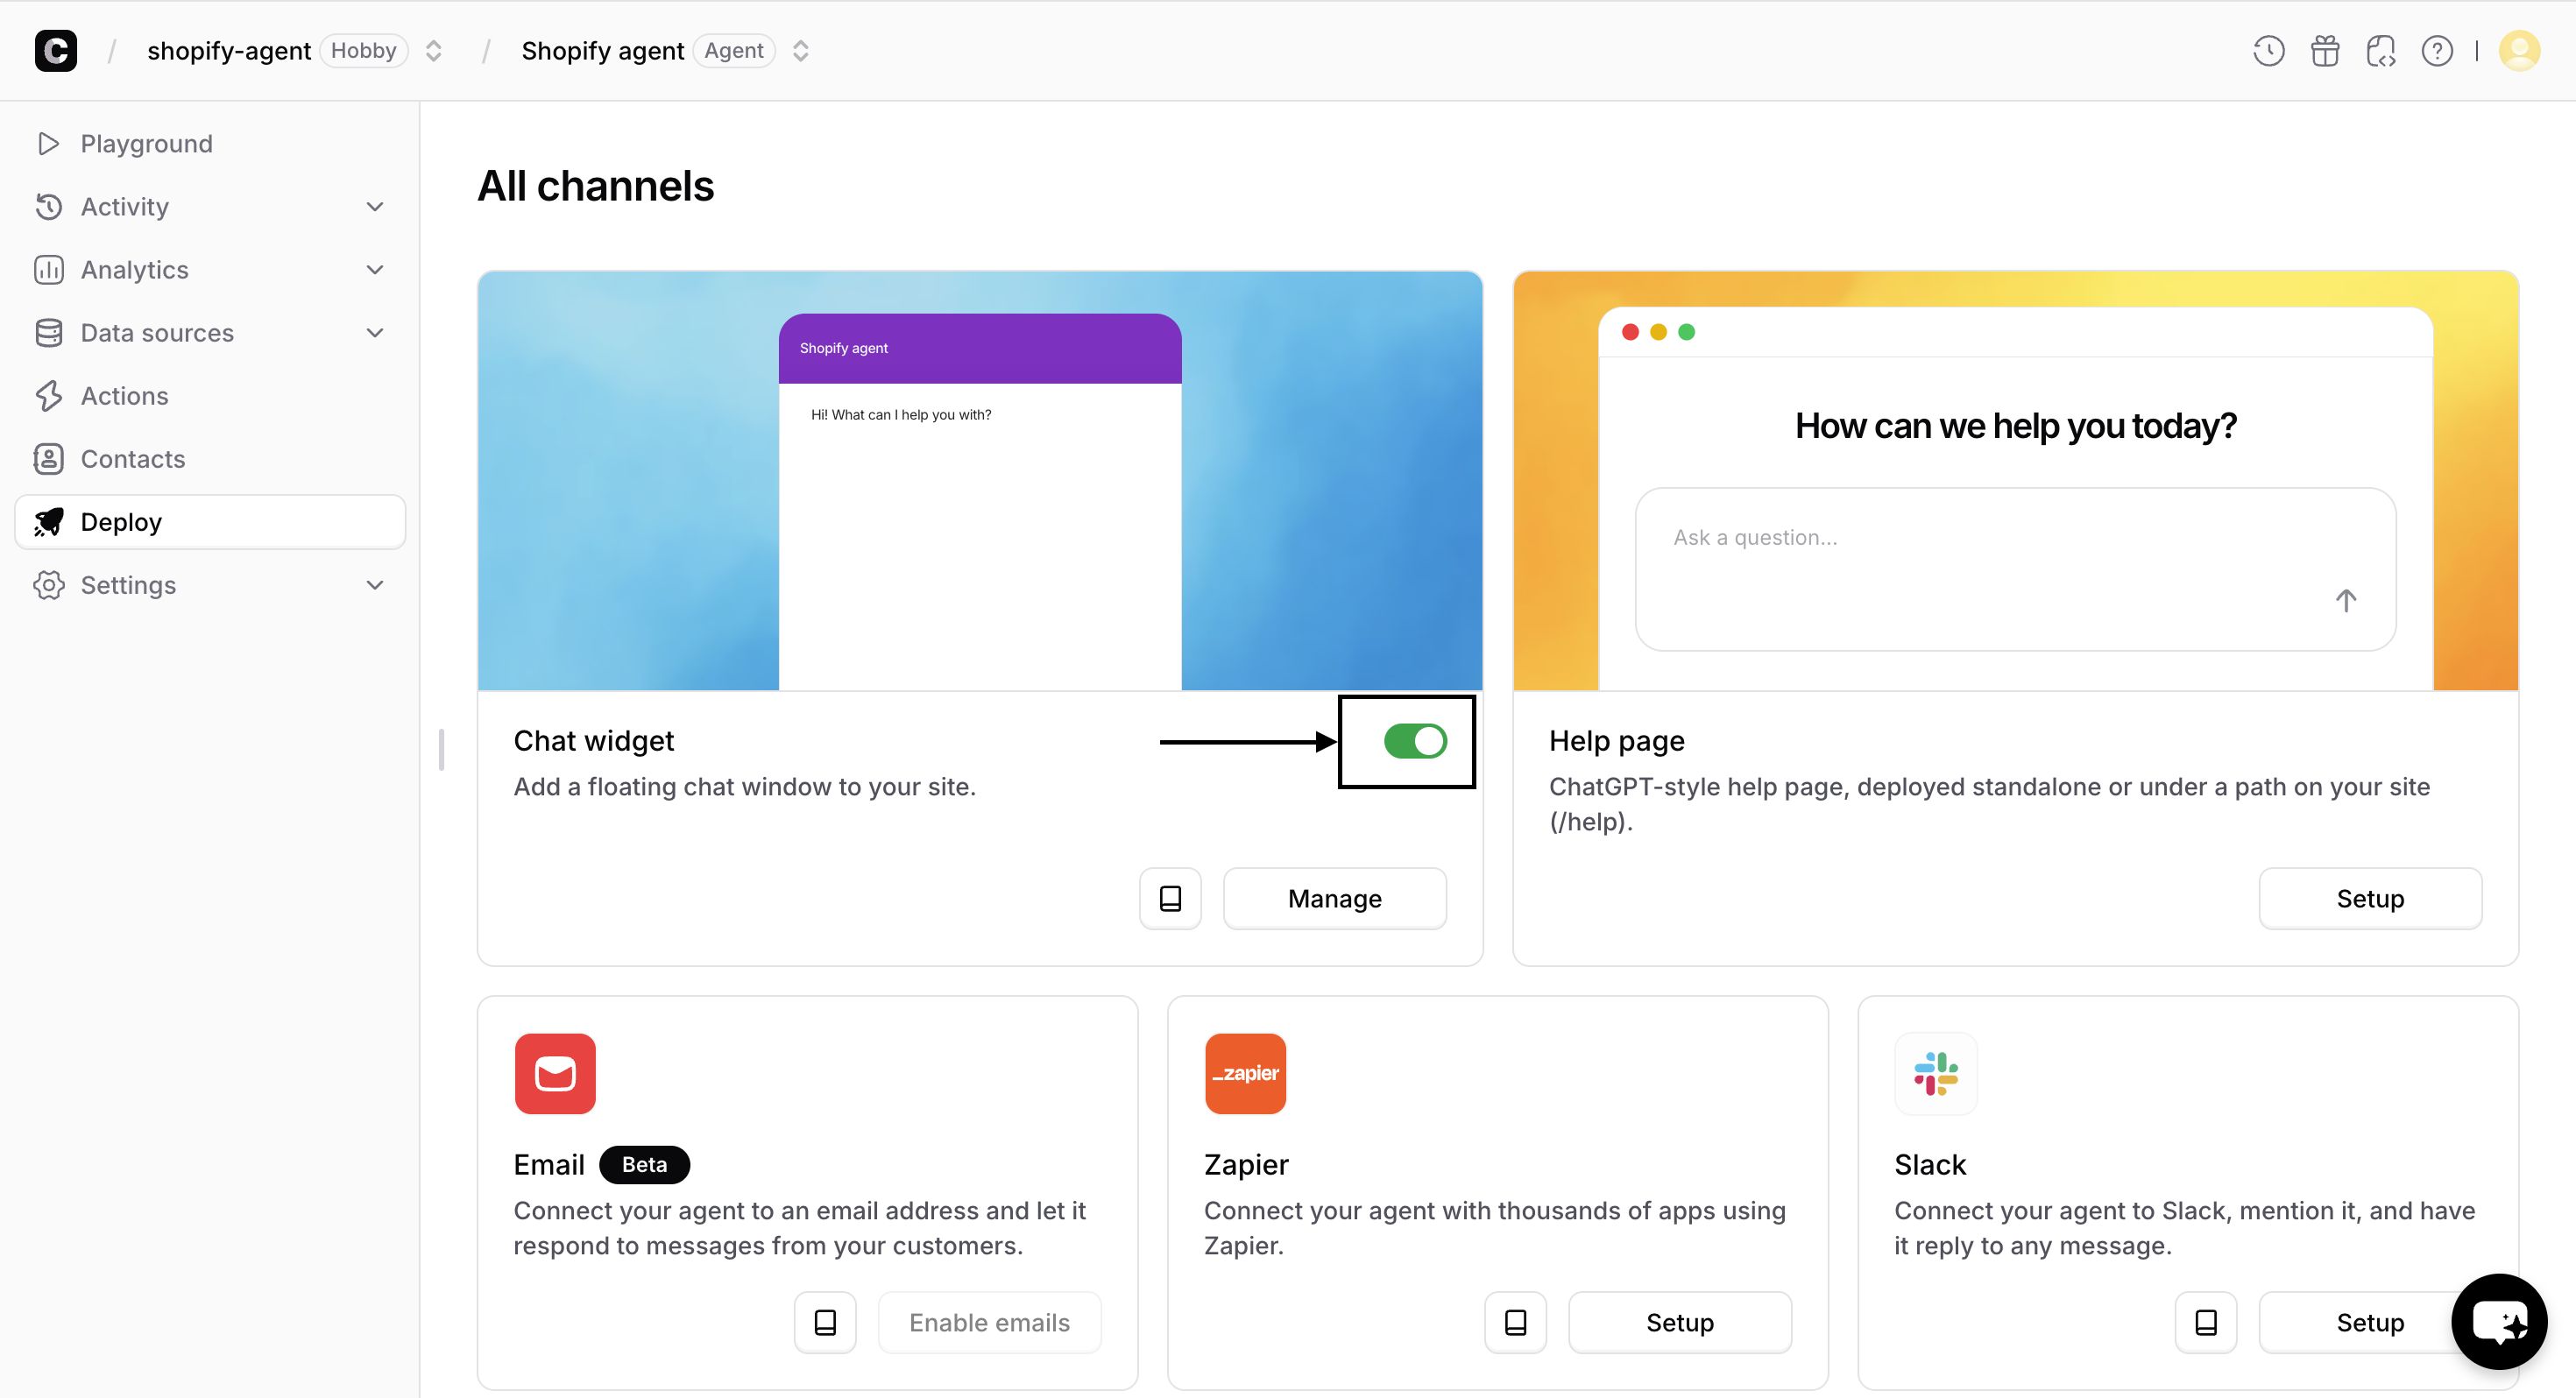
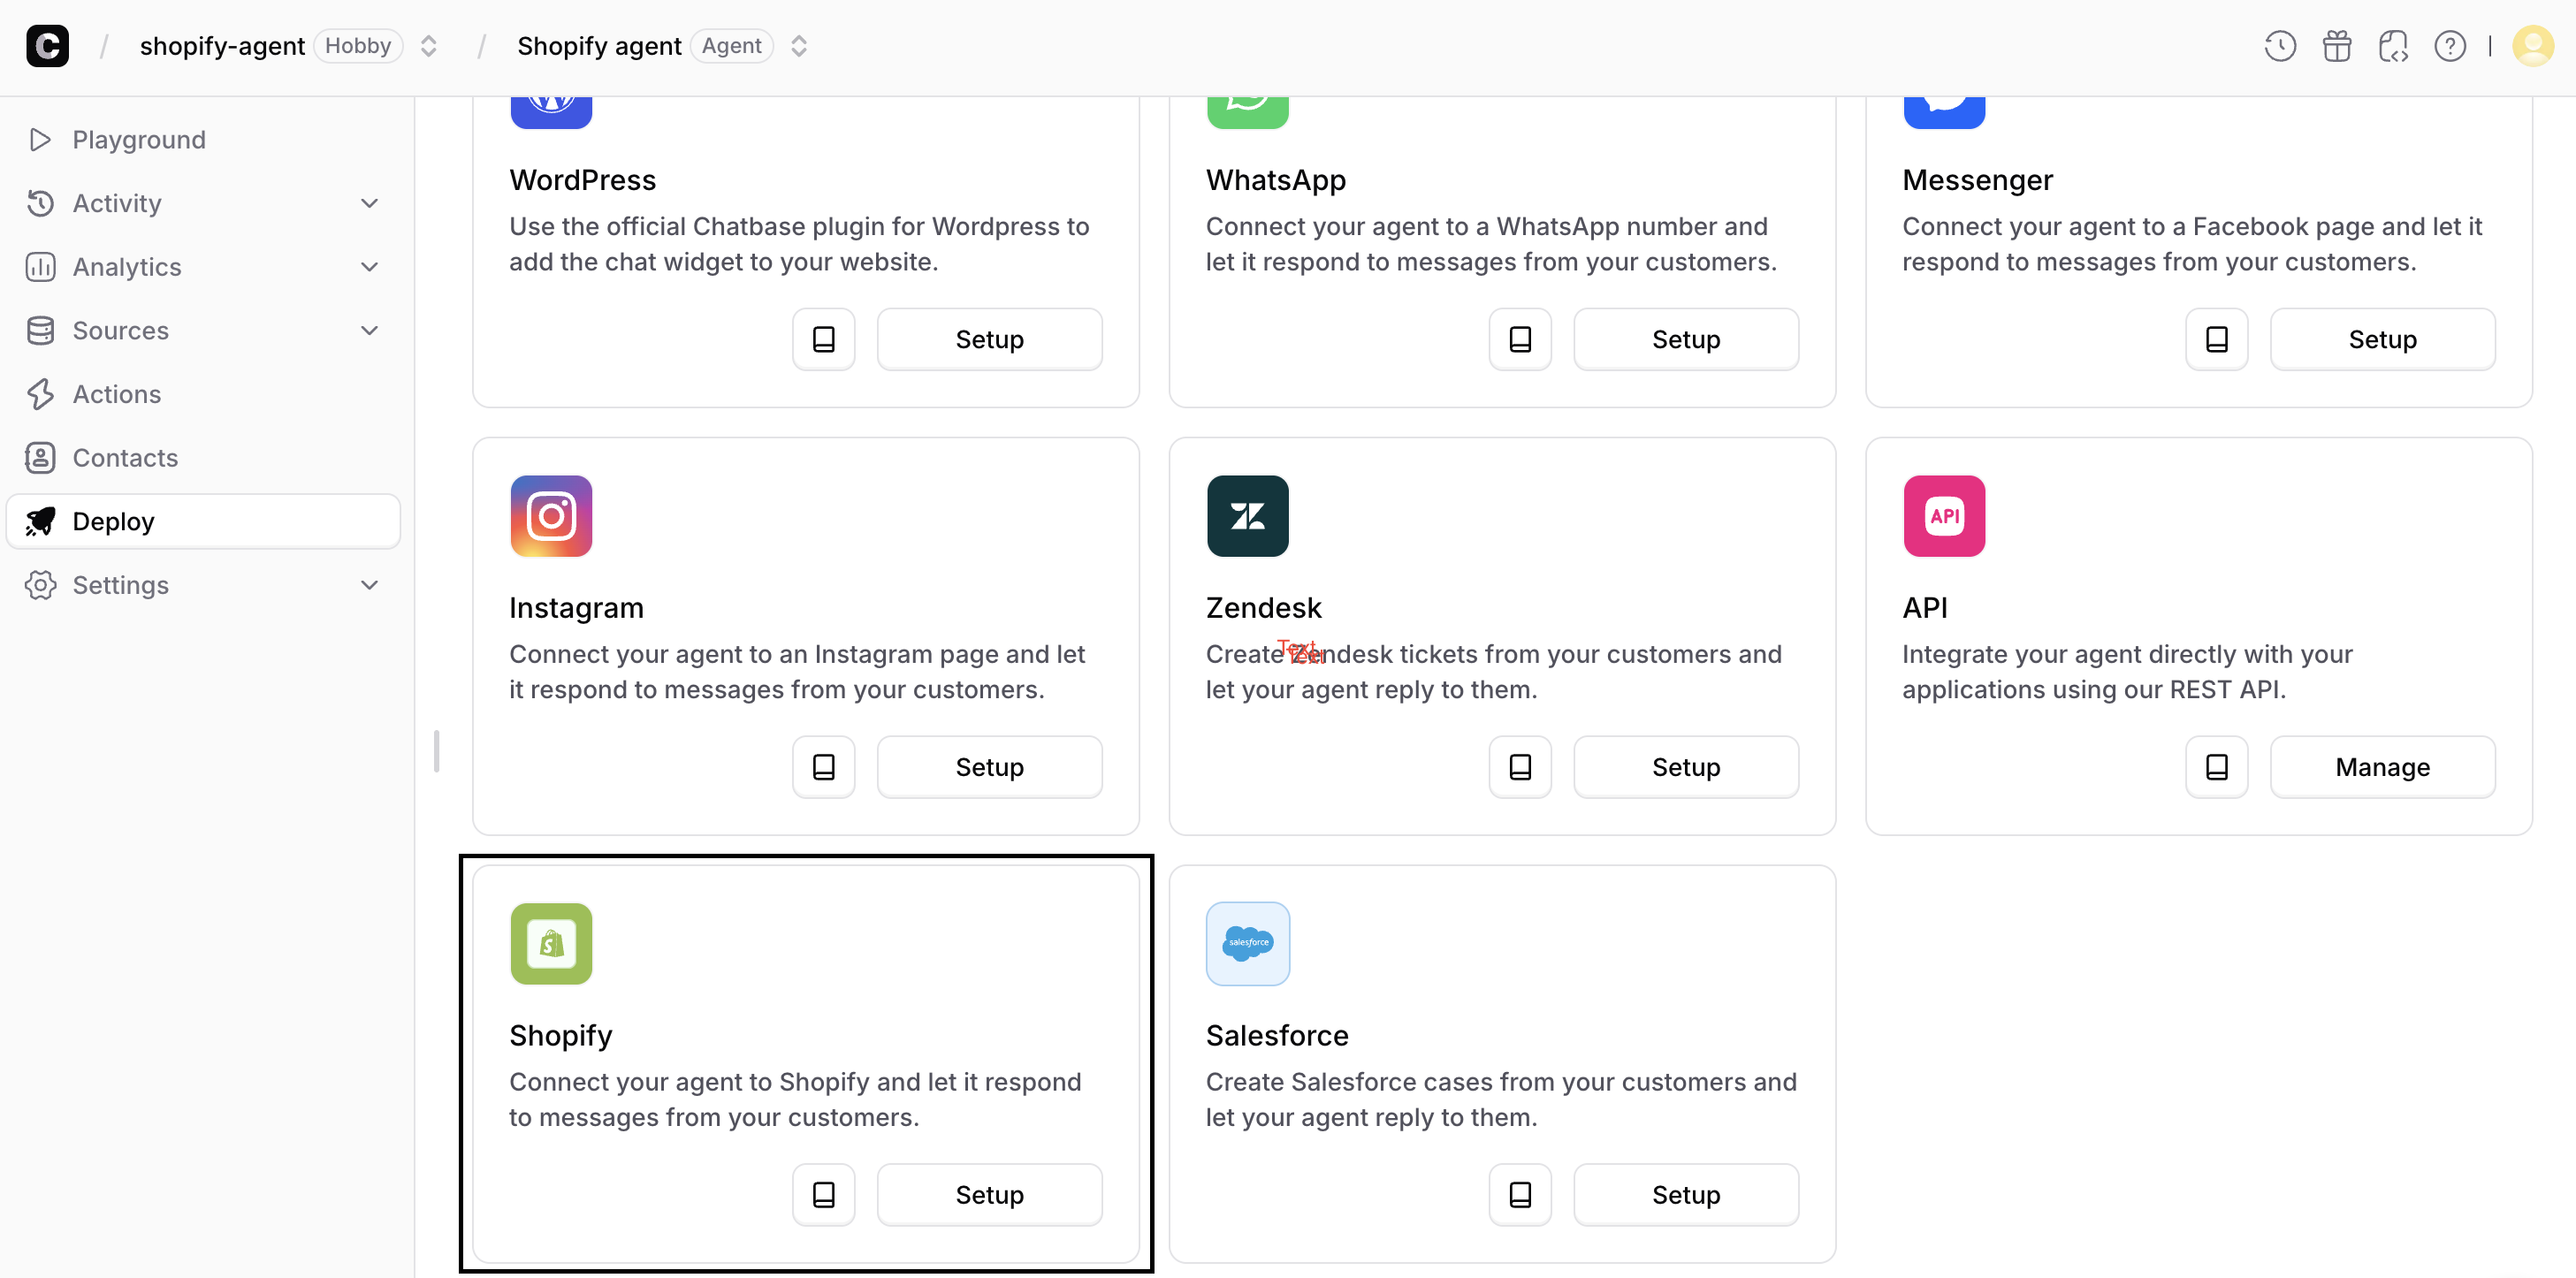
- Find the Shopify card and click Setup.
Step 3: Connect Your Store
- Enter your Shopify store name, this is the subdomain of your myshopify.com URL. For example, if your store is at
mystore.myshopify.com,entermystore.
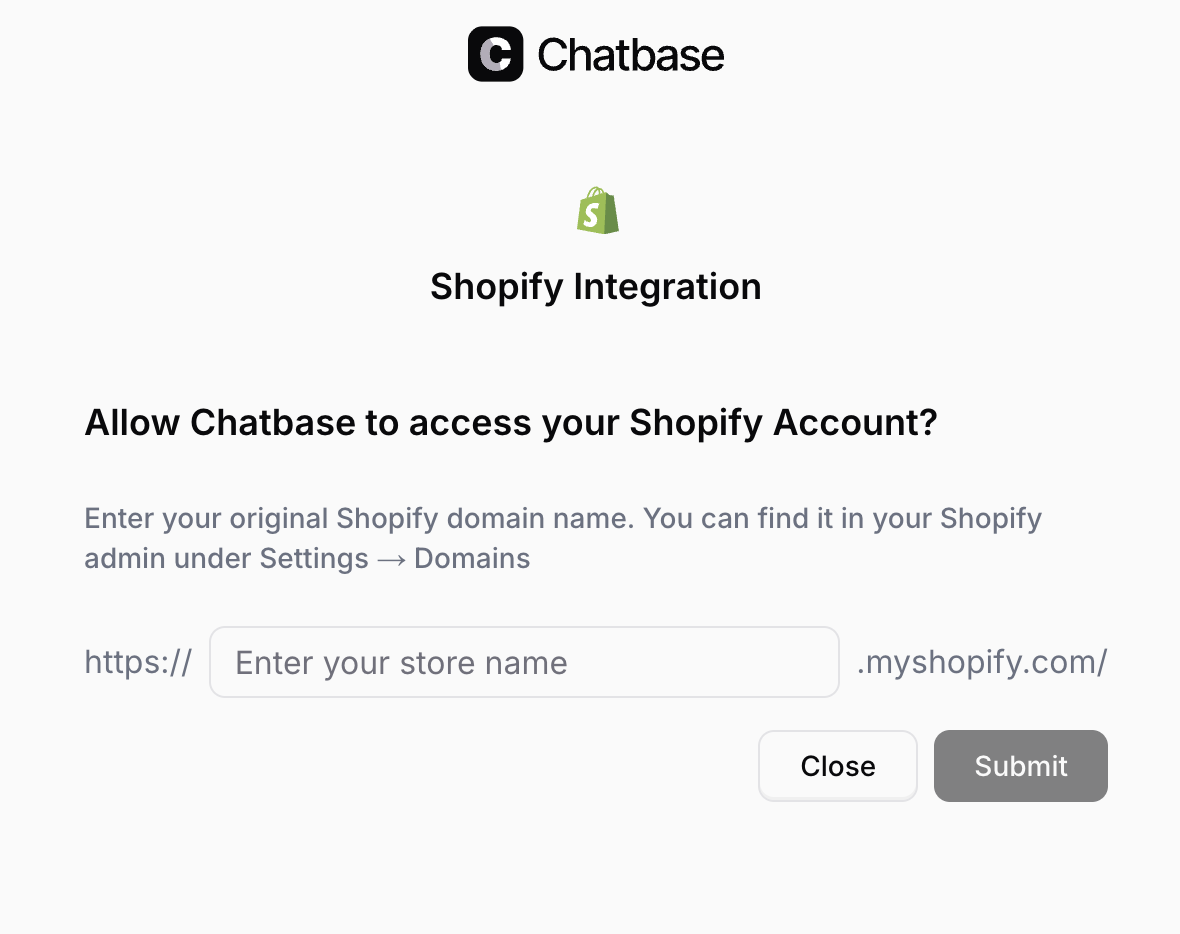
- Click Submit to start the authorization process.
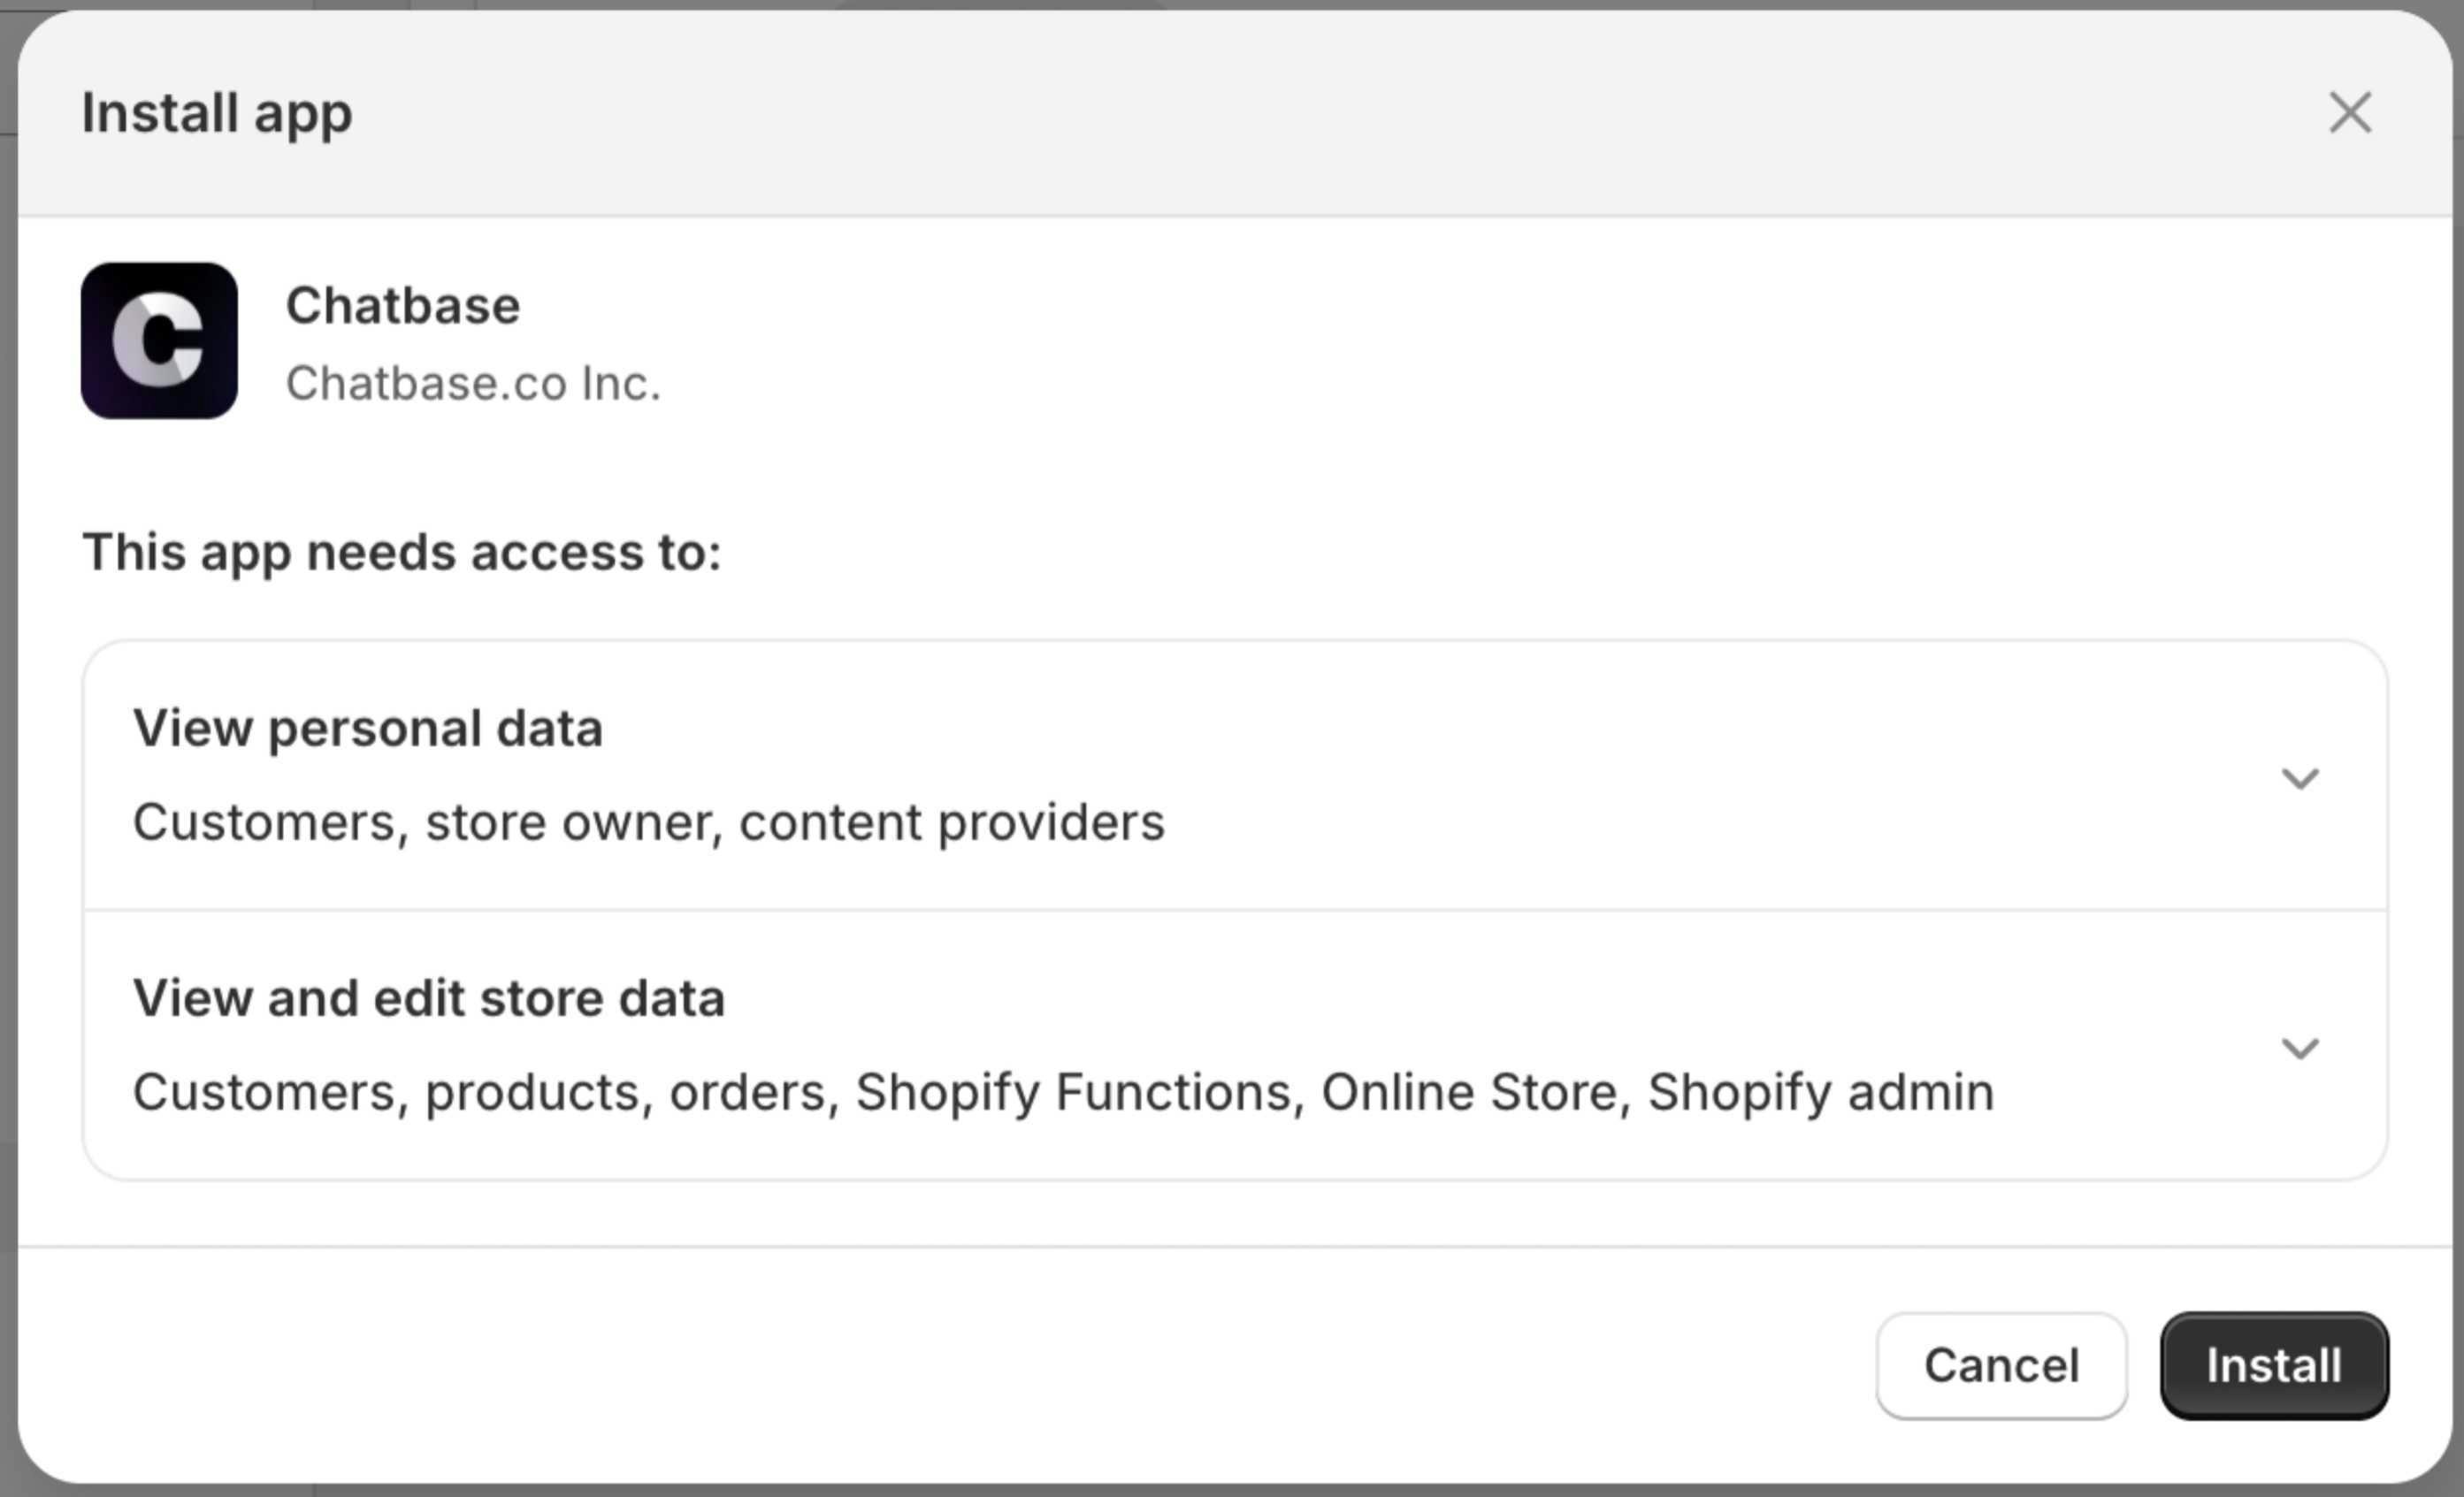
- Shopify will ask you to authorize Chatbase. Review the requested permissions and click Install.
- Once authorized, you’ll be redirected back to Chatbase with a confirmation message.
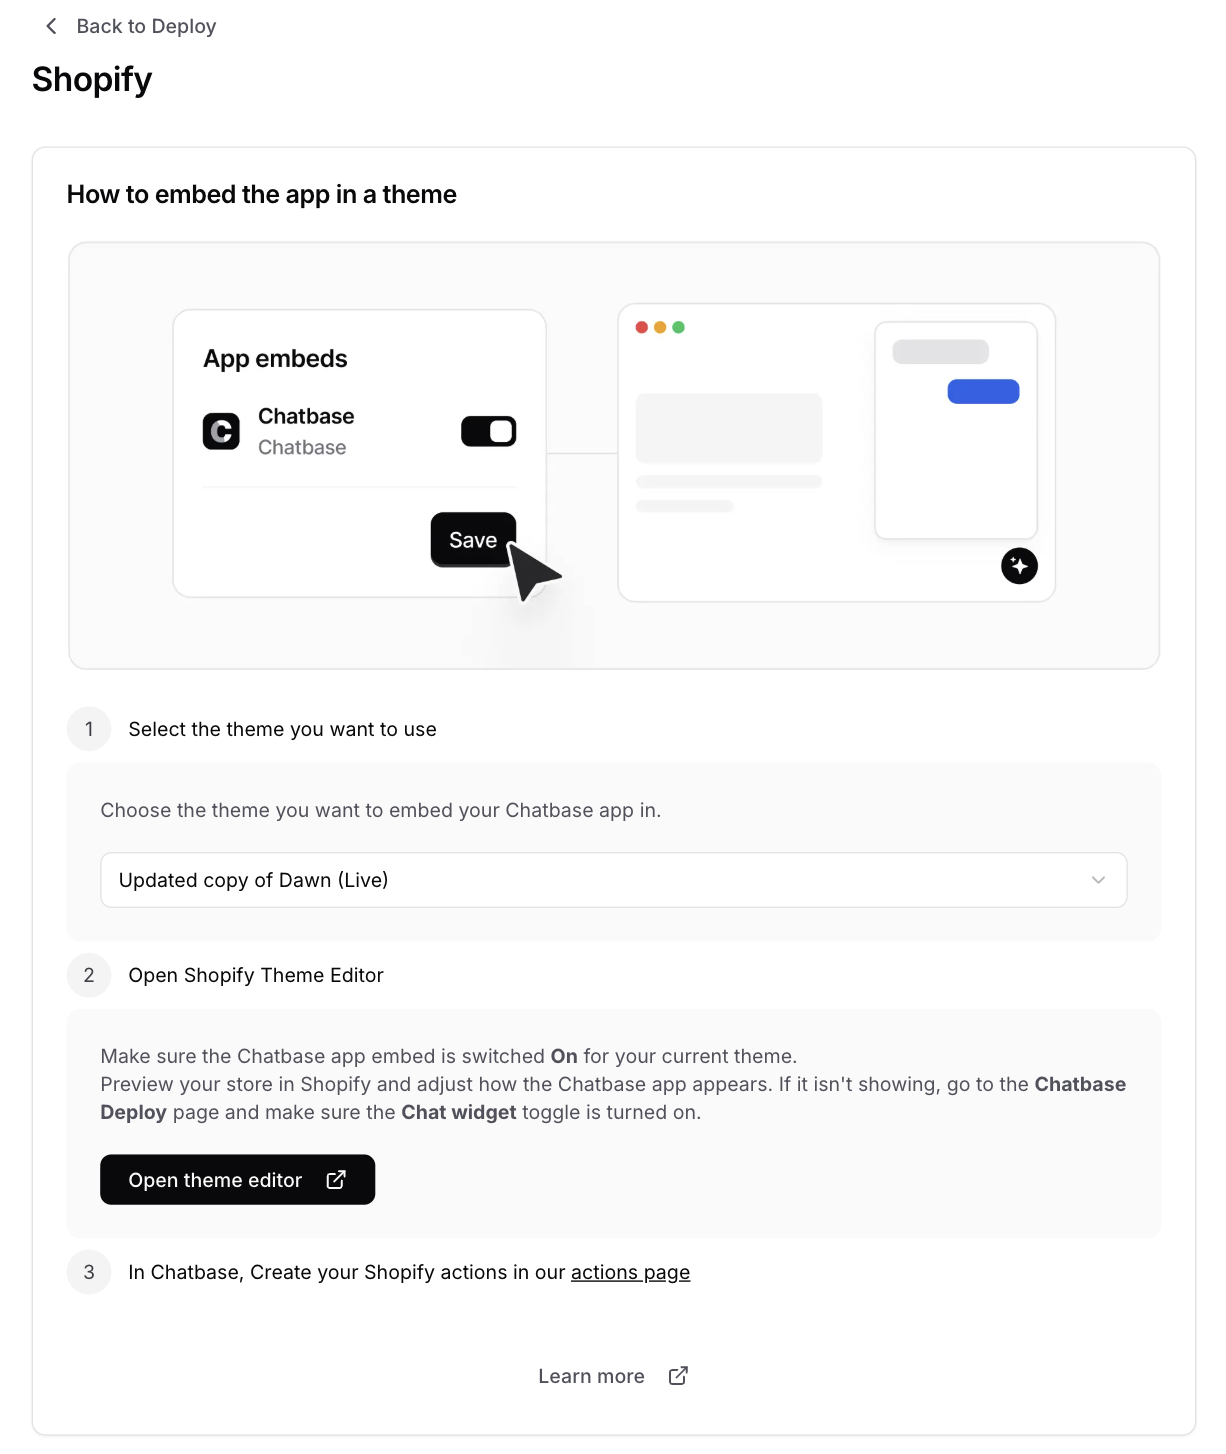
Step 4: Manage your integration
- On the same Deploy page, click Manage on the Shopify card
- Choose the theme you wish to embed your widget in and open your Shopify theme editor to configure the widget’s display settings.
Method 2: Connect via Shopify Marketplace
Choose this method if you prefer to manage billing through Shopify. Keep in mind that this option has limited add-ons and only allows a single AI agent.Step 1: Install the Chatbase App
- Go to the Chatbase app listing on the Shopify App Store: https://apps.shopify.com/chatbase
- Click Install.
- Review the permissions Chatbase requires and click Install to approve.
Step 2: Complete Setup
- After installation, you’ll be redirected to Chatbase onboarding process to finish setting up your account.
- Follow the prompts to configure your agent.
- Open your Shopify theme editor to configure the widget’s display settings.
Next Steps
Once your Shopify store is connected, you’ll need to enable actions that allow your agent to assist customers with product searches, order lookups, cart management, and more.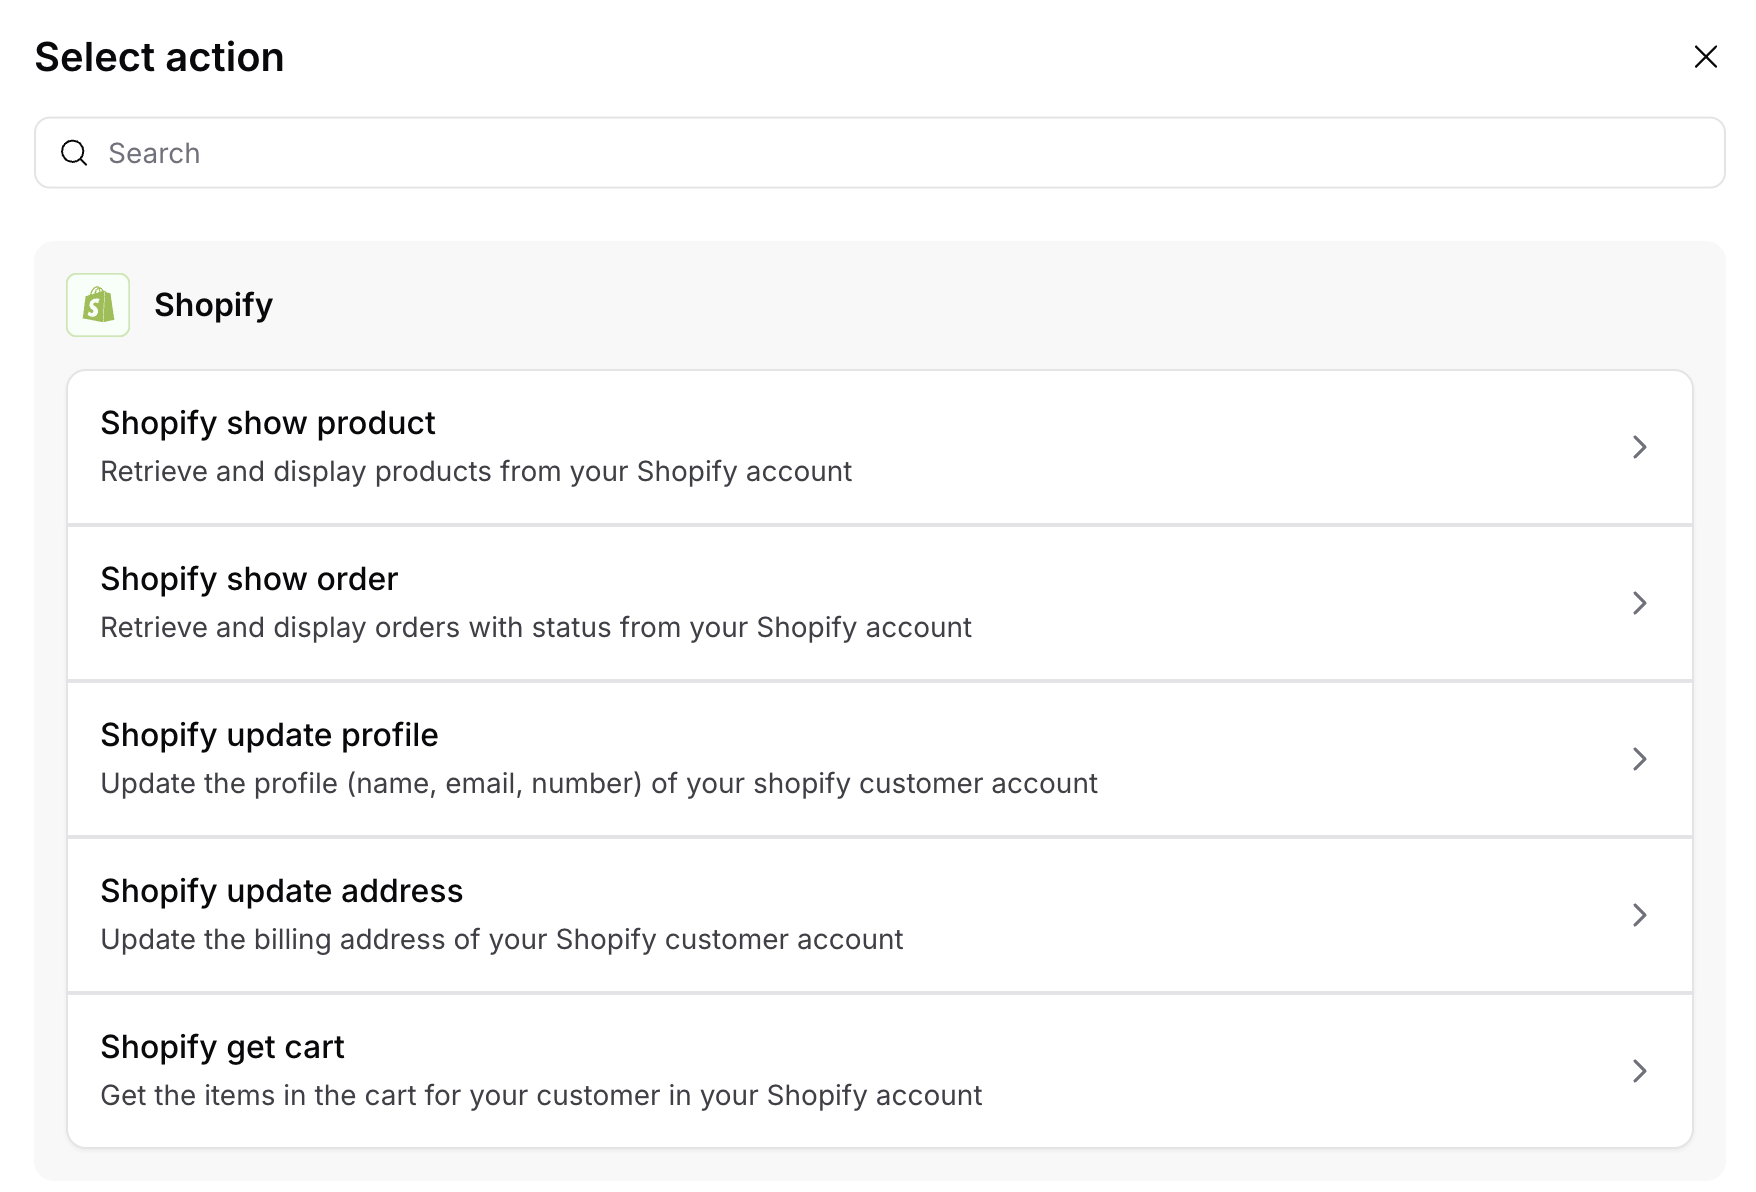
Shopify Actions
Learn how to configure and use Shopify actions to help customers browse products, track orders, manage their cart, and update their account information.