> ## Documentation Index
> Fetch the complete documentation index at: https://chatbase.co/docs/llms.txt
> Use this file to discover all available pages before exploring further.
# WordPress
## **Step 1: Sign Into Chatbase and Configure Your Chatbase AI agent**
To add a Chatbase agent to your WordPress website, you'll need to first sign into your Chatbase account to create and set up an agent. You must also make sure that **[the agent is enabled](/user-guides/quick-start/your-first-agent#navigate-to-the-deploy-section)**. If you don't have an account, you can start by [creating a Chatbase account for free](https://www.chatbase.co/auth/signup). If you are not sure how to create a agent, read this [detailed guide on how to create a agent on Chatbase](/user-guides/quick-start/your-first-agent).
## Step 2: **Install Chatbase on Your WordPress Website**
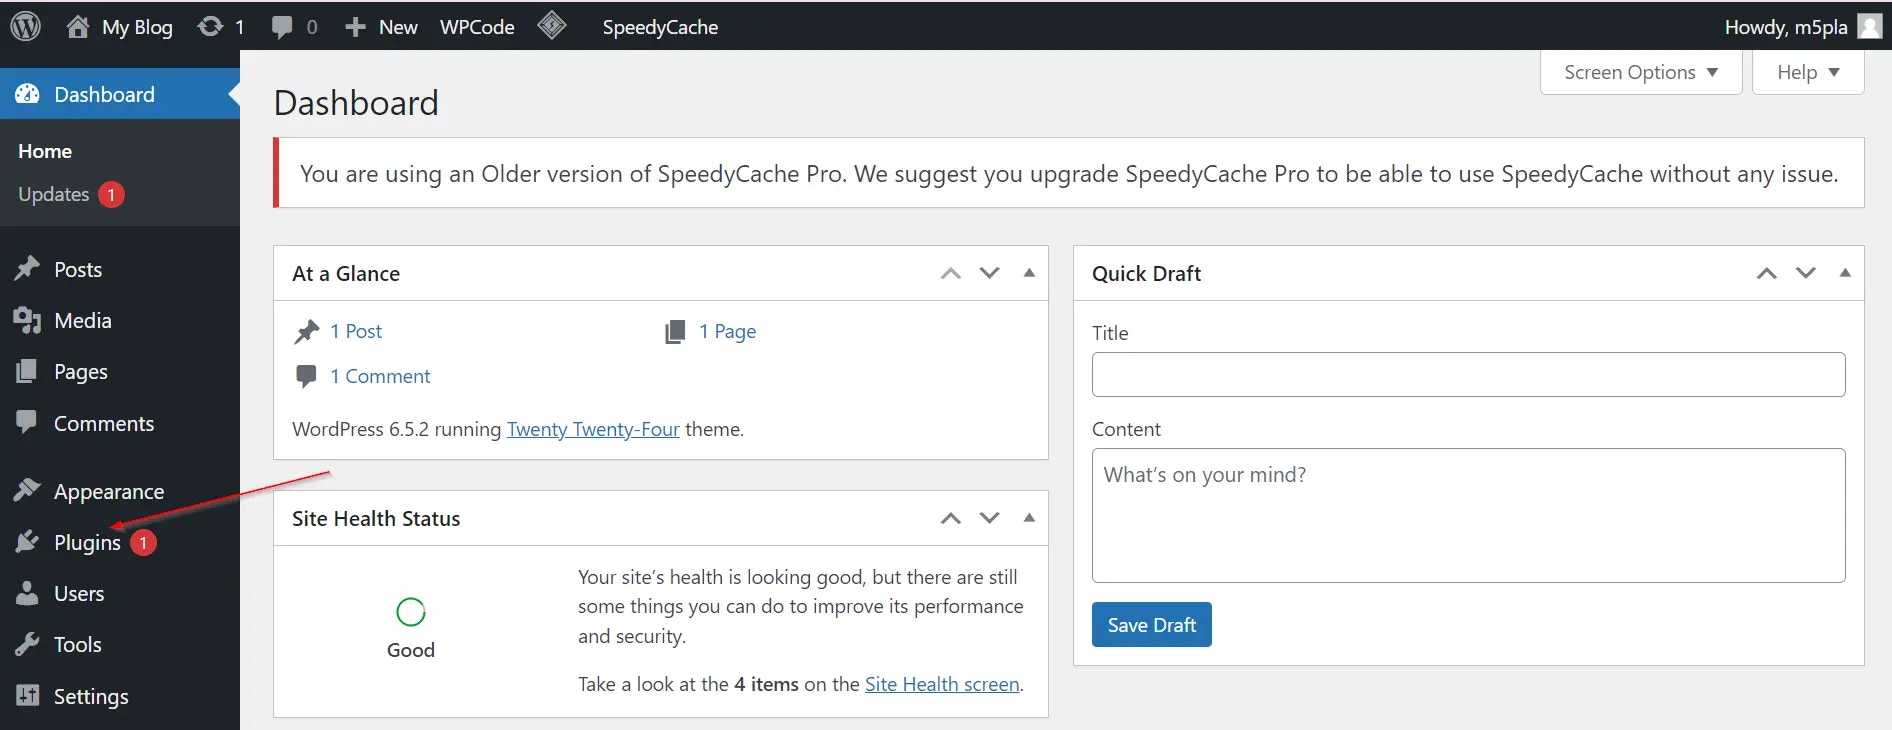
**1. Log in to your WordPress admin dashboard:**
Your dashboard URL is typically *yourdomainname.com/wp-admin/*. You can also access it through your web hosting control panel.
**2. Install and activate the Chatbase plugin:**
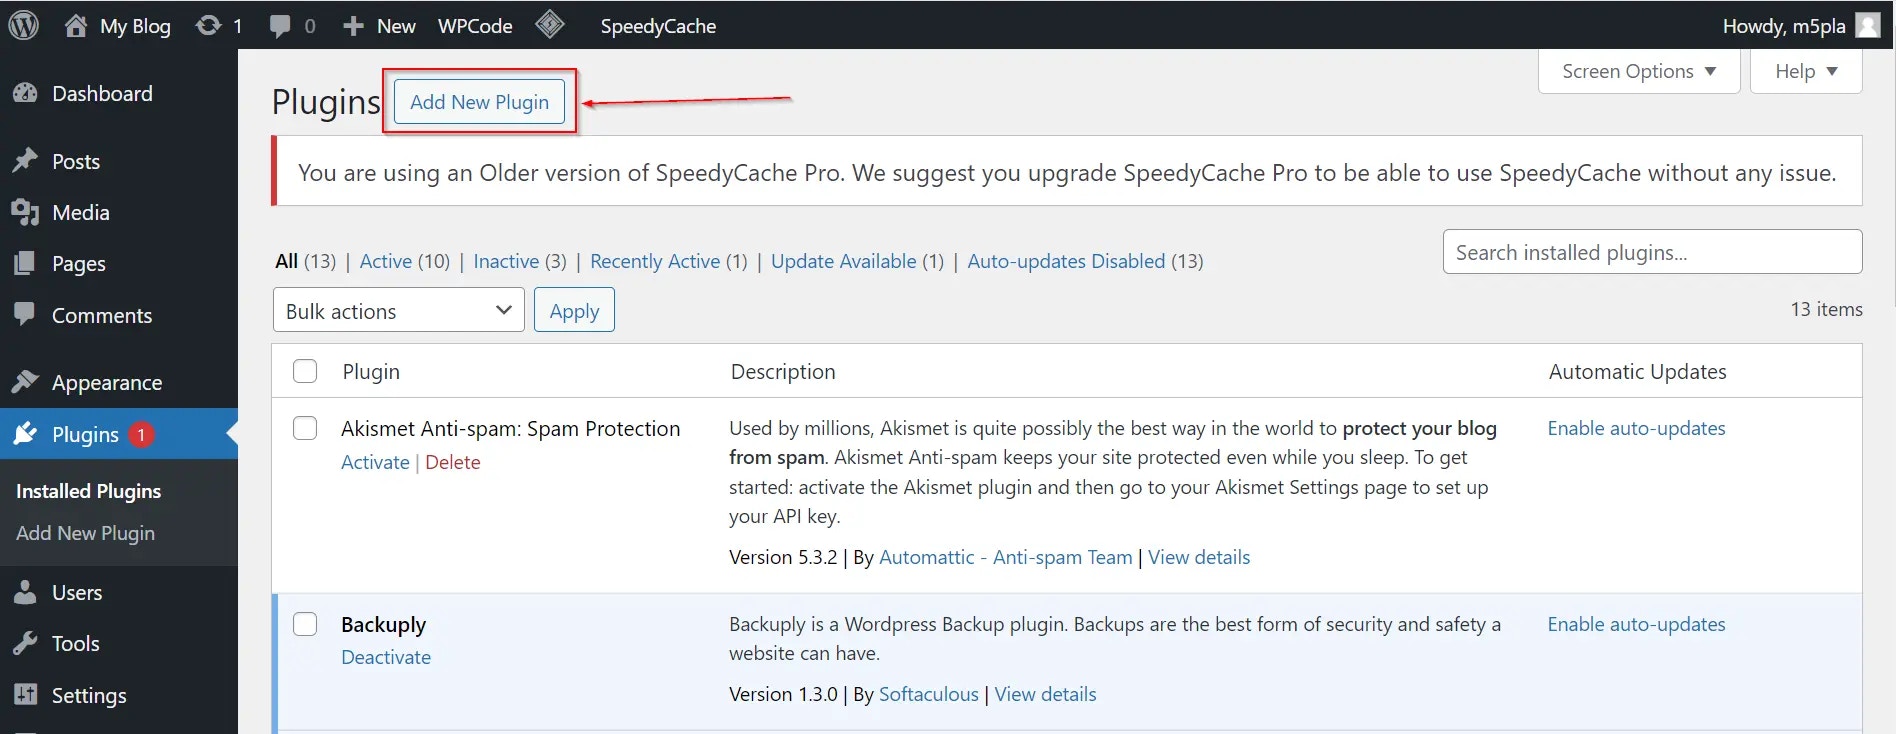
* In the left sidebar of your WordPress admin dashboard, click on **Plugins**.
 * Click **Add New Plugin** at the top of the next page.
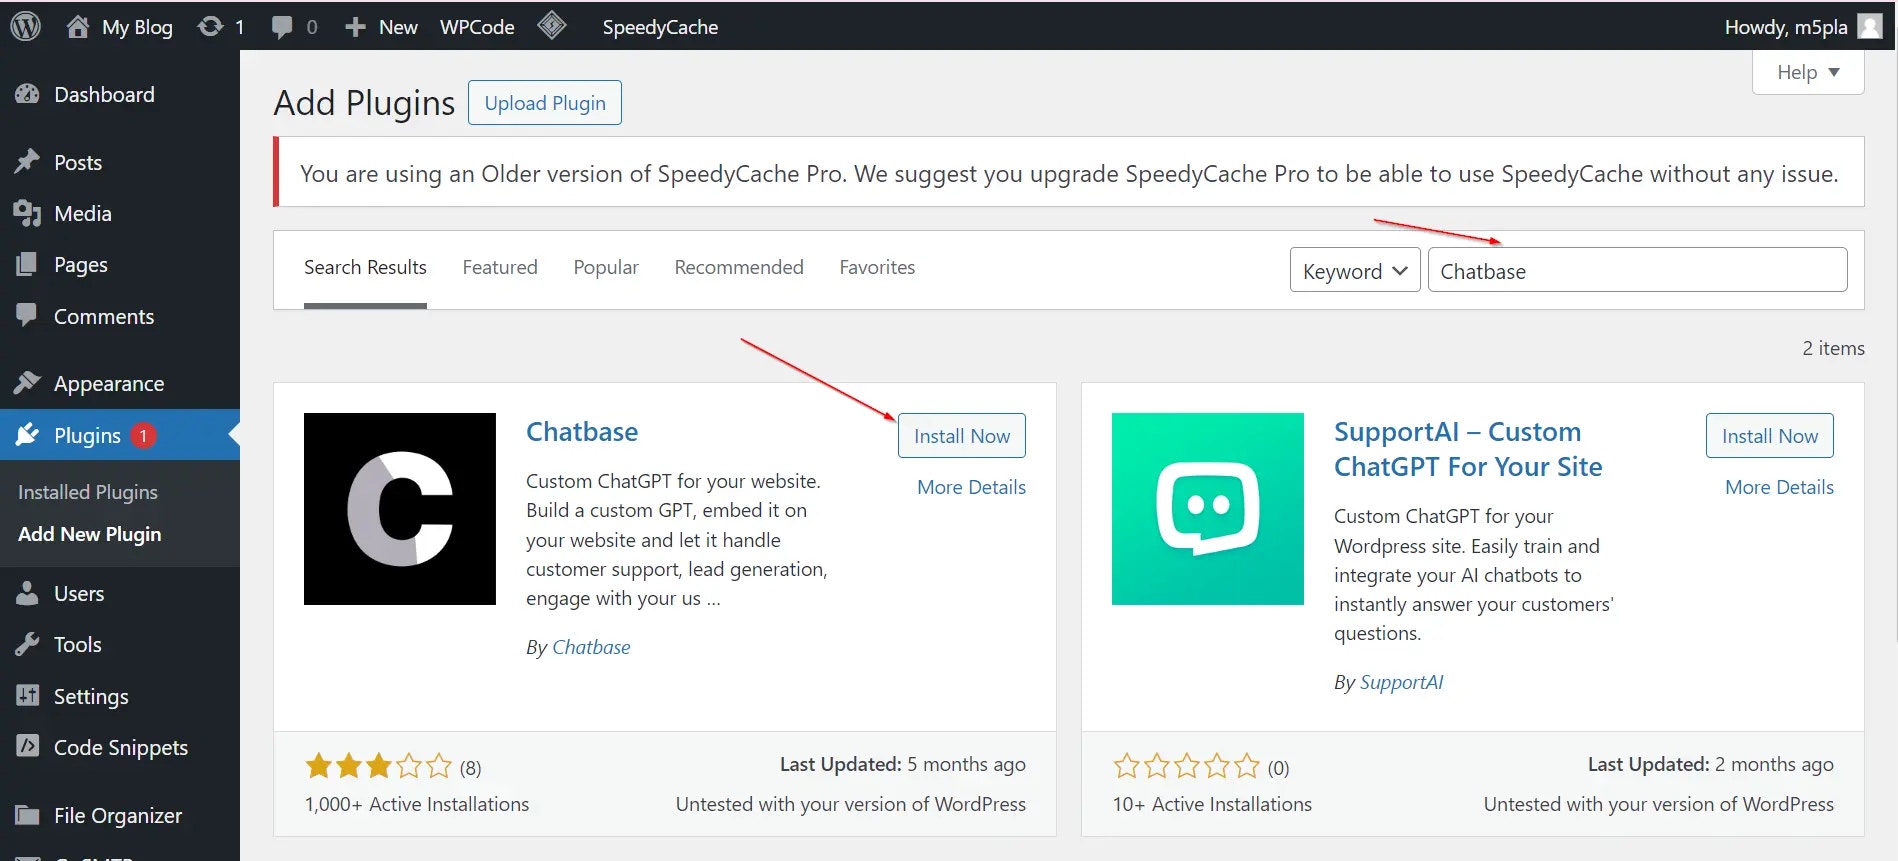
 * In the search bar on the next page, type "**Chatbase**" to search for the Chatbase plugin.
* Find the Chatbase WordPress plugin, click **Install Now**, then **Activate**.
* In the search bar on the next page, type "**Chatbase**" to search for the Chatbase plugin.
* Find the Chatbase WordPress plugin, click **Install Now**, then **Activate**.
 **3. Add your Agent ID:**
1. In the left sidebar of the WordPress Admin dashboard, click **Settings**.
2. Look for **Chatbase options** and click on it.
3. In the Chatbase settings, find the text box labeled "Agent ID".
**3. Add your Agent ID:**
1. In the left sidebar of the WordPress Admin dashboard, click **Settings**.
2. Look for **Chatbase options** and click on it.
3. In the Chatbase settings, find the text box labeled "Agent ID".
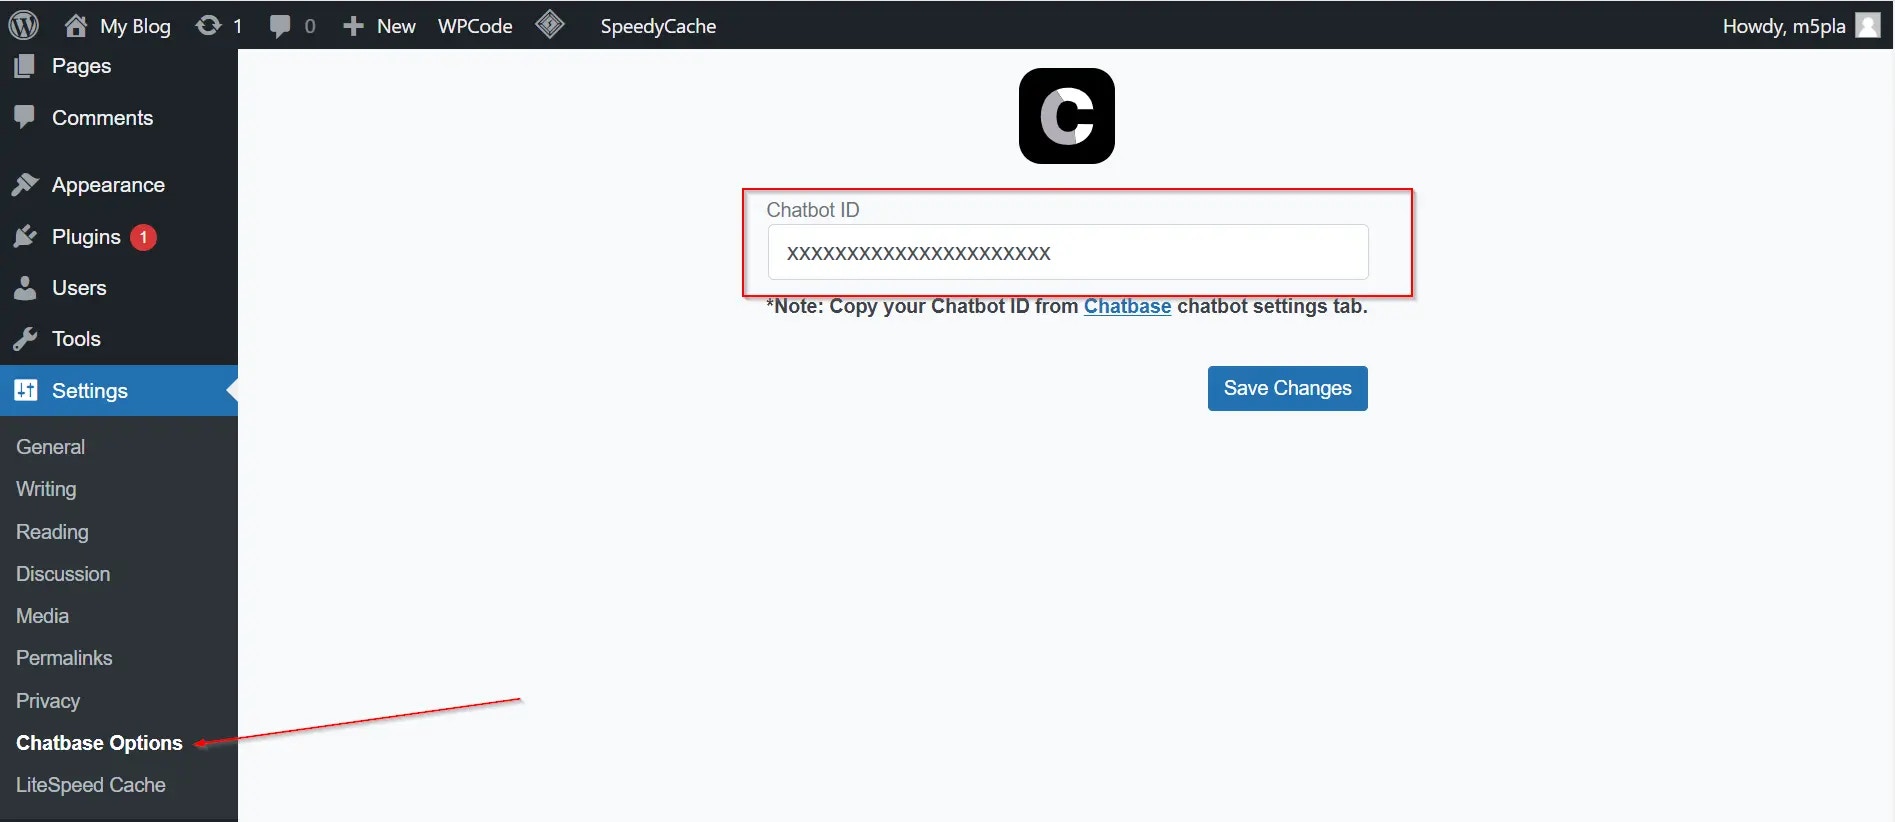 **4. Copy and paste your Agent ID:**
* Go to your Chatbase account and navigate to your [dashboard](https://www.chatbase.co/dashboard/).
* Select the agent you want to embed.
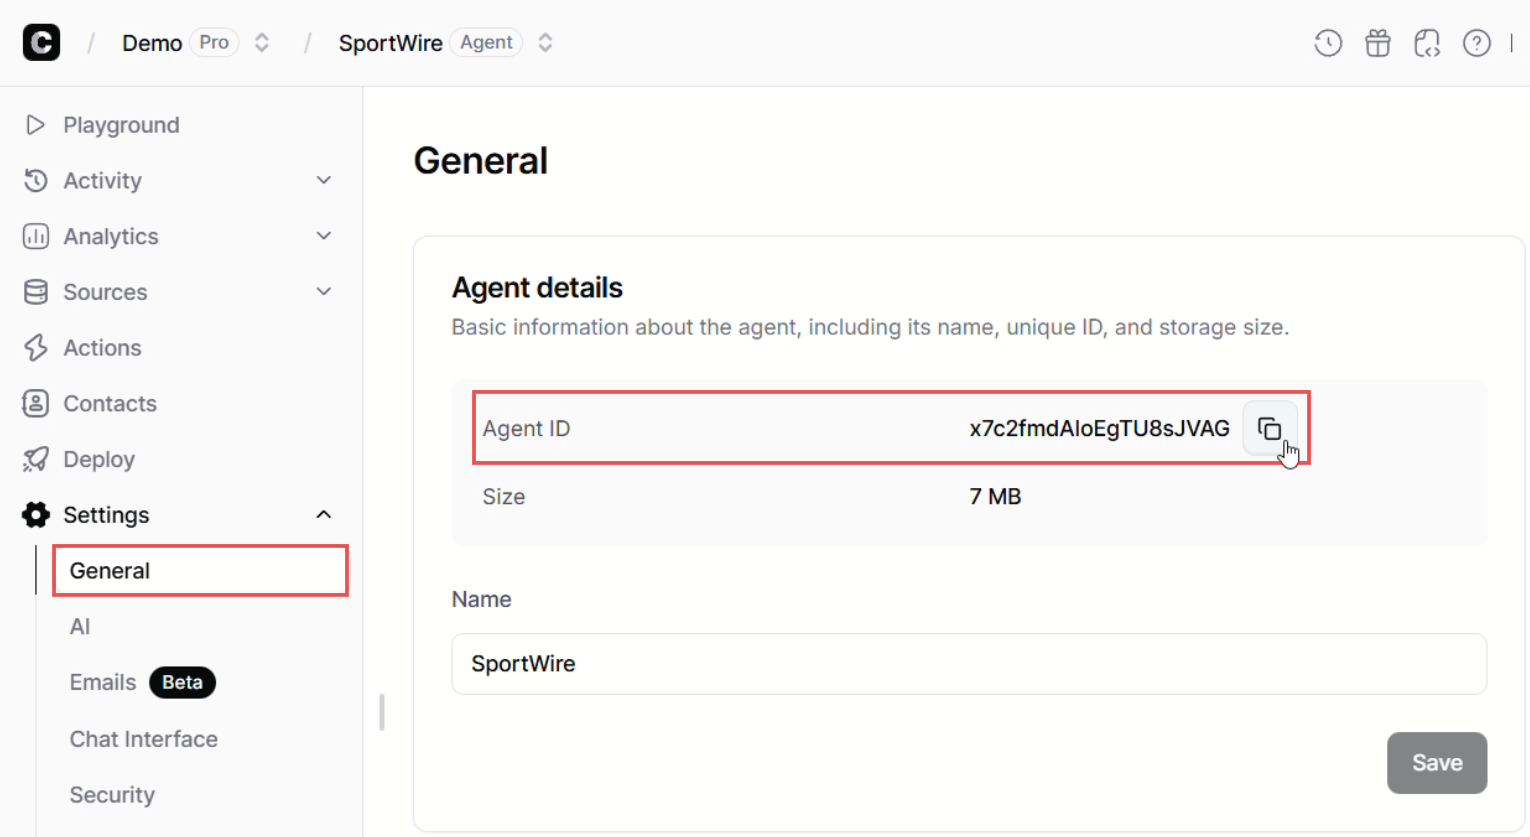
* Click on the "**Settings**" tab. At the top of the **General Settings** page, you'll find the Agent ID. Copy it.
* Paste the copied Agent ID into the text box in your WordPress settings.
**4. Copy and paste your Agent ID:**
* Go to your Chatbase account and navigate to your [dashboard](https://www.chatbase.co/dashboard/).
* Select the agent you want to embed.
* Click on the "**Settings**" tab. At the top of the **General Settings** page, you'll find the Agent ID. Copy it.
* Paste the copied Agent ID into the text box in your WordPress settings.
 **5. Save your changes:**
Click **Save Changes**. Your Chatbase agent should now be live on your WordPress website!
**5. Save your changes:**
Click **Save Changes**. Your Chatbase agent should now be live on your WordPress website!