> ## Documentation Index
> Fetch the complete documentation index at: https://chatbase.co/docs/llms.txt
> Use this file to discover all available pages before exploring further.
# Framer
## Step 1: Sign Into Your Chatbase Account and Copy Your Embed Code
1\. Log into your Chatbase account and navigate to the [**Dashboard**](https://www.chatbase.co/dashboard/) page.
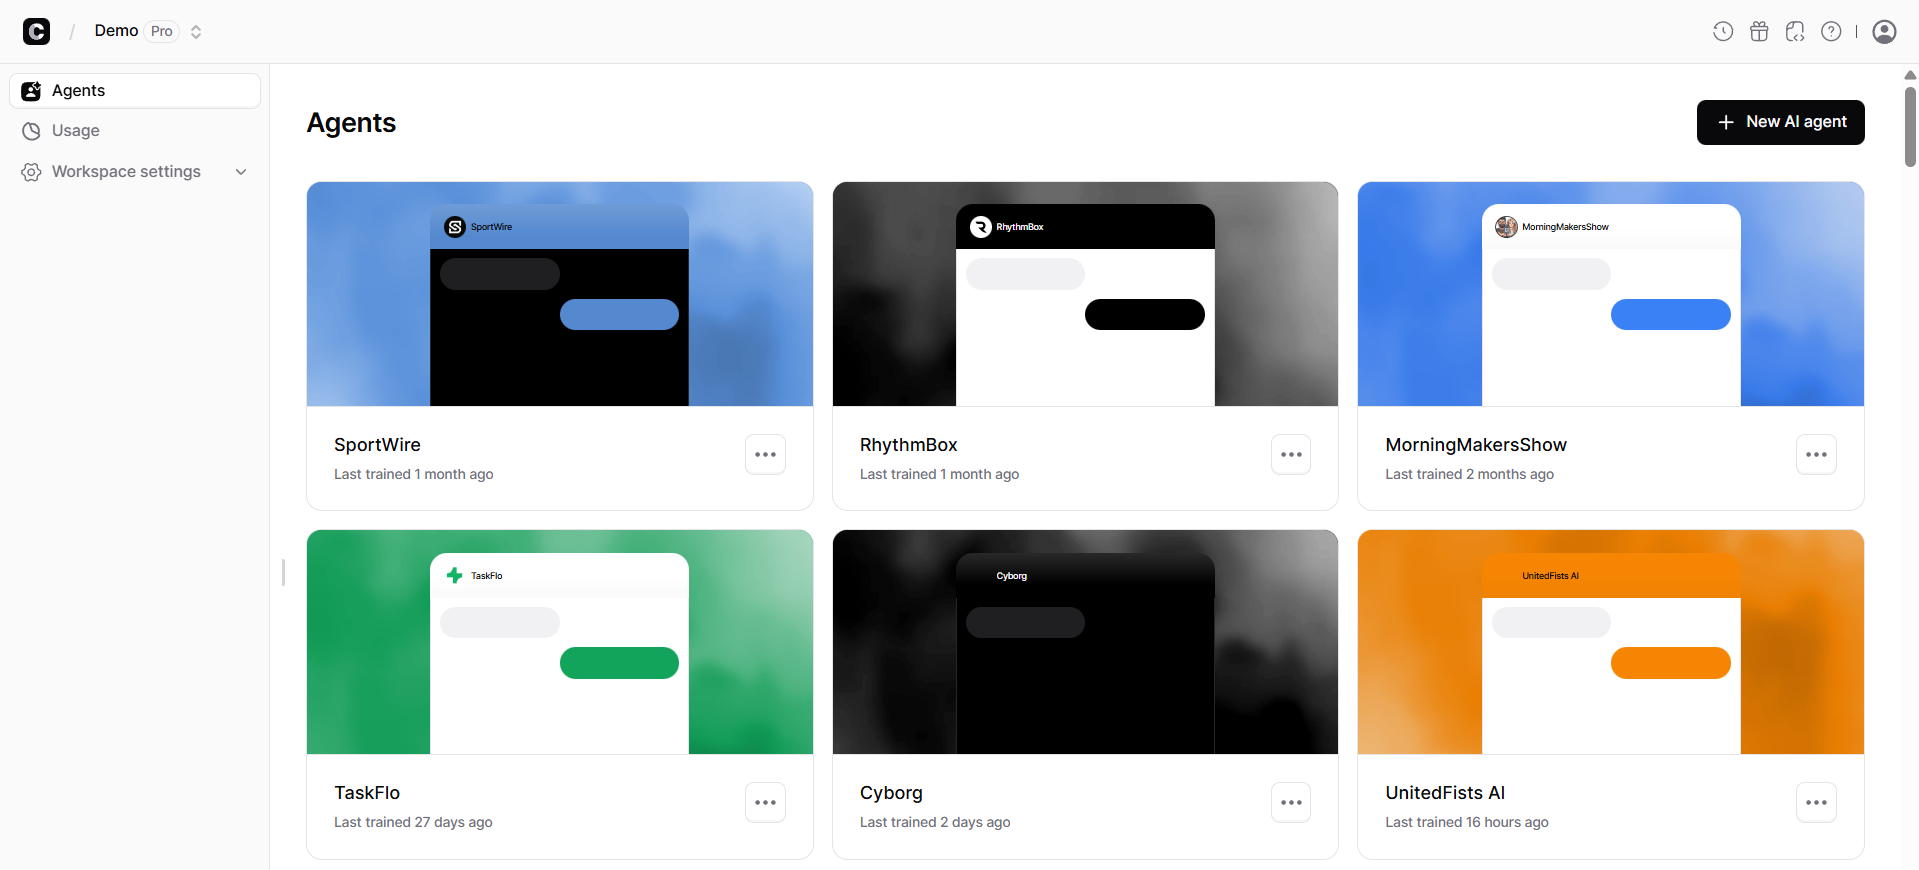 2\. On the list of available agents, click on the one you want to integrate into your Framer website. Once you've clicked on your chosen agent, you'll be directed to the AI Playground page.
3\. On the agent preview page, click on the **Deploy** tab.
2\. On the list of available agents, click on the one you want to integrate into your Framer website. Once you've clicked on your chosen agent, you'll be directed to the AI Playground page.
3\. On the agent preview page, click on the **Deploy** tab.
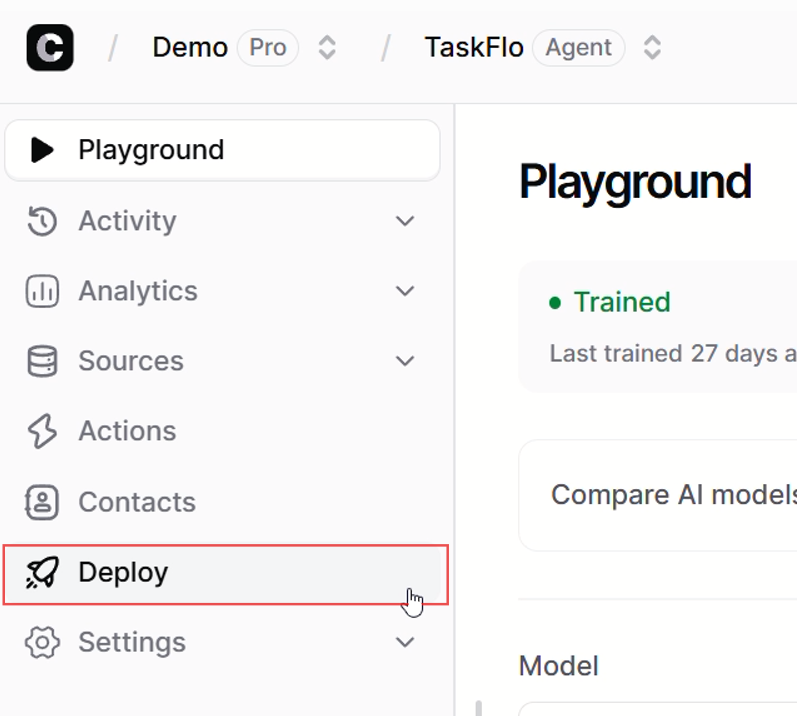 4\. A new page should come up. Click on **Manage** for the Chat Widget.
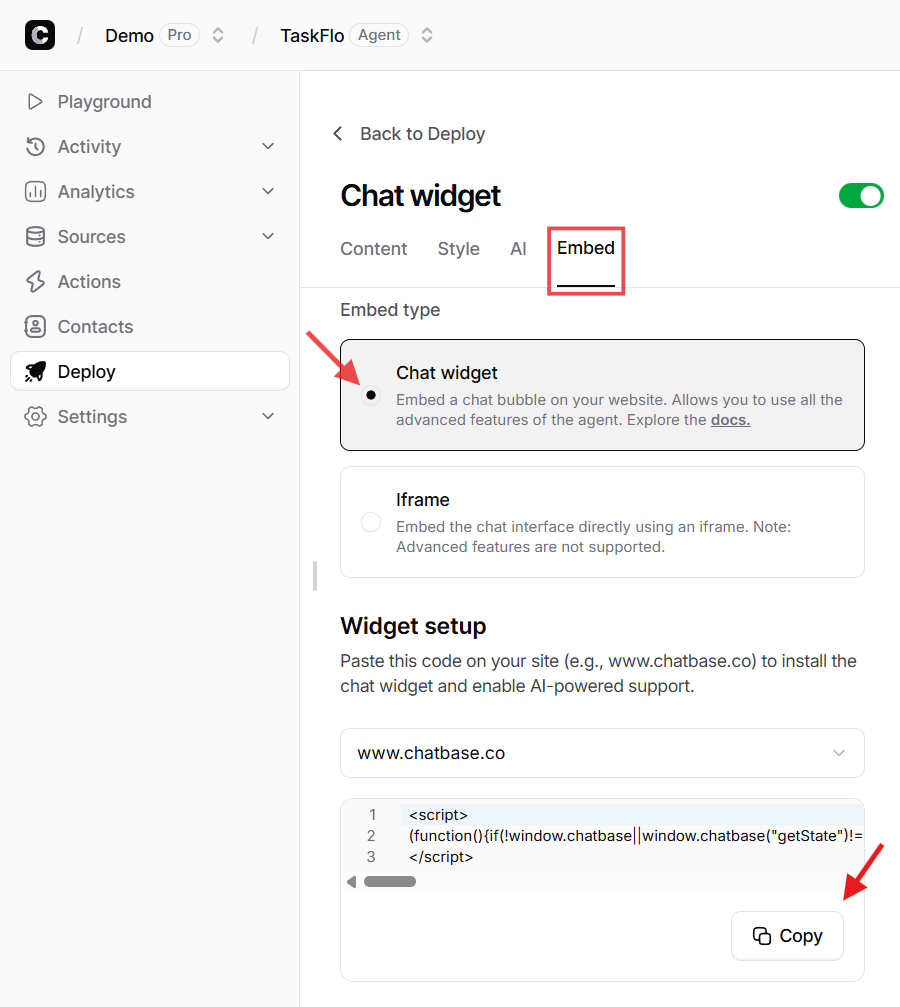
![Chat Widget [Manage]](https://mintlify.s3.us-west-1.amazonaws.com/chatbase/user-guides/integrations/images/Integrations/chatwidget-manage.png) 5\. Click on **Embed** and select the **Chat widget** embed type. Scroll down and Click **Copy** to copy the provided script.
5\. Click on **Embed** and select the **Chat widget** embed type. Scroll down and Click **Copy** to copy the provided script.
 ## Step 2: Sign Into Your Framer Website and Embed Your Chatbot
1\. Sign in to your Framer website and head to your project dashboard
2\. Click on the website project you wish to embed your Chatbase agent
## Step 2: Sign Into Your Framer Website and Embed Your Chatbot
1\. Sign in to your Framer website and head to your project dashboard
2\. Click on the website project you wish to embed your Chatbase agent
 3\. After clicking through to open the website project, locate the page you wish to embed your agent on the left side of the editor and click the three-dot icon next to the name of the page.
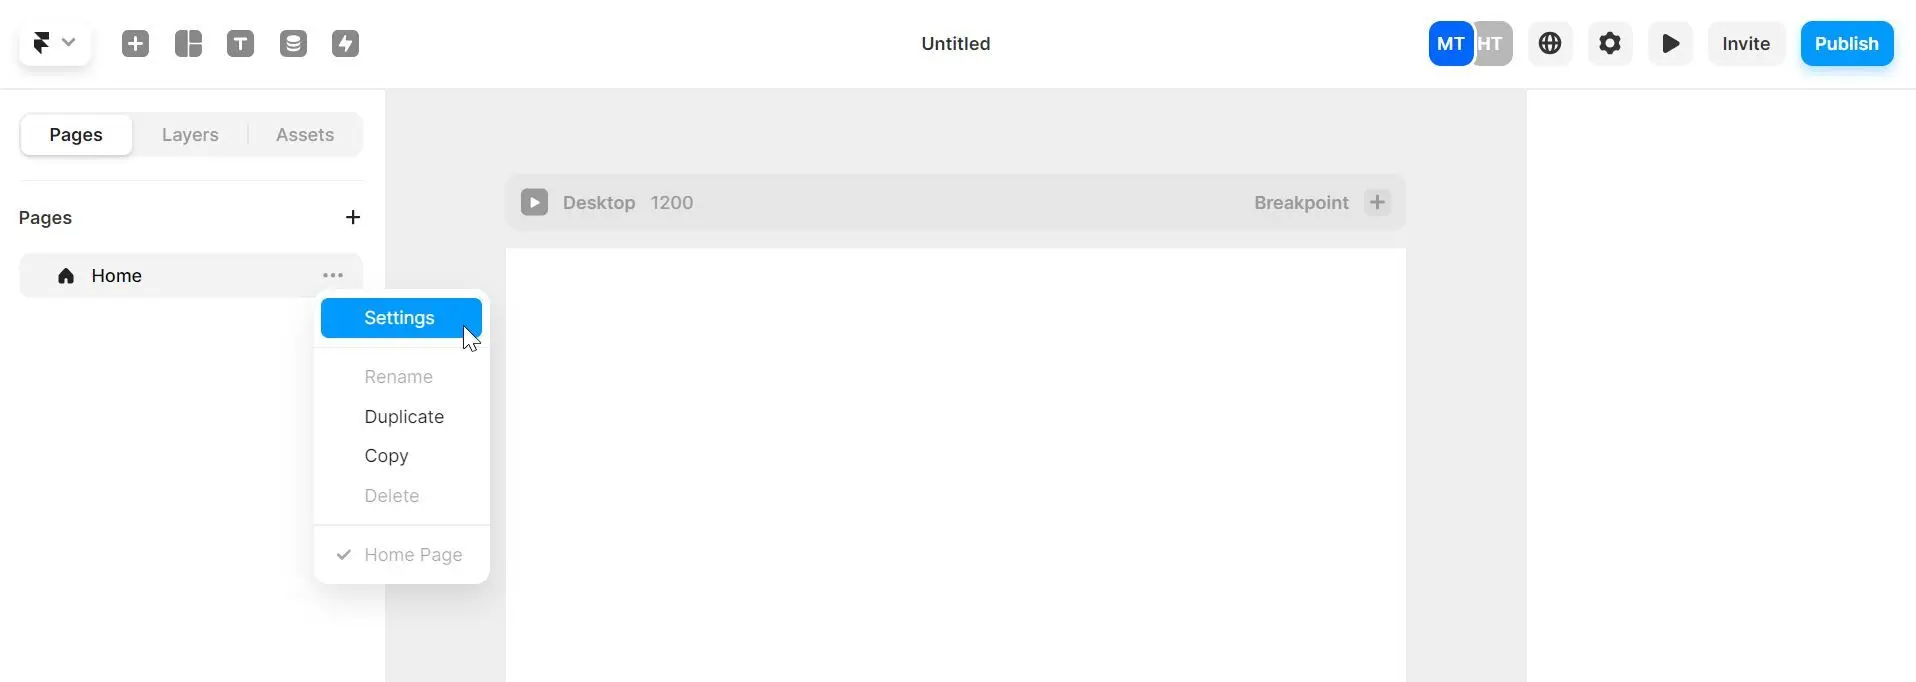 4\. Click **Settings** to open the settings for that page.
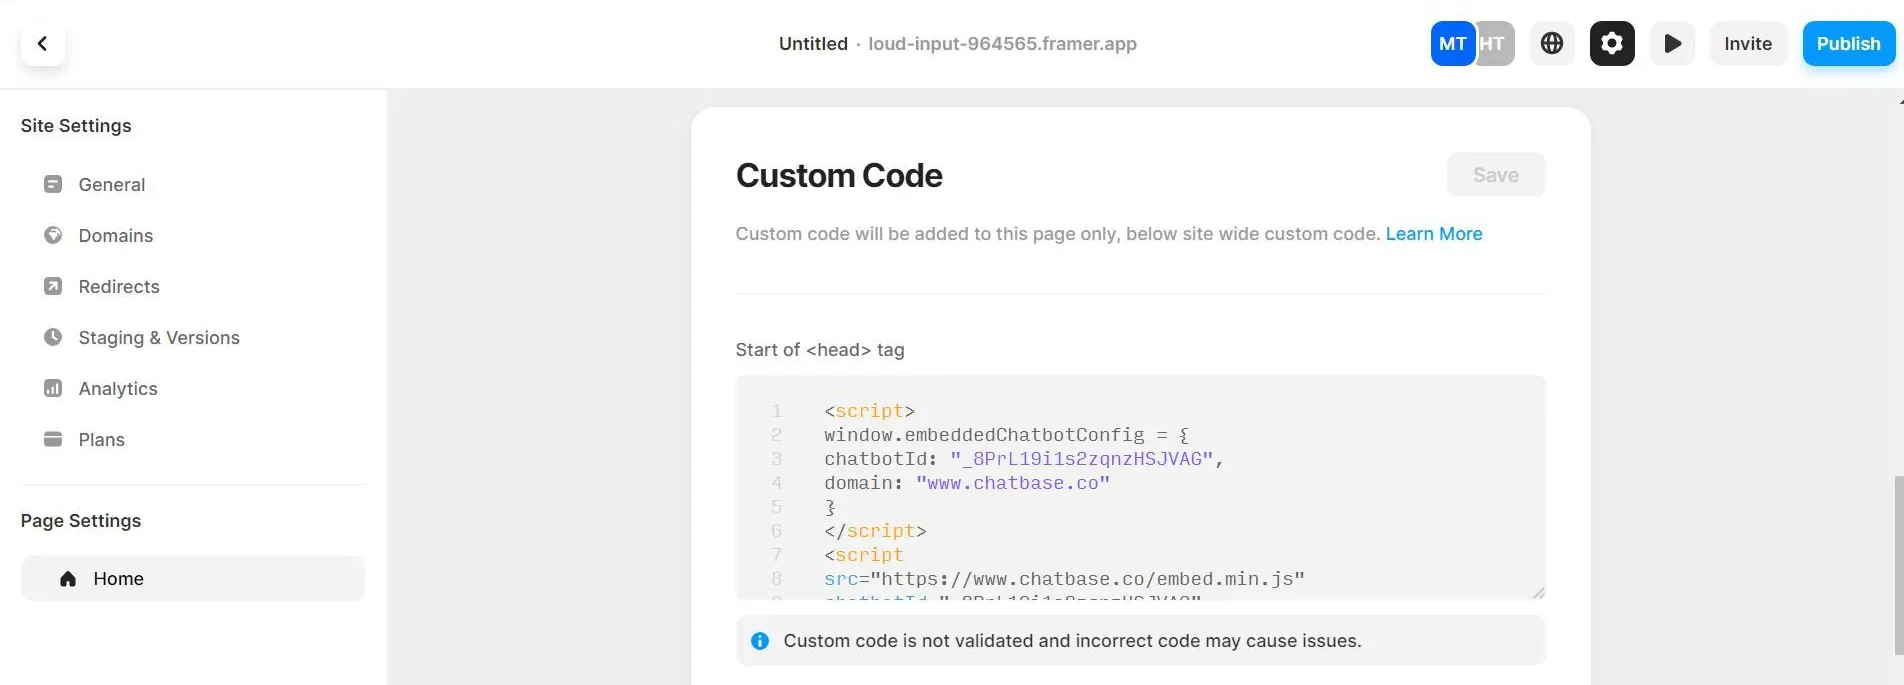
5\. On the Settings page, scroll down to find the section labeled "**Custom Code**."
6\. Right under the Custom Code section, paste your Chatbase agent embed code in the first box labeled *"Start of \ tag"* and click **Save** on the top right corner of the panel.
4\. Click **Settings** to open the settings for that page.
5\. On the Settings page, scroll down to find the section labeled "**Custom Code**."
6\. Right under the Custom Code section, paste your Chatbase agent embed code in the first box labeled *"Start of \ tag"* and click **Save** on the top right corner of the panel.
 7\. If everything was done well, you should now see a floating Chatbase agent icon on the bottom left corner of your Framer website (on the page you added it to)
 **Congratulations! Your Chatbase bot is now ready to use on your website.**
> **Note:** You can customize the appearance and colors of your bot on your Chatbase dashboard. To do this, go to your [**dashboard**](https://www.chatbase.co/dashboard/), choose a bot, click the **Settings** tab on the top of the page, and then click **Chat Interface** on the left sidebar to reveal the agent customization options.
**Congratulations! Your Chatbase bot is now ready to use on your website.**
> **Note:** You can customize the appearance and colors of your bot on your Chatbase dashboard. To do this, go to your [**dashboard**](https://www.chatbase.co/dashboard/), choose a bot, click the **Settings** tab on the top of the page, and then click **Chat Interface** on the left sidebar to reveal the agent customization options.