> ## Documentation Index
> Fetch the complete documentation index at: https://chatbase.co/docs/llms.txt
> Use this file to discover all available pages before exploring further.
# Client-Side Custom Forms
> Create dynamic, interactive forms in your chatbot using client-side JavaScript configuration
## Overview
Client-side custom forms enable you to create dynamic, interactive forms that run directly in the user's browser.
Server-side custom form configuration is not currently available. All custom forms must be configured using client-side JavaScript.
### Key Benefits
* **Real-time validation**: Instant feedback as users fill out forms
* **Enhanced UX**: Smooth interactions without server round trips
* **Full customization**: Complete control over form appearance and behavior
### Prerequisites
A website with the Chatbase embed script already installed and working.
New to Chatbase? Check out [Your First Agent](/user-guides/quick-start/your-first-agent) to get started with the embed script first.
## Setup Guide
Set up the form configuration in your Chatbase dashboard:
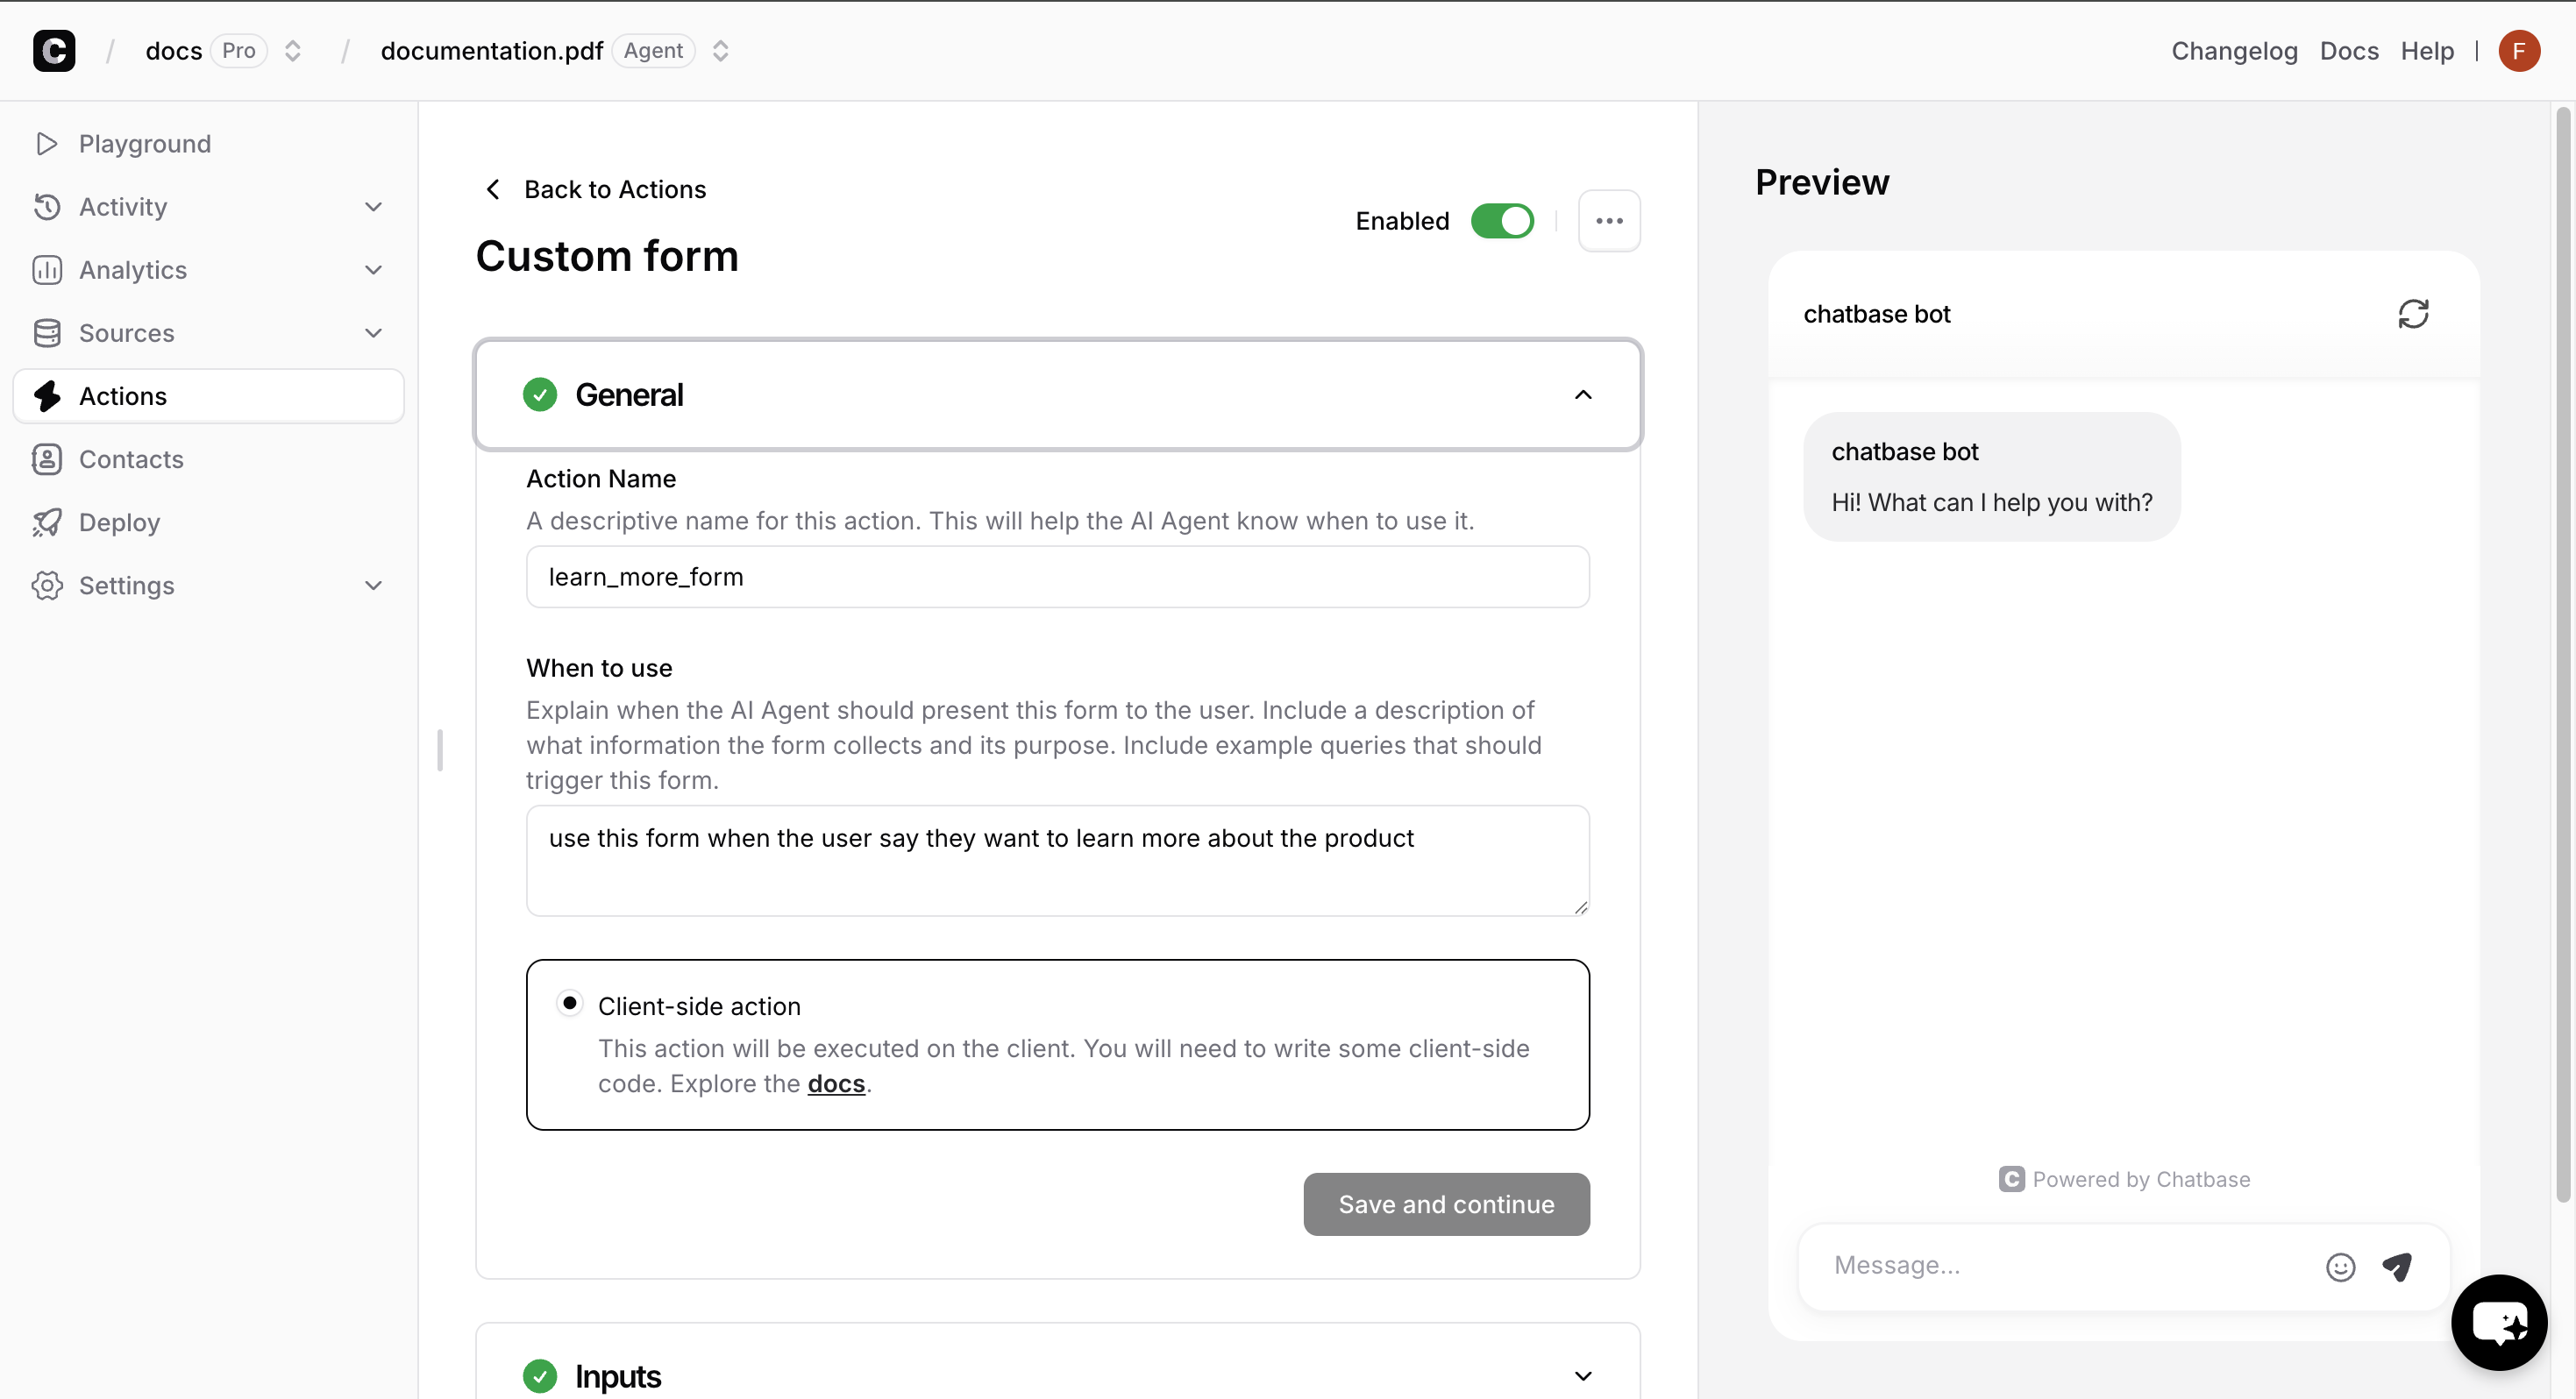
1. Navigate to **Actions** → **Create action** → **Custom form**
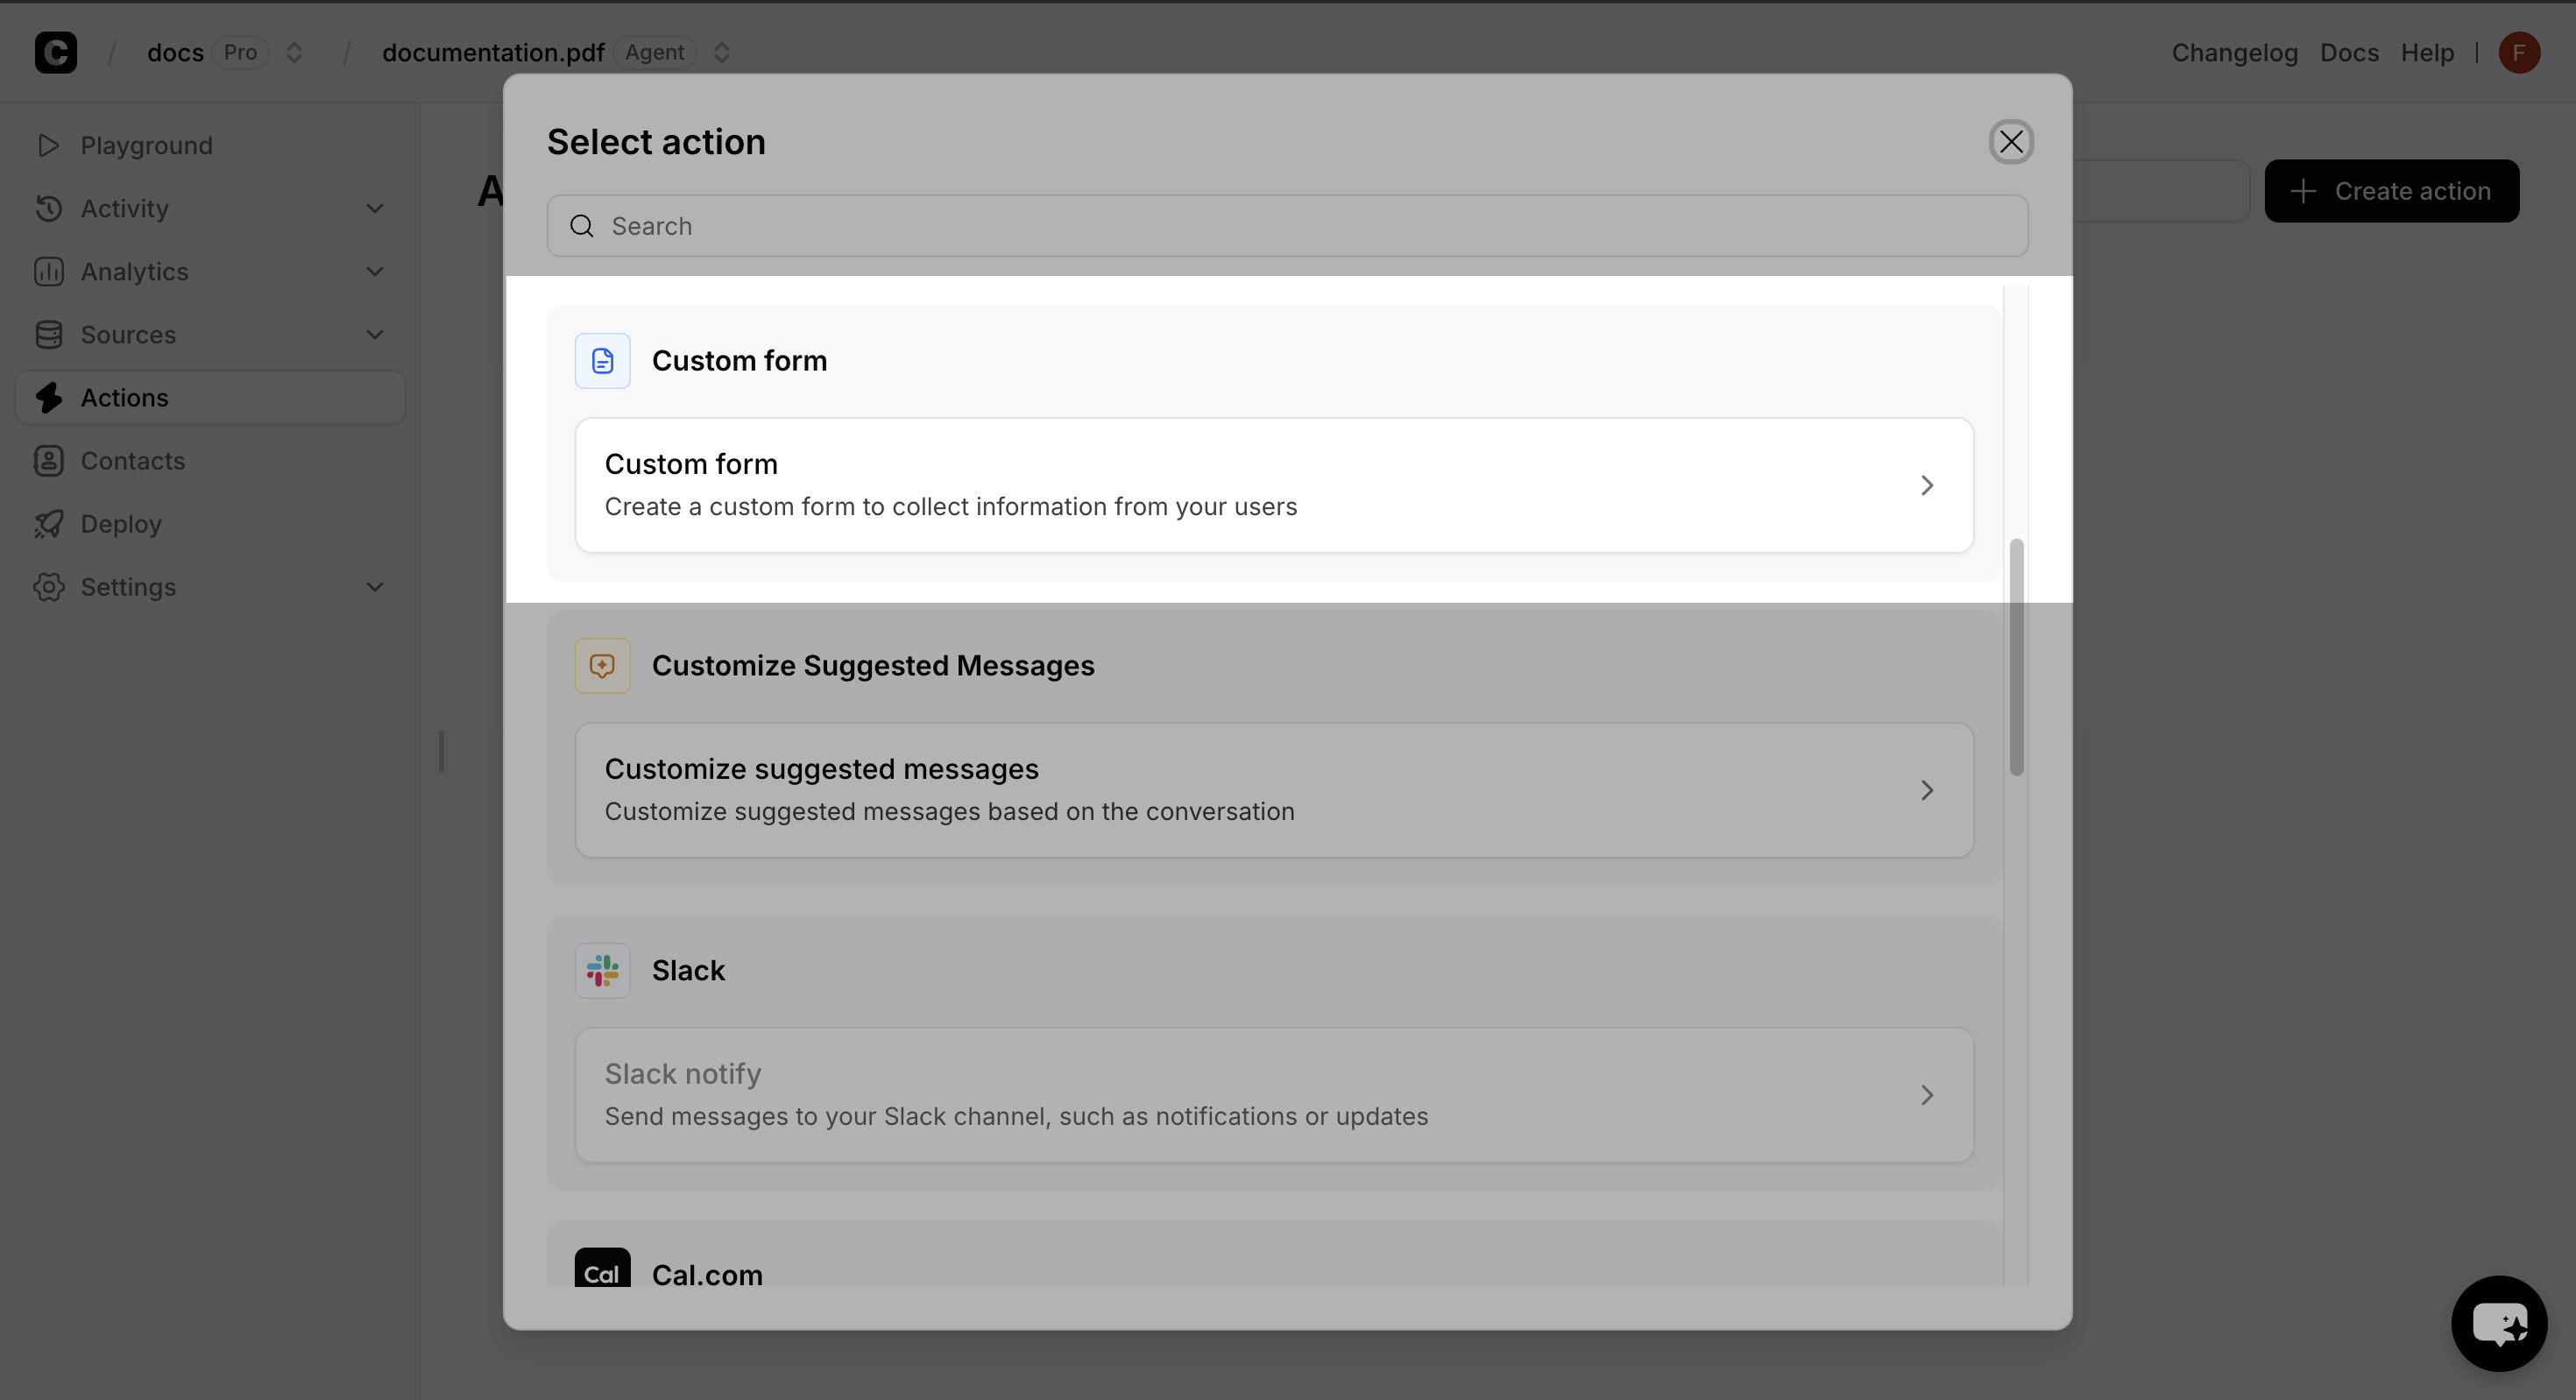 2. Enter a unique name for your form.
3. Configure the form when to use.
4. Click on the **Save and Continue** button.
5. Enable the action.
2. Enter a unique name for your form.
3. Configure the form when to use.
4. Click on the **Save and Continue** button.
5. Enable the action.
 **Environment Limitations**: Client-side custom forms will not function in:
* Chatbase Playground environment
* Action Preview mode
* Compare features
Testing this action should be done in your actual website environment. Embed the [JavaScript script](/developer-guides/javascript-embed) in your website and test the action.
On your website, register your form schema by calling the `registerFormSchema` method anywhere in your JavaScript code, with the name of the action you created in the dashboard.
Register the form in a root page of your website, or in a component that is loaded on every page.
```javascript theme={null}
window.chatbase.registerFormSchema({
"learn_more_form": async (args, user) => {
return {
fields: [
{
name: "name",
label: "Full Name",
type: "text",
placeholder: "Enter your full name",
validation: {
required: {
value: true,
message: "Name is required"
}
}
},
{
name: "email",
label: "Email Address",
type: "email",
placeholder: "Enter your email",
validation: {
required: {
value: true,
message: "Email is required"
}
}
},
{
name: "message",
label: "Message",
type: "textarea",
placeholder: "How can we help you?",
validation: {
required: {
value: true,
message: "Please enter your message"
}
}
}
],
submitButtonText: "Send Message",
successMessage: "Thank you! We'll get back to you soon.",
errorMessage: "Failed to send message. Please try again."
};
}
});
```
**Multiple Registration Override**: Calling `registerFormSchema` multiple times will completely replace all previously registered forms. Always include all your forms in a single registration call.
Your custom form is now ready to use! The chatbot will automatically display your form when the corresponding action is triggered.
You can also configure webhooks to receive real-time notifications when users submit your custom forms. For detailed configuration instructions, see [Webhooks Integration](#webhooks-integration).
**Environment Limitations**: Client-side custom forms will not function in:
* Chatbase Playground environment
* Action Preview mode
* Compare features
Testing this action should be done in your actual website environment. Embed the [JavaScript script](/developer-guides/javascript-embed) in your website and test the action.
On your website, register your form schema by calling the `registerFormSchema` method anywhere in your JavaScript code, with the name of the action you created in the dashboard.
Register the form in a root page of your website, or in a component that is loaded on every page.
```javascript theme={null}
window.chatbase.registerFormSchema({
"learn_more_form": async (args, user) => {
return {
fields: [
{
name: "name",
label: "Full Name",
type: "text",
placeholder: "Enter your full name",
validation: {
required: {
value: true,
message: "Name is required"
}
}
},
{
name: "email",
label: "Email Address",
type: "email",
placeholder: "Enter your email",
validation: {
required: {
value: true,
message: "Email is required"
}
}
},
{
name: "message",
label: "Message",
type: "textarea",
placeholder: "How can we help you?",
validation: {
required: {
value: true,
message: "Please enter your message"
}
}
}
],
submitButtonText: "Send Message",
successMessage: "Thank you! We'll get back to you soon.",
errorMessage: "Failed to send message. Please try again."
};
}
});
```
**Multiple Registration Override**: Calling `registerFormSchema` multiple times will completely replace all previously registered forms. Always include all your forms in a single registration call.
Your custom form is now ready to use! The chatbot will automatically display your form when the corresponding action is triggered.
You can also configure webhooks to receive real-time notifications when users submit your custom forms. For detailed configuration instructions, see [Webhooks Integration](#webhooks-integration).
 ## Function Parameters
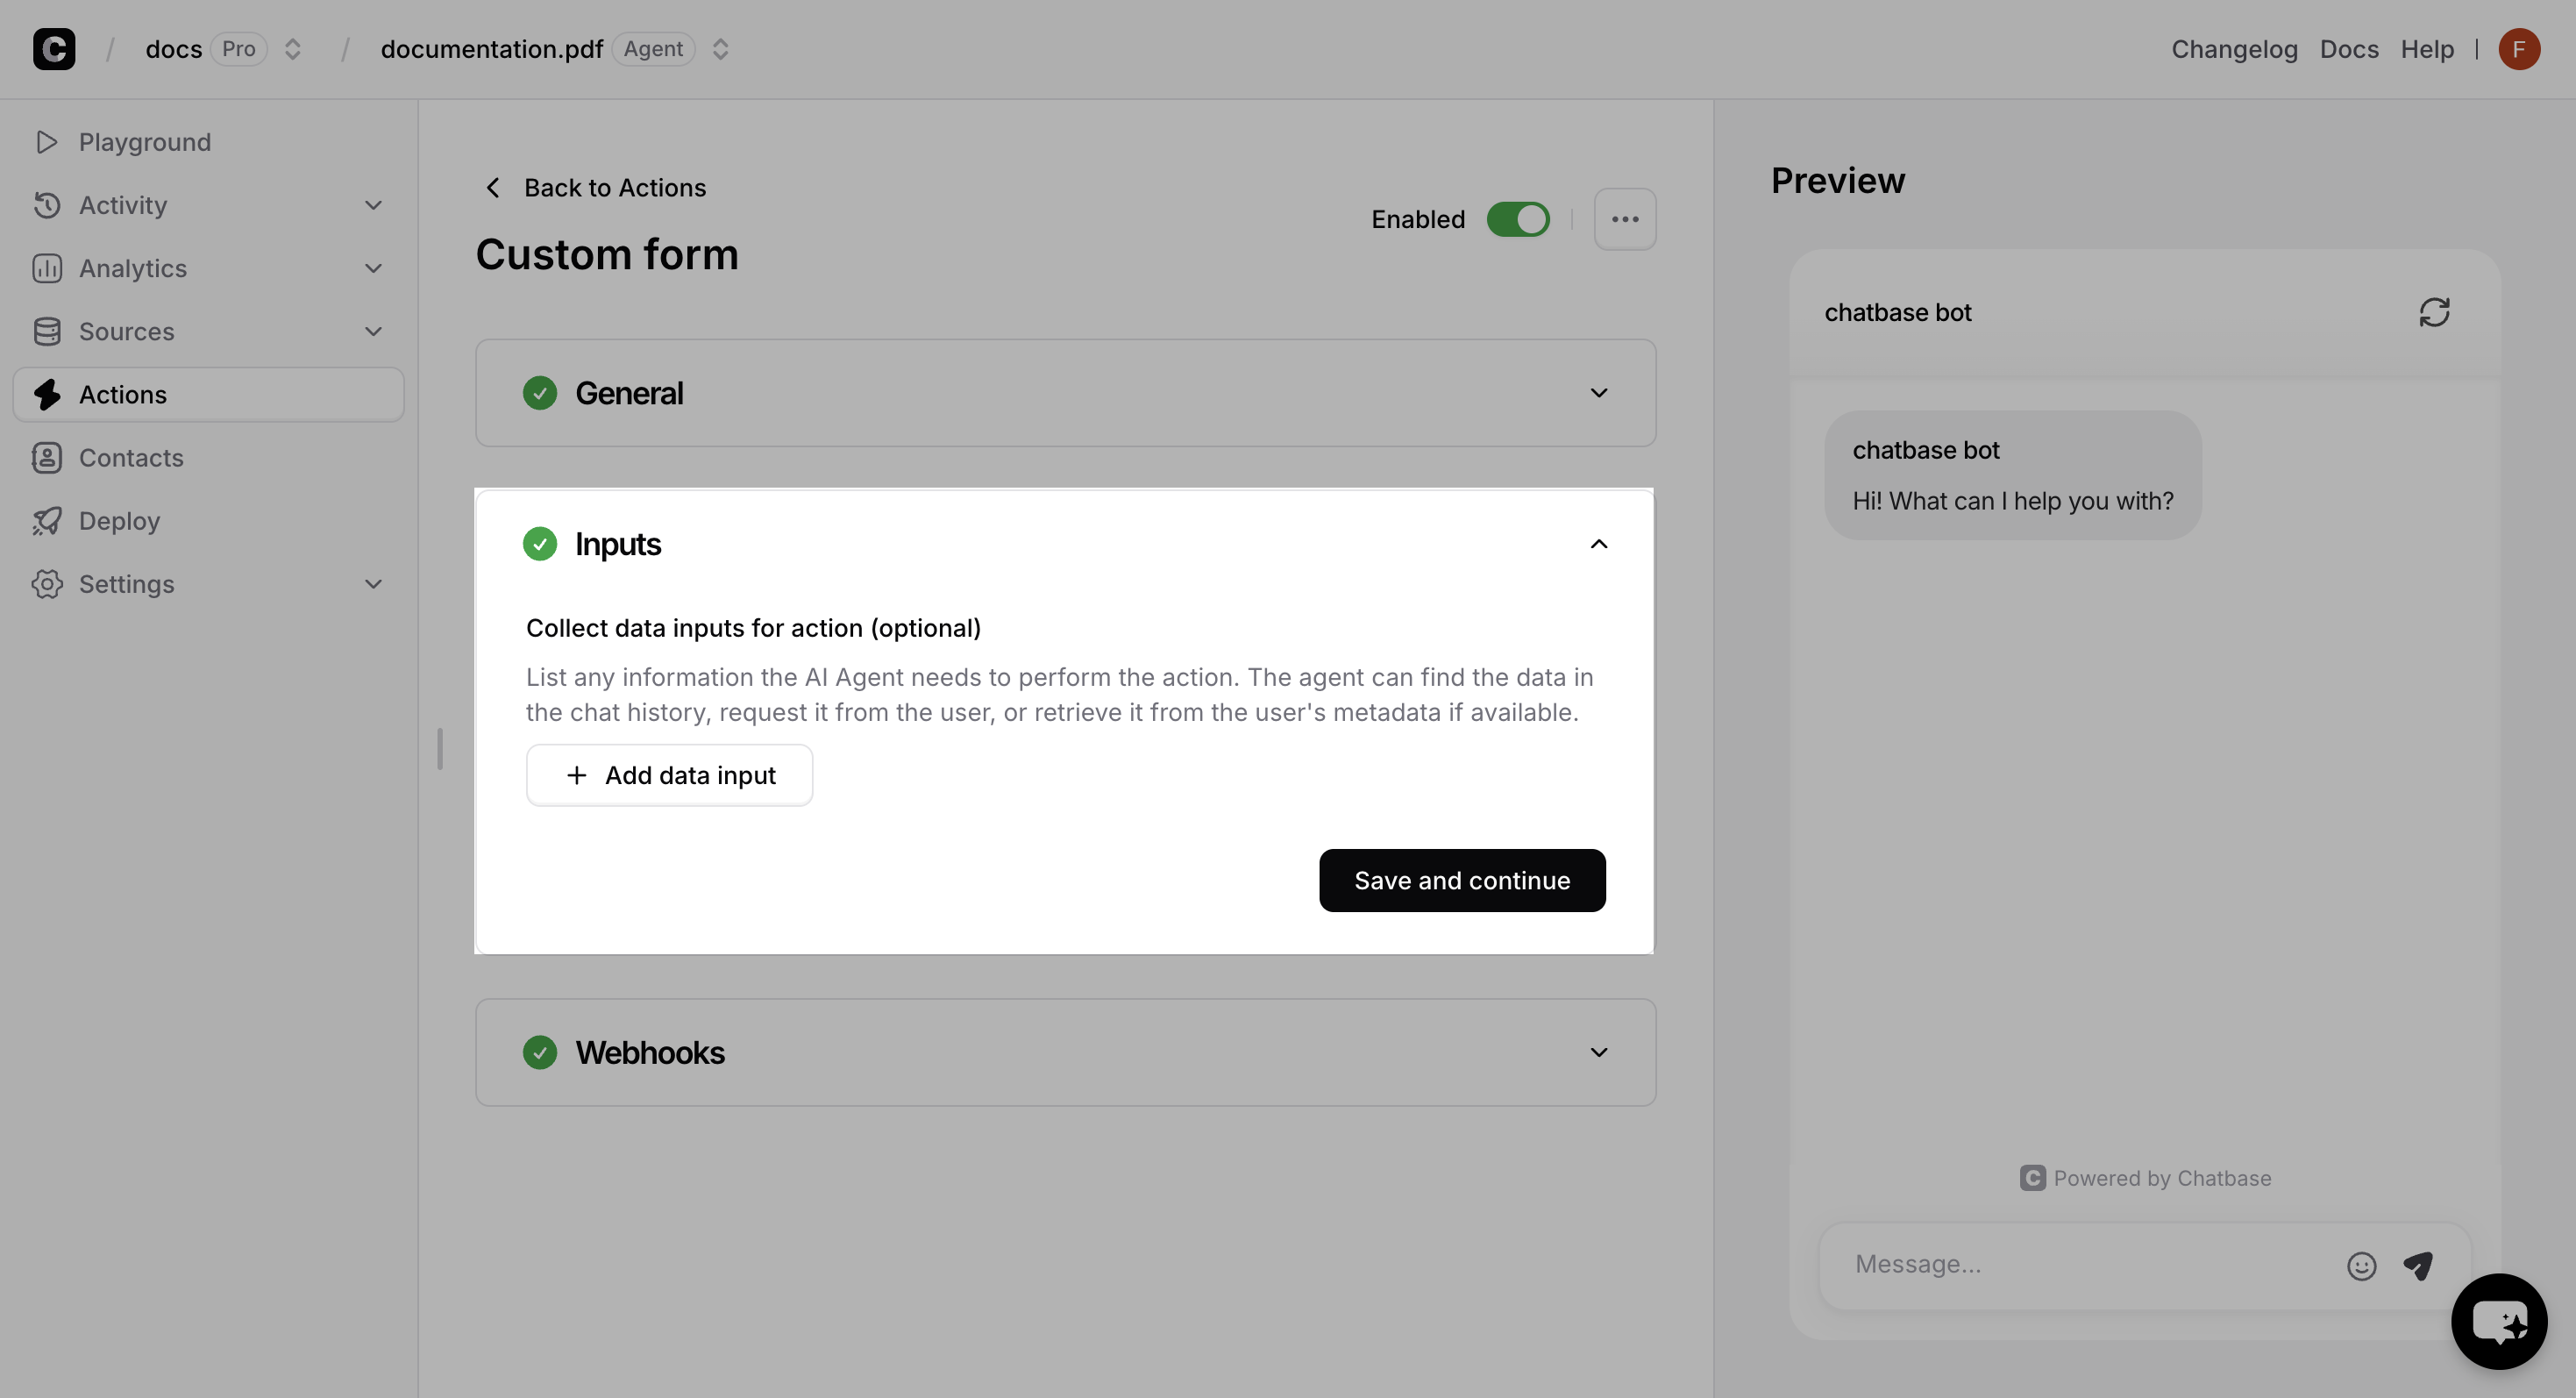
Each custom form function receives two parameters that provide context and data:
Contains all the arguments defined in your custom form configuration. These are the values the ai agent generated and passed from the AI action when the form is triggered.
## Function Parameters
Each custom form function receives two parameters that provide context and data:
Contains all the arguments defined in your custom form configuration. These are the values the ai agent generated and passed from the AI action when the form is triggered.
 Contains user information that varies depending on your identity verification setup.
Unique identifier for the authenticated user as provided during the identify call.
Hash of the user\_id used for verification (generated server-side).
Internal anonymous user identifier. You can ignore this field.
Internal Chatbase anonymous identifier. You can ignore this field.
Custom user data passed during the identify call (e.g., name, email, company). This field is only present if metadata was provided during identification.
Internal anonymous user identifier. You can ignore this field.
Internal Chatbase anonymous identifier. You can ignore this field.
Custom user data passed during any identify calls. This field is only present if metadata was provided during identification.
The anonymous IDs (`anon_user_id` and `chatbase_anon_id`) are internal identifiers used by Chatbase and can be safely ignored in your custom form implementations.
## Complete Example
Here's a comprehensive example showing a user profile form with various field types and validation rules:
The function name in your JavaScript code (e.g., `userProfileForm`) must exactly match the name you assign to your AI Action in the Chatbase dashboard.
```javascript userProfileForm.js theme={null}
window.chatbase.registerFormSchema({
userProfileForm: async (args, user) => {
// Pre-populate form with user data if available
const defaultName = user?.user_metadata?.name || args.name || '';
const defaultEmail = user?.user_metadata?.email || '';
return {
fields: [
{
name: "name",
label: "First Name",
type: "text",
defaultValue: defaultName,
placeholder: "Enter your first name",
validation: {
required: {
value: true,
message: "Name is required"
},
minLength: {
value: 2,
message: "Name must be at least 2 characters"
},
maxLength: {
value: 50,
message: "Name cannot exceed 50 characters"
}
}
},
{
name: "email",
label: "Email Address",
type: "email",
defaultValue: defaultEmail,
validation: {
required: {
value: true,
message: "Email is required"
},
pattern: {
value: "^[^\s@]+@[^\s@]+\.[^\s@]+$",
message: "Please enter a valid email address"
}
}
},
{
name: "officeLocation",
type: "groupselect",
label: "Office Location",
options: {
"North America": [
{ value: "nyc", label: "New York City" },
{ value: "sf", label: "San Francisco" },
{ value: "toronto", label: "Toronto" }
],
"Europe": [
{ value: "london", label: "London" },
{ value: "berlin", label: "Berlin" },
{ value: "paris", label: "Paris" }
],
"Asia Pacific": [
{ value: "tokyo", label: "Tokyo" },
{ value: "singapore", label: "Singapore" }
]
},
validation: {
required: {
value: true,
message: "Please select your office location"
}
}
},
{
name: "skills",
type: "multiselect",
label: "Technical Skills",
options: [
{ value: "javascript", label: "JavaScript" },
{ value: "python", label: "Python" },
{ value: "react", label: "React" },
{ value: "nodejs", label: "Node.js" },
{ value: "sql", label: "SQL" }
]
},
{
name: "bio",
label: "Bio",
type: "textarea",
placeholder: "Tell us about yourself...",
validation: {
maxLength: {
value: 500,
message: "Bio cannot exceed 500 characters"
}
}
},
{
name: "profileImage",
label: "Profile Image",
type: "image",
placeholder: "Click or drop your profile image here"
}
],
submitButtonText: "Update Profile",
showLabels: true,
successMessage: "Profile updated successfully!",
errorMessage: "Failed to update profile. Please try again."
};
}
});
```
Contains user information that varies depending on your identity verification setup.
Unique identifier for the authenticated user as provided during the identify call.
Hash of the user\_id used for verification (generated server-side).
Internal anonymous user identifier. You can ignore this field.
Internal Chatbase anonymous identifier. You can ignore this field.
Custom user data passed during the identify call (e.g., name, email, company). This field is only present if metadata was provided during identification.
Internal anonymous user identifier. You can ignore this field.
Internal Chatbase anonymous identifier. You can ignore this field.
Custom user data passed during any identify calls. This field is only present if metadata was provided during identification.
The anonymous IDs (`anon_user_id` and `chatbase_anon_id`) are internal identifiers used by Chatbase and can be safely ignored in your custom form implementations.
## Complete Example
Here's a comprehensive example showing a user profile form with various field types and validation rules:
The function name in your JavaScript code (e.g., `userProfileForm`) must exactly match the name you assign to your AI Action in the Chatbase dashboard.
```javascript userProfileForm.js theme={null}
window.chatbase.registerFormSchema({
userProfileForm: async (args, user) => {
// Pre-populate form with user data if available
const defaultName = user?.user_metadata?.name || args.name || '';
const defaultEmail = user?.user_metadata?.email || '';
return {
fields: [
{
name: "name",
label: "First Name",
type: "text",
defaultValue: defaultName,
placeholder: "Enter your first name",
validation: {
required: {
value: true,
message: "Name is required"
},
minLength: {
value: 2,
message: "Name must be at least 2 characters"
},
maxLength: {
value: 50,
message: "Name cannot exceed 50 characters"
}
}
},
{
name: "email",
label: "Email Address",
type: "email",
defaultValue: defaultEmail,
validation: {
required: {
value: true,
message: "Email is required"
},
pattern: {
value: "^[^\s@]+@[^\s@]+\.[^\s@]+$",
message: "Please enter a valid email address"
}
}
},
{
name: "officeLocation",
type: "groupselect",
label: "Office Location",
options: {
"North America": [
{ value: "nyc", label: "New York City" },
{ value: "sf", label: "San Francisco" },
{ value: "toronto", label: "Toronto" }
],
"Europe": [
{ value: "london", label: "London" },
{ value: "berlin", label: "Berlin" },
{ value: "paris", label: "Paris" }
],
"Asia Pacific": [
{ value: "tokyo", label: "Tokyo" },
{ value: "singapore", label: "Singapore" }
]
},
validation: {
required: {
value: true,
message: "Please select your office location"
}
}
},
{
name: "skills",
type: "multiselect",
label: "Technical Skills",
options: [
{ value: "javascript", label: "JavaScript" },
{ value: "python", label: "Python" },
{ value: "react", label: "React" },
{ value: "nodejs", label: "Node.js" },
{ value: "sql", label: "SQL" }
]
},
{
name: "bio",
label: "Bio",
type: "textarea",
placeholder: "Tell us about yourself...",
validation: {
maxLength: {
value: 500,
message: "Bio cannot exceed 500 characters"
}
}
},
{
name: "profileImage",
label: "Profile Image",
type: "image",
placeholder: "Click or drop your profile image here"
}
],
submitButtonText: "Update Profile",
showLabels: true,
successMessage: "Profile updated successfully!",
errorMessage: "Failed to update profile. Please try again."
};
}
});
```
 ## API Reference
### Form Schema
The `registerFormSchema` function returns a schema object that defines your form's structure and behavior:
Array of form field definitions. Each field must conform to the Field Schema specifications below.
Text displayed on the form's submit button.
Controls whether field labels are displayed above form inputs.
Message shown to users when the form is successfully submitted.
Message displayed when form submission fails.
### Field Schema
Each field in the `fields` array supports the following properties:
Unique identifier for the form field. This name is used to reference the field's value in form submissions.
Specifies the input type. Must be one of the supported field types listed below.
Display text shown to users for this field.
Placeholder text displayed inside the input field. If not provided, the label text is used as placeholder.
Pre-filled value for the field. Type depends on the field type (string for text, number for numeric fields, etc.).
Whether the field should be read-only and non-interactive.
Validation rules for the field. See Validation Rules section below for detailed specifications.
Required for selection fields (`select`, `multiselect`, `groupselect`, `groupmultiselect`).
**For `select` and `multiselect`**: Array of objects with `label` and `value` properties:
```javascript theme={null}
options: [
{ value: "option1", label: "Option 1" },
{ value: "option2", label: "Option 2" }
]
```
**For `groupselect` and `groupmultiselect`**: Object where keys are group names and values are arrays of options:
```javascript theme={null}
options: {
"Group 1": [
{ value: "item1", label: "Item 1" },
{ value: "item2", label: "Item 2" }
],
"Group 2": [
{ value: "item3", label: "Item 3" }
]
}
```
### Field Types
**`text`** - Single-line text input
* Supports: `required`, `minLength`, `maxLength`, `pattern` validation
* Best for: Names, titles, short descriptions
**`textarea`** - Multi-line text input
* Supports: `required`, `minLength`, `maxLength` validation
* Best for: Comments, descriptions, long-form text
**`email`** - Email address input with built-in format validation
* Supports: `required`, `pattern` validation
* Automatically validates email format
**`phone`** - Phone number input
* Must follow format: `+[country code][number]` (e.g., +1234567890)
* Supports: `required`, `pattern` validation
* Built-in international format validation
**`number`** - Numeric input
* Supports: `required`, `min`, `max` validation
* Only accepts numeric values
* Best for: Ages, quantities, prices
**`select`** - Single selection dropdown
* Requires: `options` array with `{ value, label }` objects
* Supports: `required` validation
* Best for: Categories, single choice selections
**`multiselect`** - Multiple selection dropdown
* Requires: `options` array with `{ value, label }` objects
* Supports: `required` validation
* Best for: Tags, multiple choice selections
**`groupselect`** - Grouped single selection dropdown
* Requires: `options` object with group names as keys
* Each group contains array of `{ value, label }` objects
* Supports: `required` validation
* Best for: Categorized options (e.g., locations by region)
**`groupmultiselect`** - Grouped multiple selection dropdown
* Requires: `options` object with group names as keys
* Each group contains array of `{ value, label }` objects
* Supports: `required` validation
* Best for: Multiple selections from categorized options
**`image`** - Image file upload with drag & drop
* Accepts: JPEG, JPG, PNG, GIF, WebP formats
* Maximum size: 2MB per file
* Supports: `required` validation
* Features: Drag & drop, preview, format validation
### Validation Rules
Each validation rule is defined as an object with `value` and `message` properties:
**`required`** - Makes field mandatory
```javascript theme={null}
validation: {
required: {
value: true,
message: "This field is required"
}
}
```
**`pattern`** - Regex pattern validation
```javascript theme={null}
validation: {
pattern: {
value: "^[A-Za-z]+$", // Only letters
message: "Only letters are allowed"
}
}
```
**`minLength`** - Minimum character count
```javascript theme={null}
validation: {
minLength: {
value: 3,
message: "Must be at least 3 characters"
}
}
```
**`maxLength`** - Maximum character count
```javascript theme={null}
validation: {
maxLength: {
value: 100,
message: "Cannot exceed 100 characters"
}
}
```
**`min`** - Minimum numeric value
```javascript theme={null}
validation: {
min: {
value: 18,
message: "Must be at least 18"
}
}
```
**`max`** - Maximum numeric value
```javascript theme={null}
validation: {
max: {
value: 120,
message: "Cannot exceed 120"
}
}
```
**`defaultErrorMessage`** - Fallback error message
```javascript theme={null}
validation: {
min: { value: 18 }, // No custom message
defaultErrorMessage: "Please enter a valid value"
}
```
This message is shown when validation fails but no specific message is provided for the failed rule.
## Advanced Configuration
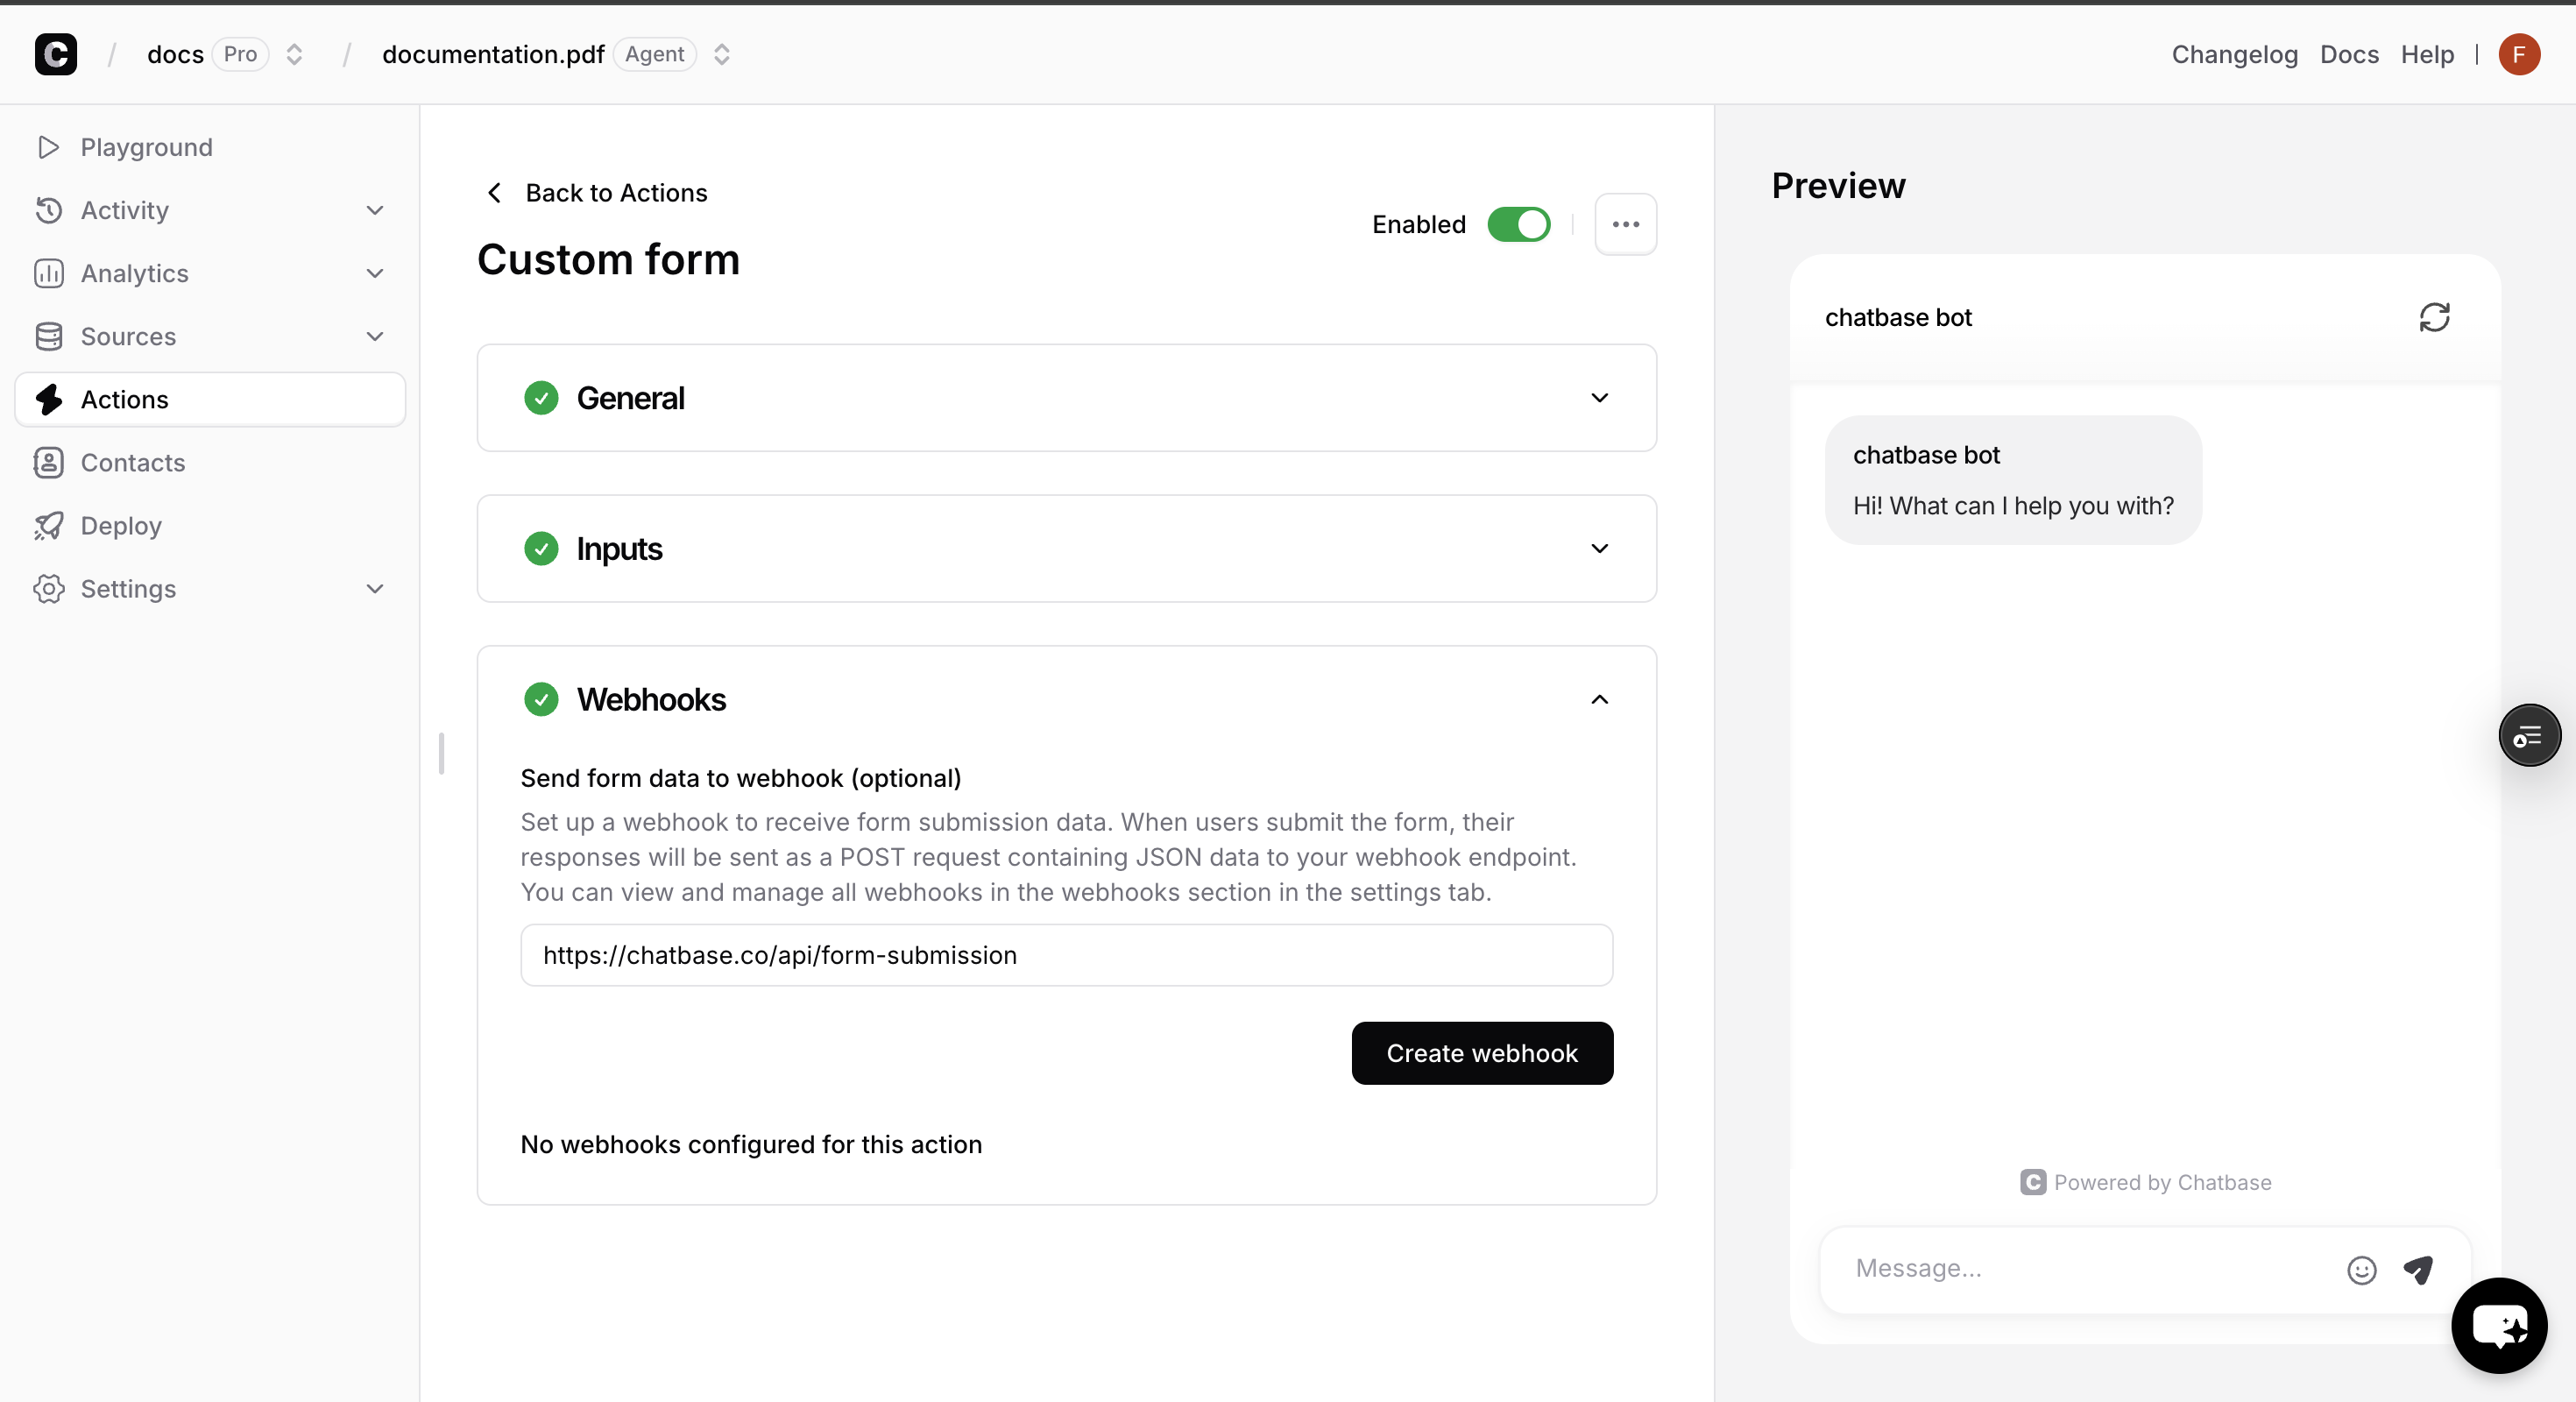
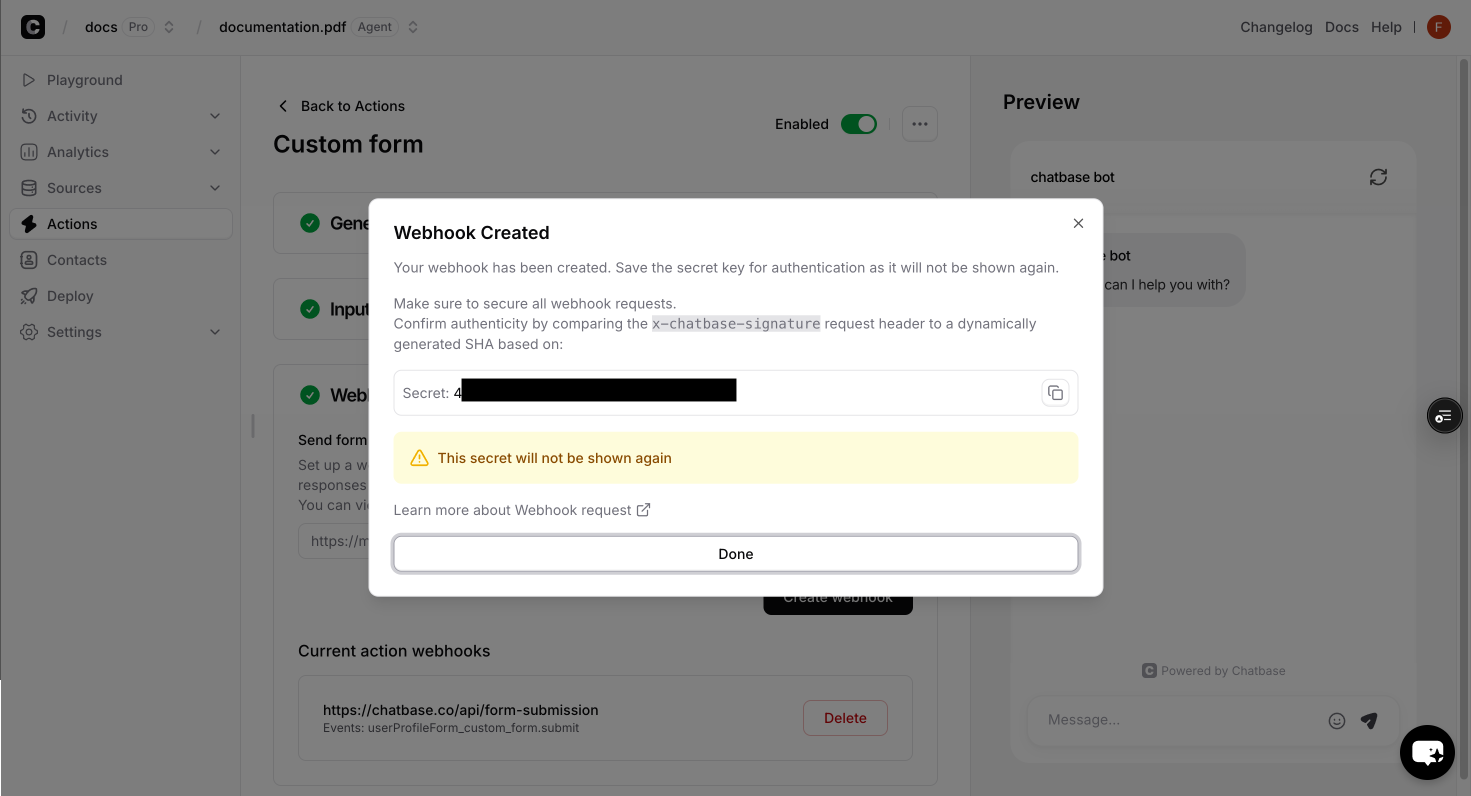
### Webhooks Integration
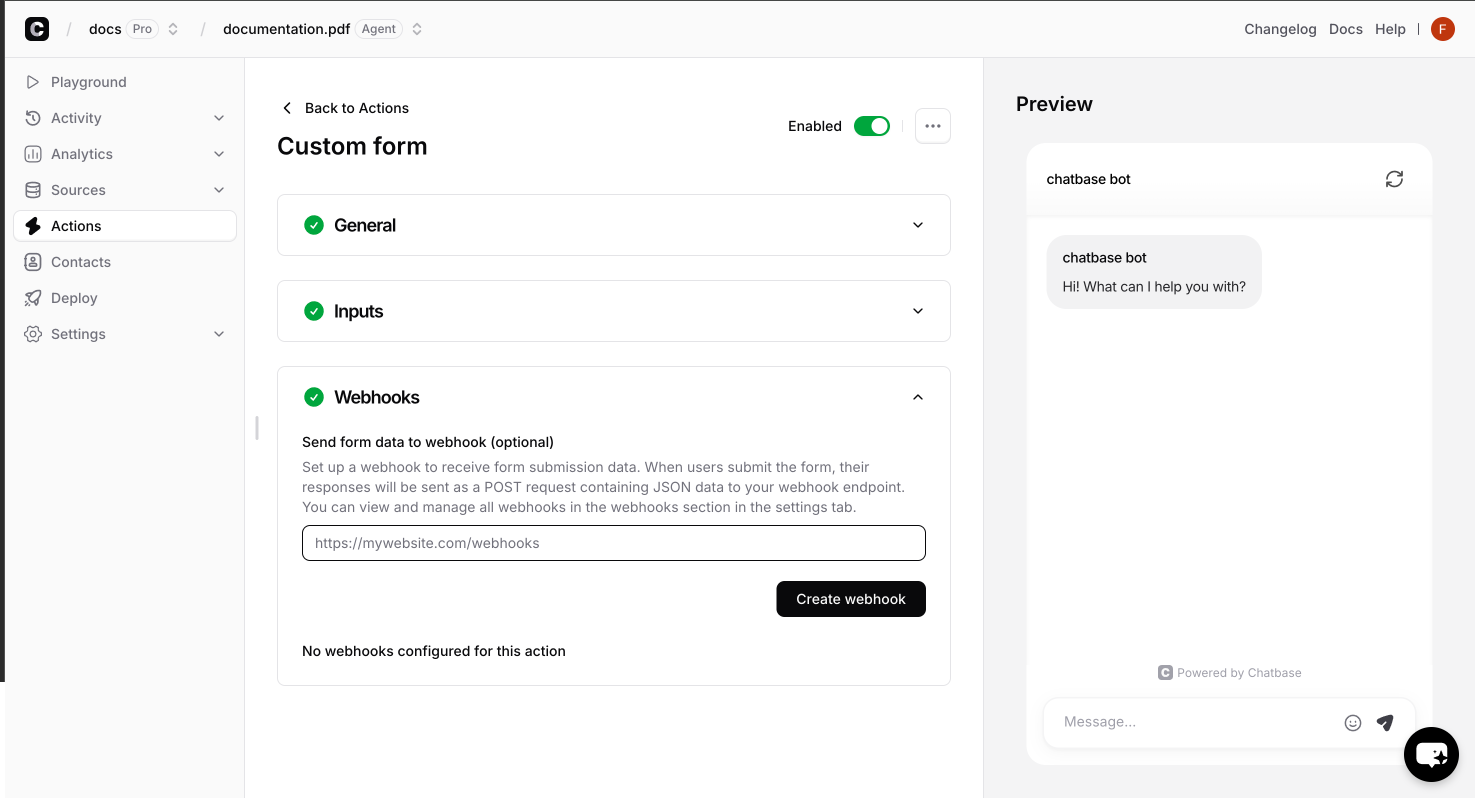
Configure webhooks to receive real-time notifications when users submit your custom forms:
* In the action settings, click on the **Webhooks** tab.
* Write the webhook URL and click on the **Create Wbhook** button.
## API Reference
### Form Schema
The `registerFormSchema` function returns a schema object that defines your form's structure and behavior:
Array of form field definitions. Each field must conform to the Field Schema specifications below.
Text displayed on the form's submit button.
Controls whether field labels are displayed above form inputs.
Message shown to users when the form is successfully submitted.
Message displayed when form submission fails.
### Field Schema
Each field in the `fields` array supports the following properties:
Unique identifier for the form field. This name is used to reference the field's value in form submissions.
Specifies the input type. Must be one of the supported field types listed below.
Display text shown to users for this field.
Placeholder text displayed inside the input field. If not provided, the label text is used as placeholder.
Pre-filled value for the field. Type depends on the field type (string for text, number for numeric fields, etc.).
Whether the field should be read-only and non-interactive.
Validation rules for the field. See Validation Rules section below for detailed specifications.
Required for selection fields (`select`, `multiselect`, `groupselect`, `groupmultiselect`).
**For `select` and `multiselect`**: Array of objects with `label` and `value` properties:
```javascript theme={null}
options: [
{ value: "option1", label: "Option 1" },
{ value: "option2", label: "Option 2" }
]
```
**For `groupselect` and `groupmultiselect`**: Object where keys are group names and values are arrays of options:
```javascript theme={null}
options: {
"Group 1": [
{ value: "item1", label: "Item 1" },
{ value: "item2", label: "Item 2" }
],
"Group 2": [
{ value: "item3", label: "Item 3" }
]
}
```
### Field Types
**`text`** - Single-line text input
* Supports: `required`, `minLength`, `maxLength`, `pattern` validation
* Best for: Names, titles, short descriptions
**`textarea`** - Multi-line text input
* Supports: `required`, `minLength`, `maxLength` validation
* Best for: Comments, descriptions, long-form text
**`email`** - Email address input with built-in format validation
* Supports: `required`, `pattern` validation
* Automatically validates email format
**`phone`** - Phone number input
* Must follow format: `+[country code][number]` (e.g., +1234567890)
* Supports: `required`, `pattern` validation
* Built-in international format validation
**`number`** - Numeric input
* Supports: `required`, `min`, `max` validation
* Only accepts numeric values
* Best for: Ages, quantities, prices
**`select`** - Single selection dropdown
* Requires: `options` array with `{ value, label }` objects
* Supports: `required` validation
* Best for: Categories, single choice selections
**`multiselect`** - Multiple selection dropdown
* Requires: `options` array with `{ value, label }` objects
* Supports: `required` validation
* Best for: Tags, multiple choice selections
**`groupselect`** - Grouped single selection dropdown
* Requires: `options` object with group names as keys
* Each group contains array of `{ value, label }` objects
* Supports: `required` validation
* Best for: Categorized options (e.g., locations by region)
**`groupmultiselect`** - Grouped multiple selection dropdown
* Requires: `options` object with group names as keys
* Each group contains array of `{ value, label }` objects
* Supports: `required` validation
* Best for: Multiple selections from categorized options
**`image`** - Image file upload with drag & drop
* Accepts: JPEG, JPG, PNG, GIF, WebP formats
* Maximum size: 2MB per file
* Supports: `required` validation
* Features: Drag & drop, preview, format validation
### Validation Rules
Each validation rule is defined as an object with `value` and `message` properties:
**`required`** - Makes field mandatory
```javascript theme={null}
validation: {
required: {
value: true,
message: "This field is required"
}
}
```
**`pattern`** - Regex pattern validation
```javascript theme={null}
validation: {
pattern: {
value: "^[A-Za-z]+$", // Only letters
message: "Only letters are allowed"
}
}
```
**`minLength`** - Minimum character count
```javascript theme={null}
validation: {
minLength: {
value: 3,
message: "Must be at least 3 characters"
}
}
```
**`maxLength`** - Maximum character count
```javascript theme={null}
validation: {
maxLength: {
value: 100,
message: "Cannot exceed 100 characters"
}
}
```
**`min`** - Minimum numeric value
```javascript theme={null}
validation: {
min: {
value: 18,
message: "Must be at least 18"
}
}
```
**`max`** - Maximum numeric value
```javascript theme={null}
validation: {
max: {
value: 120,
message: "Cannot exceed 120"
}
}
```
**`defaultErrorMessage`** - Fallback error message
```javascript theme={null}
validation: {
min: { value: 18 }, // No custom message
defaultErrorMessage: "Please enter a valid value"
}
```
This message is shown when validation fails but no specific message is provided for the failed rule.
## Advanced Configuration
### Webhooks Integration
Configure webhooks to receive real-time notifications when users submit your custom forms:
* In the action settings, click on the **Webhooks** tab.
* Write the webhook URL and click on the **Create Wbhook** button.
 Set up your webhook endpoint to receive form submission data:
```javascript webhook-handler.js theme={null}
// Example webhook handler (Node.js/Express)
app.post('/form-webhook', (req, res) => {
const { formData, userId, timestamp } = req.body;
// Process the form submission
console.log('Form submitted:', formData);
// Respond with success
res.status(200).json({ success: true });
});
```
## Troubleshooting
**Possible causes:**
* Function name mismatch between dashboard and code
* Chatbase script not loaded before `registerFormSchema` call
* JavaScript errors preventing form registration
**Solutions:**
1. Verify the function name matches exactly (case-sensitive)
2. Ensure proper script loading order
3. Check browser console for JavaScript errors
**Possible causes:**
* Incorrect validation rule syntax
* Missing required properties in validation objects
**Solutions:**
1. Ensure validation rules have both `value` and `message` properties
2. Check field type compatibility with validation rules
3. Verify regex patterns are valid JavaScript regex strings
**Possible causes:**
* Incorrect options format
* Missing `options` property
**Solutions:**
1. Ensure options follow the correct format for your field type
2. Verify all option objects have both `value` and `label` properties
3. For grouped selections, check the nested object structure
**Best Practices**:
* Test your forms thoroughly in your actual website environment
* Keep form schemas simple and focused on specific use cases
* Use clear, descriptive field names and validation messages
* Implement proper error handling for form submissions
## Next Steps
Programmatically control the chat interface
Learn to listen for and respond to chat events in real-time
Create dynamic, personalized initial messages for users
Display floating messages over the chat bubble
Set up your webhook endpoint to receive form submission data:
```javascript webhook-handler.js theme={null}
// Example webhook handler (Node.js/Express)
app.post('/form-webhook', (req, res) => {
const { formData, userId, timestamp } = req.body;
// Process the form submission
console.log('Form submitted:', formData);
// Respond with success
res.status(200).json({ success: true });
});
```
## Troubleshooting
**Possible causes:**
* Function name mismatch between dashboard and code
* Chatbase script not loaded before `registerFormSchema` call
* JavaScript errors preventing form registration
**Solutions:**
1. Verify the function name matches exactly (case-sensitive)
2. Ensure proper script loading order
3. Check browser console for JavaScript errors
**Possible causes:**
* Incorrect validation rule syntax
* Missing required properties in validation objects
**Solutions:**
1. Ensure validation rules have both `value` and `message` properties
2. Check field type compatibility with validation rules
3. Verify regex patterns are valid JavaScript regex strings
**Possible causes:**
* Incorrect options format
* Missing `options` property
**Solutions:**
1. Ensure options follow the correct format for your field type
2. Verify all option objects have both `value` and `label` properties
3. For grouped selections, check the nested object structure
**Best Practices**:
* Test your forms thoroughly in your actual website environment
* Keep form schemas simple and focused on specific use cases
* Use clear, descriptive field names and validation messages
* Implement proper error handling for form submissions
## Next Steps
Programmatically control the chat interface
Learn to listen for and respond to chat events in real-time
Create dynamic, personalized initial messages for users
Display floating messages over the chat bubble